You are currently browsing all posts tagged with 'tutorial'.
Displaying 11 - 20 of 26 entries.

bed for a 15cm princess- mattress

  • Posted on December 12, 2015 at 12:30 pm

coming back to this one for a bit, while once again waiting for paint to dry on another project. (it is taking a very long time) this time i am working starting on the bedding. first the mattresses. to begin i cut out the filler. the rectangular bed got 1″ thick memory foam. that was too thick for the other two and hid too much of the head board so instead they got three layers each of warm and natural quilt batting.
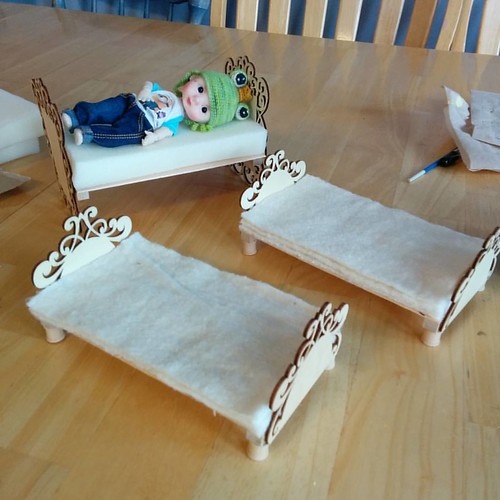
Mattress filler

the covers are simple, pillow cover like. i cut a rectangle a little bigger than the filling, stitched it 1/4″ wider on each side for the smaller mattresses. 1/2″ bigger for the larger then “boxed” each corner, turned it right side out and stuffed. the small opening is closed with a ladder stitch. i had originally planned to make tufted and piped mattresses – even got one mostly done, but then realized that would mean i’d have to make bottom sheets for these tiny beds 🙁 so i tossed it and made these simple ones instead!
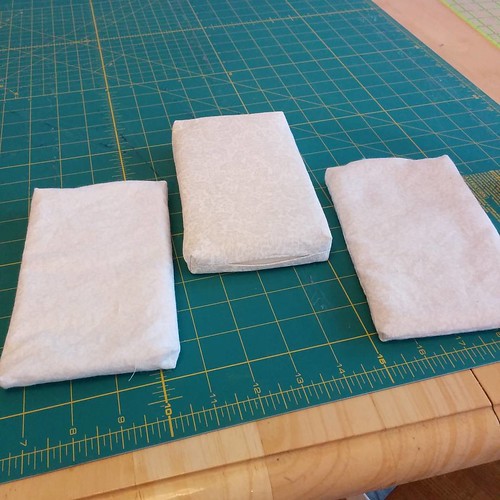
Mattress covers

1/4 scale fireplace

  • Posted on December 10, 2015 at 8:53 am

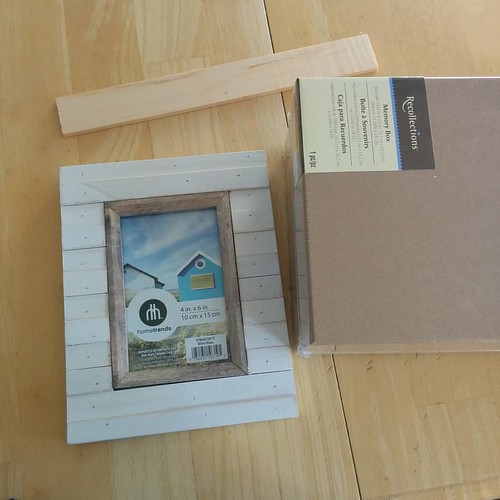
leaving the beds for a bit, just cause i want to get the woodworking done while i have no kids at home, and since christmas is coming, i’m going to tackle another project that has been on my list for ages…. a fireplace. i’m starting with a photo box using the lid only) a picture frame and a vague idea in my head of where i’m going….
Building a fireplace
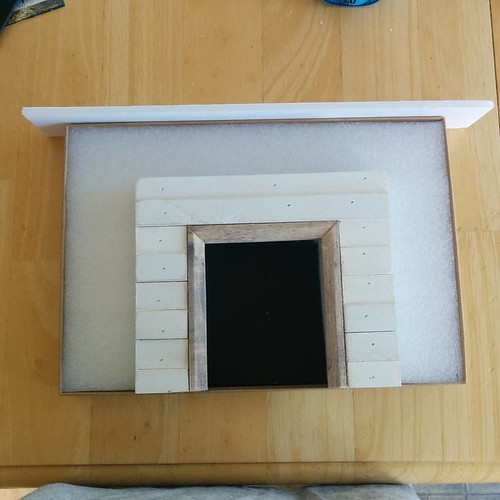
i cut the frame down to make the front of the fire place. for the back i turned the lid over – it already was black inside which is a bonus since i may be able to leave that as is – then filled it in with a piece of packing foam. this is the same foam i used for my couch ages ago. i still have a bunch of it left over. it wasn’t quite deep enough so i put scrap pieces foam board on the back. i could have put the foam core on top but it wasn’t cutting as smoothly on the edges.
Mockup
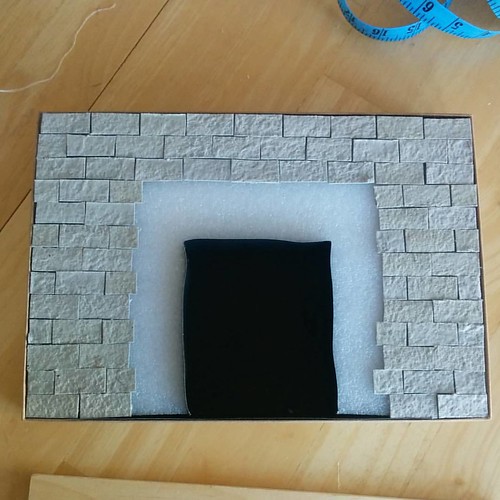
i’ve always wanted to try doing egg carton bricks and this seemed to be the perfect place for them. unfortunately my first calculations were off and the 1/2″ x 1″ bricks i cut were just slightly too small. i ended up with either too much gapping or uneven rows and and asymmetrical pattern. so i recut them all at 1-1/8″ X 5/16″. that worked out perfectly and i got hem all cut out and glued down. however cutting two sets of bricks took all my time, and i’m out at drs again tomorrow so this gets put on hold for a couple of days most likely.
Brick "layed" and ready for painting

bed for a 15 cm prince(ss)

  • Posted on December 6, 2015 at 12:48 pm

while we were waiting for paint to dry on the previous project, liya started hauling out wood and asking me to build her a princess bed that was just her size. feeling bad that every one thinks the poor girl is a boy since she is still bald i complied since it would be a fairly quick build anyway.
Building a bed for my prince(ss)
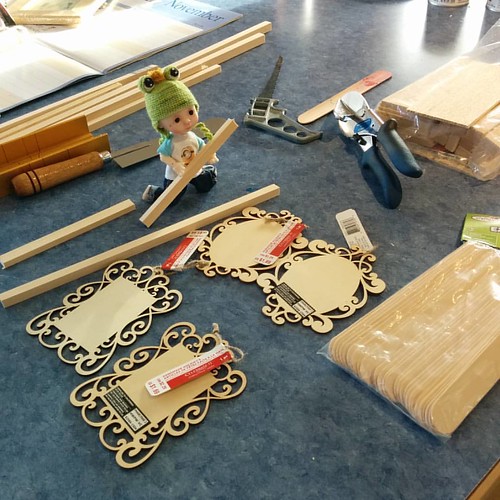
we gathered up a bunch of odds and ends to see what would work. the “frilly” ones are christmas ornaments i got on sale at michaels. we have jumbo craft sticks, odds and ends of square dowels left over from other projects, a bag of balsa scraps, my miter box, saws, pencil and glue. after some testing we decided to start with the rectangular ornaments for the head/footboard, the dowels for supports and 4 craft sticks for slats as the balsa wood was just a smidge too short and narrow.
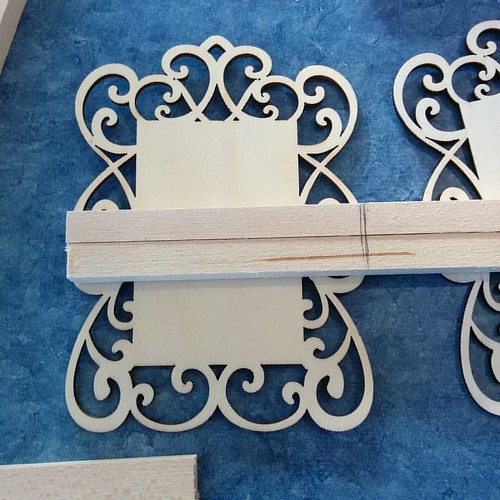
Mark the supports
next we figured out how high the bed should be and marked the dowel supports against the end boards at that point
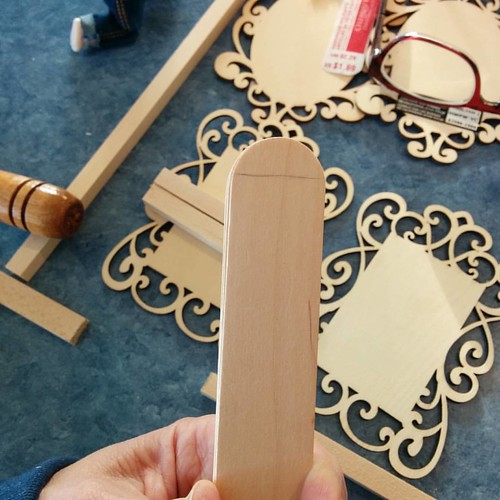
And the jumbo craft stick slats
and marked the ends of the craft sticks so they would be square not curved
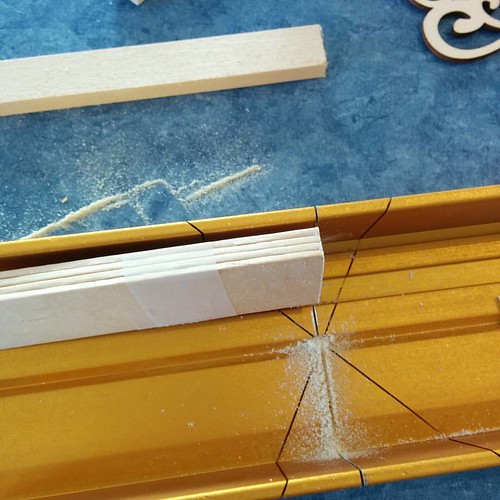
Taped together I can cut them exactly even
i wrapped some scotch tape around the craft sticks so that i could cut them all at once. then laid the bundle flat in my miter box and zipped off the ends. it is turned this way just to show how even it came out. (the miter box is really handy for people like me who don’t really know how to do wood work, and if you use your 40% off coupon at michaels it is less than $10… even in canada!. go on a separate day and use the coupon to get the matching saw that cheap as well ;))
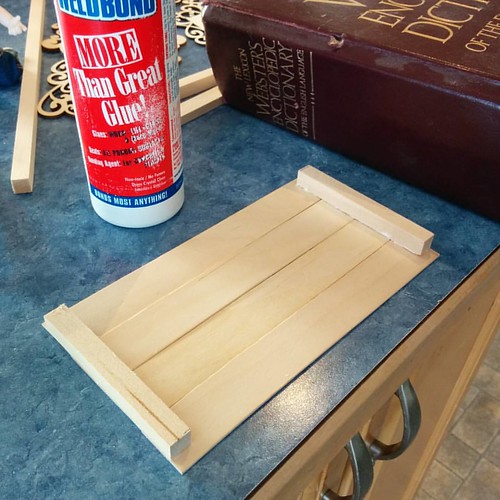
Glue supports across end of slats
center the trimmed supports across the very ends of the slats making sure everything is square and even, and glue down using weld bond, or wood glue.
Place heavy weight on top and wait for glue to dry
and placed a heavy weight on top and wait for the glue to dry

couch tutorial part 8 where we finish it up!

  • Posted on December 10, 2014 at 10:14 am

sew back pieces together at 90 degree angle
i whip stitched the bottom and used a ladder stitch on the top where it would show.

the ladder stitch continues down the back but i didn’t do any stitching on the front. i liked the way it looked unstitched and it held firmly enough without any stitching. i was planning to put a line of glue between the two seats, but once i got it all together it turned out not to be necessary.

sew back to seat with a ladder stitch. a little bit time consuming but it gave a really nice finished edge so it was worth it. and the seats were really nice and sturdy once i was done. if you choose to glue instead of sew you would need to put another cover on the back and sides. a piece of matboard covered with fabric would probably work

sew all the way across the back. its hard to see in the picture but the stitching goes across the short ends of the seat backs all across the back and then just up the other short end. i left the front unstitched again. it held really well and i liked the look

and the finished couch. i’ll take some better pictures when i get a couple of throw pillows made, but i’m really pleased with how it came out :0)

of course the girls are now busily measuring the leftover foam to see if there is enough for a chair, an ottoman, and a fireplace like wovenflames! 😆

if you do use this tutorial, even as a jumping off point i’d love to see pics of what you come up with! you are welcome to sell finished pieces you make. design credit would be appreciated, but is not required, put please do not repost this tutorial/sell it or claim it as your own. i retain copyright to this tutorial and all it’s images. thank you

couch tutorial part 7 finish the seat backs

  • Posted on December 9, 2014 at 7:09 am

grade the overlapping edges
once the tufts are all sewn grade any overlapping edges to cut down on the bulk. i realized after i got all the back pieces covered that the only overlapped edges were on the long sections and i had graded the short ones too :p oh well, it actually wasn’t noticeable and i wasn’t going to redo it so i’ll have to live with it, but you might want to see which ones really need it before cutting! i did grade the correct ends at least by wrapping loosely around the foam, placing the backs on the seats then marking the end to be cut of with a tiny x on the inside -it got cut off anyway so didn’t show.

start at the bottom edge where you will want to finish, line up the padded seat portion and pin it on then wrap. i use lots of pins to keep everything flat and snug then trimmed off the fabric i didn’t need before sewing. my foam was thick enough that i could bury the pins without poking myself and leave them there till my stitching was done.

stitch with a flat whip stitch you want the fabric to be pulled snug but not super tight, and to be as flat as you can make it on the bottom. that will make attaching the backs easier.

close up of the finished seat back

next post we will attach the seat backs and the couches will be done 🙂

couch tutorial part 6 start the seat backs

  • Posted on December 8, 2014 at 5:21 pm

the seat backs do need the ends covered, since they will show. so i cut pieces of fabric big enough to wrap around like this. i glued where the foam is resting on the fabric on both sides, (hope that make sense, if not take a look at the next picture) but not the end since i didn’t want the glue to bleed through.

cut a rectangle out of each corner then glue those long flaps down

you will need to cover each piece of seat back, however many you choose. in my original picture i had 3 but i added an arm/end to the longer couch so now i have 4 🙂

now to make the covers while the glue dries
these are very similar tho the seat covers. 3 layers of warm and natural with an extra layer of the cover fabric to prevent show through since my fabric is fairly thin. you wouldn’t need that extra fabric if your fabric was darker or thicker. the difference is the placement since this time my seam will be on the narrow edge instead of in the middle of the back.

i decided to only do the tufting partway up the backs. looking at my clippings file, that was the style i preferred. but even so there are 62 more tufts to go!

couch tutorial part 5 a change of plans, and we add the feet

  • Posted on December 7, 2014 at 11:28 am

after i got the skirt sew on i decided the seats just looked too blocky the way they were. so i took off the bottom layer of foam (luckily the glue hadn’t completely hardened yet) and folded the skirt under instead. here it is pinned tight to glue

i cut pieces of posterboard a few millimeters smaller than the foam piece to cover the base (for those of you using inches that would be about 1/8″ on either end)
the posterboard glued in place. this was weighted down with my trusty stack of hardcover books to dry 🙂

sticking to my plan to only use what i already had on hand for this couch, i auditioned feet from the supply in my craft drawers, instead of following my initial impulse of running to michaels or the dollar store to get small wooden blocks. the ones on the left hand side won. both because i liked the style better and i had four more of them, so there were enough to put six feet on the each couch instead of only four

and the feet glued on…

couch tutorial part 4 skirting

  • Posted on December 6, 2014 at 9:26 am

the glue is all dry now it’s time to add the skirt. having cut a piece wide enough to go to the floor and also fold over quite aways, i press it the right length. the extra fold will be in the center back. the fabric i used had enough selvedge edge for both skirts so i didn’t have to hem it – bonus!

pinned all around to check the length. then unpinned on end and pressed under again to finish edge. i left it a bit long since a plan to add feet underneath which will take up the slack

flip up and sew…

back stitch along fold line to edge of seat. (to be continued when i finish this step)

couch tutorial part 3 attaching the seat covers

  • Posted on December 5, 2014 at 9:04 am

the tufting is all done. this is really the only part that wouldn’t work to glue, but you could make your dots farther apart if you aren’t as obsessive as i am 😉 you could also add small buttons or beads on each tuft to mimic the buttons on a couch. personally i hate sitting on pillows with buttons so i refuse to inflict them on my dolls 😆

now tuck the ends in this hides all those ugly frayed ends and makes it look neat from the outside. make sure it is exactly as wide as your foam piece.

and pin in place, line up your batting even with the top of the foam and pin it in place so it doesn’t shift before you turn it over and stretch the back around.

whip stitched closed. this doesn’t have to be super neat as it won’t show. it’s more important that it be relatively flat, and that it hold the fabric tight. you could also glue this step if you’d rather and just leave the pins in to hold it tight till the glue dries, but i think stitching is more secure.

glue and weight …and wait 😉

the top layer added to each seat and weighted again so it will dry flat. once again there are TWO seats here, just stacked for space and so i can use the same weight for both. if you look at the end you will see i carefully covered the foam piece before i wrapped my tufted piece around it. i realized after i did, that the ends would be completely covered in the next step so it wasn’t necessary and i didn’t show that step.

next step coming after the glue dries….

couch tutorial part 2 making the seat covers

  • Posted on December 4, 2014 at 7:34 am

i cut (actually tore since it was easier to keep square) a piece of fabric big enough to just wrap around each of the third foam seat pieces, with an inch or so pressed under for a clean edgecut (or tear) a piece of fabric big enough to just wrap around the third foam seat, with an inch or so pressed under for a clean edge

also 3 pieces of warm and natural and 1 of the cover fabric each the same size as the foam

i glued them together with temporary spray adhesive (505 spray) and centered them on the cover fabric

pin basting

marking the grid

sew and tie each dot!

there are 156 on my two seats so that will take me a while…..