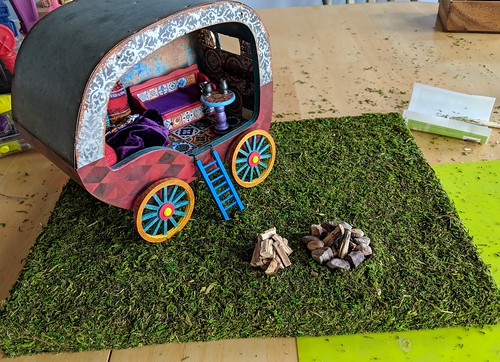
You are currently browsing all posts tagged with 'real puki'.
Displaying 1 - 2 of 2 entries.

washboard

  • Posted on October 13, 2018 at 9:58 am

it’s hard to stay clean while traveling, so my ‘pukis asked for a washtub and board. i made the washboard first.
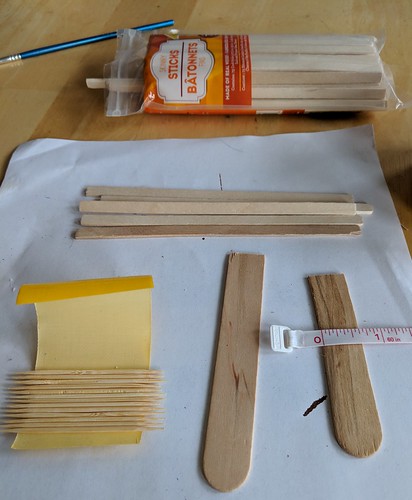
washboard supplies
i started with toothpicks – placed on duck tape to make it easier to cut them all the same size,
skinny sticks
and 5/8″ wide craft sticks.
not shown is silver and black paint, wood stain, and fast tack glue.
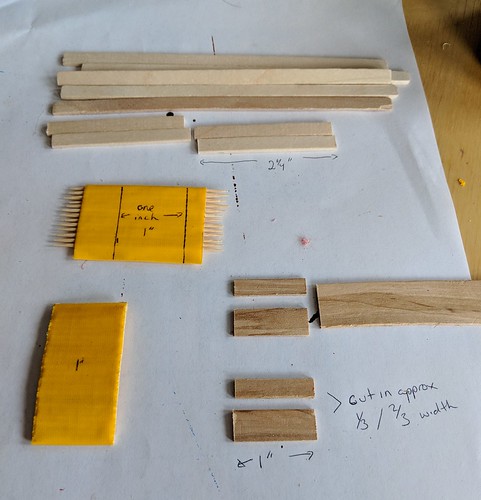
washboard pieces cut dimensions
here are the sizes i cut to get to approx 1/12th scale. i used a pair of heavy duty scissors to cut on the drawn line for the toothpicks, and my small saw to cut the wood. you could use a small saw for all of it, or a good cutting knife.
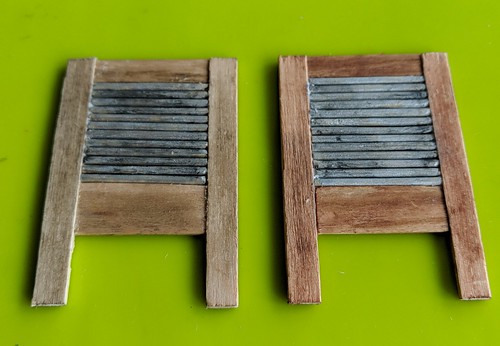
washboard done
first i pre-painted the rollers silver and stained the wood. when that was dry, i glued the top and bottom wood pieces to the top and bottom toothpick. next i lined up toothpicks till i liked the length and glued on the sides. there is no need to glue the toothpicks to each other as the side pieces hold them all in place. make sure the glue covers the whole edge except for the bottom “leg” portion.

once the glue dried, i dry brushed on black paint over the silver to age it.

there you have a quick and easy washboard!

except…. it was too big!
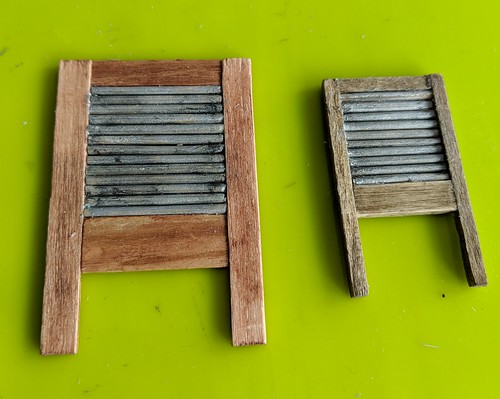
and done again
i somehow forgot that 1/12th scale is too big for my ‘puki’s :doh. the washboard was better suited for my realfees or my dream high elf so i’m thinking it’s actually more like 1/8th? anyhow i did the same thing again just cutting it all smaller.

this time i used the skinny sticks for the top and the bottom, and match sticks for the sides. the finished measurements are 1″ wide by 1-3/4″ long. the toothpicks, top and bottom pieces are cut 3/4″ wide. the bottom is a full skinny stick width, the top is a piece split roughly in half.
campfire part 3

  • Posted on October 3, 2018 at 10:06 am

next step is adding the fire to the diorama
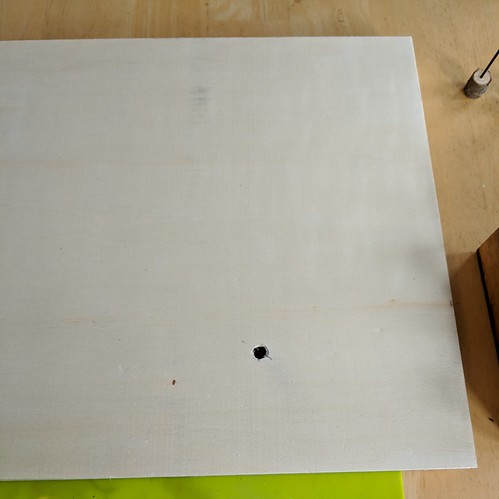
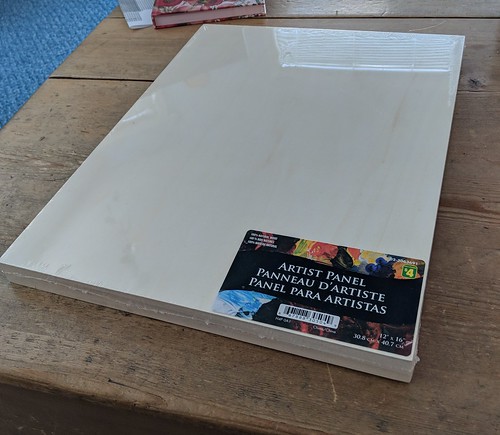
i wanted to hide all the wiring so i found a panel board at the dollerama for $4.
panel front
it is 12″ x 16″. a little small for photos, but it will fit nicely on a shelf.

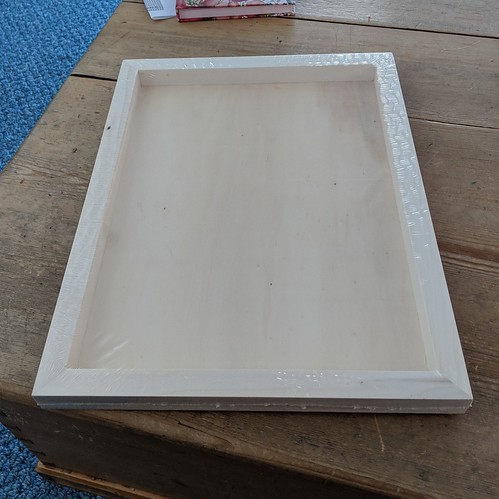
panel back
the back is hollow, with more than enough space to hide the wiring and battery

camp fire - hole for wires
after deciding where i wanted the fire to go, i marked the center with an x and then drilled a hole large enough for all the wires to fit through. i didn’t have to drill three holes this time. the top disc will keep the leds from falling through the hole.

diorama grass
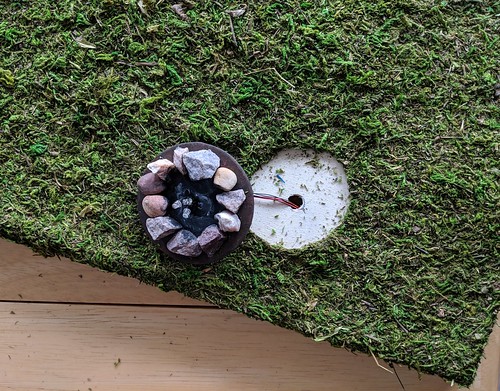
then i added the grass. first i traced around the campfire disc. this area will be left glue free. i spread glue all over the top, except for in the circle, and down the sides. then i spread a moss mat (mine was from walmart, because it was cheapest, but michael’s also has some and with a coupon the price isn’t bad.) i boxed the corners by cutting out little squares the width of the sides. this gave nice neat edges all round. As you can see, adding moss is a messy process, so best to have a broom or vacuum on hand! 😊

diorama cut out
i then poked up with a pen through the hole from underneath, to find the center, and carefully cut out the unglued moss. i cut just slightly smaller than the actual circle

diorama campfire in place
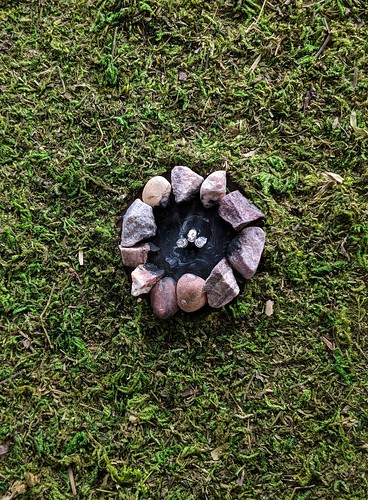
lifting the edges i tucked the fire inside the cut out, adding bits of moss to a couple of places where i went too wide

here you can see how i painted the gray/white ash as well

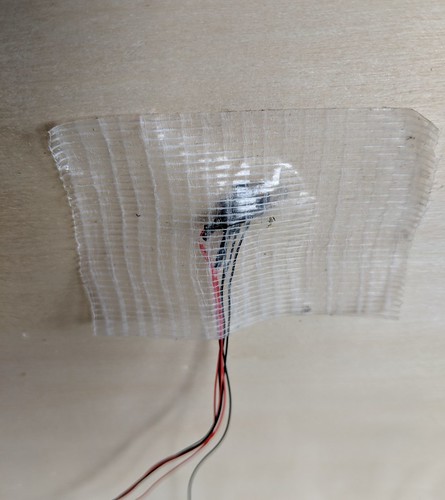
diorama underside
underneath i taped the wires with heavy duty tape.

diorama
then i glued the firewood in place. the wood pile and caravan are just set on top.

almost done. i still need to add the battery. but i don’t have the right battery in the house and we are in the middle of a snow storm so it may take a day or two to go get one.