You are currently browsing all posts tagged with 'diy'.
Displaying 1 - 10 of 37 entries.

an advent wreath.. er log

  • Posted on November 30, 2019 at 2:39 pm

the kids are getting very excited for christmas so meg has planned 24 days worth of activities to help them wait. tomorrow is the start of advent so she needed to make an advent wreath so the girls could light the candles (no the boys will not be allowed to help, honestly would any sane person let noah or emrys anywhere NEAR fire?)

i know it supposed to be a circular wreath, but she decided a birch log would make a cool option so here goes…

advent log, determining the length
first lay the candles out to decide how long the log should be

advent log hot glue
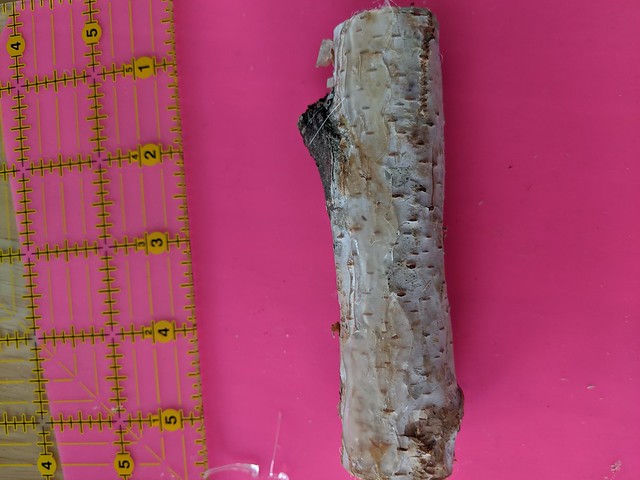
before cutting the log i put a couple of rows of hot glue on the bottom and then squished it flat on my silicone sheet, this made it a bit more stable and less likely to roll. i could have cut a piece off the bottom to make it flat instead, but this was easier.

advent log sizing
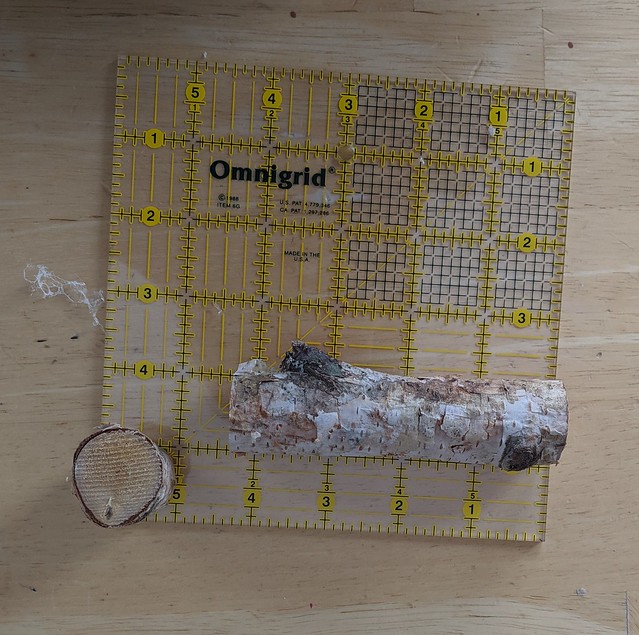
here are the dimensions we used

advent log, holes drilled
i marked the candle positions with a tiny x, then drilled the holes using progressively bigger drill bits til the hole fit. working up that way helps keep the birch bark from shattering or the log from splitting. the final size for these (birthday) candles was a 7/32 drill bit.
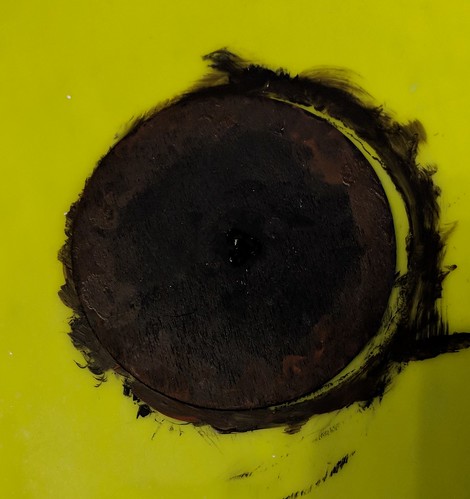
as you can see the candle rolled on me in spite of the hot glue, and the last hole is a bit wonky, but it doesn’t show if i photograph straight on

advent log candles
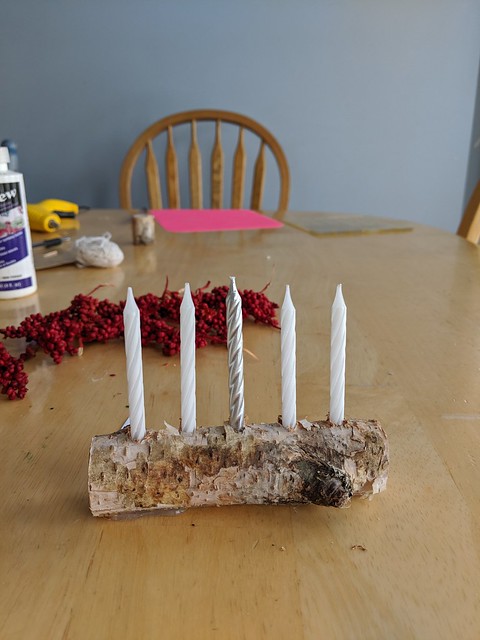
here it is with the candles. we couldn’t find the traditional purple and pink, so went with white and silver instead, because it looks nice 😉

next i needed to decorate it
advent log decor options
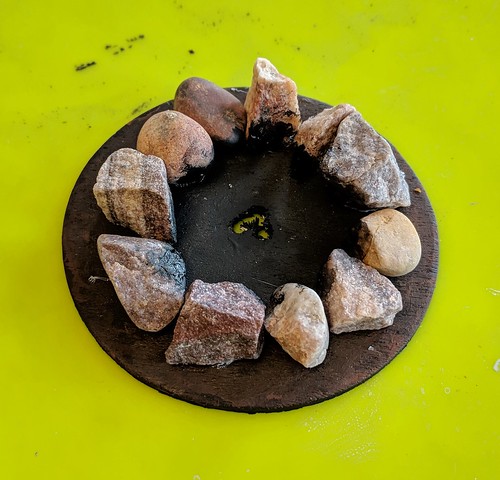
tiny red berries from a potpourri mix, and greenery pulled of a dollar store wreath

advent log done
cut to size, glued on and it’s done

fishing pole!

  • Posted on December 27, 2018 at 8:36 am

my realpuki gypsies asked for a fishing pole, so they could catch themselves some dinner, so i went looking for supplies.
fishing pole parts
a skewer and some old watch parts, and tiny gold beads seemed like a good start. in addition i got a ruler to check the length, my e6000 glue since i would be gluing metal, a toothpick to apply the glue, and scissors to cut the rod.
the first thing i realized was that my skewers were to thick to be in scale. my ‘pukis wanted a nice light rod, not a heavy stick! toothpicks would have been the right width, but were’t long enough so i went out to the garage to get sandpaper and carefully sanded down the skewer till it was the right diameter. i kept rolling it while i sanded to keep it round.
fishing pole sanded
the rod on the right is the original diameter, the rod on the left is how i sanded it down.
next i applied a thin layer of dark brown to the top, and light brown on the bottom for a handle. when it dried it looked to dark/dull, so i over-painted with red on top, blue on the handle. i forgot to photograph this step, but you can see the colors in the later pictures anyway.

fishing pole reel
while the paint was drying i made the reel. i picked out two gears for the sides, and a small tube-like gear for the center spacer. i glued those all together and added a tiny bead for the handle.
fishing pole reel side
and a side view.

fishing pole loop guides
next i went to my craft supplies and got some very fine wire. i would have preferred brass/copper to coordinate with the reel, but all i had was silver tone, and since i am on a craft purge, whenever possible i am using what i have instead of buying new.
i wrapped the wire a couple of times around the rod, twisted it around a toothpick to form a loop, then wrapped it twice more around the rod, and cut off. i did this 4 times to get four loop guides. when i had them all done, i spaced them evenly along the rod, and added a touch of glue to keep them in position. then glued the reel on near the handle and let the glue set. from a small scrap of the wire, i made a fishhook shape.

fishihg pole reel finished
once the glue was set i tied a piece of invisible thread to the hook with a surgeons knot. a dab of glue made sure it wouldn’t come undone. the thread was then threaded through the loops and wrapped several times round the reel. another dab of glue kept it from un-winding. i left the ends intact till the glue set, then trimmed them as close as possible. you have to look really close to see the thread, since it is, more or less….invisible. but the scale looks perfect in real life.
tumnus approves his new rod
tumnus agrees!
tumnus approves his new rod

camp fire part 2

  • Posted on October 2, 2018 at 8:17 am

my logs are thoroughly cooked, so i cut them down to size, then used a hammer and chisel to split them. if you don’t have a chisel, you could always leave the logs whole.

camp fire logs
once they were the right size i arranged and re-arranged them till it looked right to me, then glued them together with fast tack glue and let it dry for 1/2 hour or so.

camp fire charring the logs
after the glue set, i carefully lifted the logs out and painted the inside with a combination of black and white paint to get the look of char and ash. to do that, i put a drop of black on my palette, then white beside it and swirled the two in the middle, with a toothpick, to get marbled shades of gray. i painted with the black first and wiped it off with a damp rag to get it nice and thin. then right at the bottom, and up the middle i dabbed on the grey swirly paint, tying not to brush so much that the colors completely blended. i also swirled some of the gray mix on the wood disc to make the fire more realistic. you can’t really see it under the logs, but i know it’s there, and you can see it if you get really close.

camp fire wood pile
with the extra wood, i built a little pile of firewood that my ‘pukis can use to keep their fire burning.

camp fire part 1

  • Posted on October 1, 2018 at 8:05 am

i’m ready to start making the camp fire now. i’m going to use an evans design led fire size 3mm. a 1.8mm would probably have been big enough, but i already had the 3mm and am trying to use what i have in hand before buying new.

the other things i need so far are a 3 inch diameter, flat, wood disk from michaels, and some small rocks from the gravel pad outside, (i picked out ones i liked for color shape and size and washed them to get rid of any bugs or dirt). also acrylic paint in black, dark brown, rust and white, and glue suitable for gluing rocks to wood, i used e6000.

camp fire
first i painted the top of the wood disk solid black for the charcoal, then while still wet swirled and blended in some dark brown and rusty brown to get the look of dirt around the edge. my realpukis are safety conscious 🙂

camp fire
i drilled a set of three holes in the center to thread my leds through. i should have done that before painting since i had to repaint around the holes with my black paint. when it dried again i arranged the rocks till i liked the look and then glued them down with e6000 glue. i let that set a bit and then painted the inner surface of the rocks to make them look soot covered.

camp fire leds back
finally i threaded the leds through the holes and taped them down in the back with a bit of tape. i just used regular tape since it doesn’t have to hold for long.

next step will be building the fire itself, but first i have to dry my “logs” in the oven. i took pruned, dead branches that have been sitting in my burn pile all summer (we have had a fire ban most of the summer so they never got burned). it is pouring rain so they are all wet, and i assume have bugs. i am going to bake them at 200F for 2-4 hours to make sure any bugs are good and dead! i’ll check them every 15 min or so to make sure they don’t catch fire. i wouldn’t mind if they got a bit scorched, but i would rather not burn my house down! 😉

my caravan has a table

  • Posted on September 30, 2018 at 9:28 am

since the last attempt at a table turned into a storage bench, my ‘pukis requested another table, and there was just enough room in the caravan for a small one.

table bare
i started with a miniature candlestick from my stash, just a shade under 1-1/2″ tall. the top is a 1-1/2″ wooden disk and i just glued them together.

table painted
i painted the bottom metallic purple, the top turquoise. it looked a little bare and i considered painting a floral design on top, but realized my painting skills don’t really match the vision i had. so instead i looked online for pictures of mandalas, resized them and then printed out a bunch on cardstock. i find that what looks good on my desktop is not always the correct color or clarity when printed, so this gave me some choice. after i cut out and auditioned them, i modge-podged the one i liked best on the table-top.

table in caravan
it just fits, and holds two tiny pewter mugs i ordered online. the furnishings are done, it’s time to work on the diorama next.

tin boxes larger…

  • Posted on September 26, 2018 at 4:49 pm

i liked how the little tin boxes came out so well, that i decided to make some bigger ones for my littlefee-minifee sized dolls

'tin' boxes larger
this time instead of 15mm (9/16″) cubes, i started with 25mm (1″) cubes

'tin' boxes larger
i picked coordinating tiles to make patterned lids instead of plain.

they were nice, but at this scale there wasn’t quite enough detail to be realistic. so after thinking a bit, i got some fine cord from my embroidery thread bin, estimated how much i would need by wrapping loosely around one cube 6 times, and then painted it silver.

tins with lids
here you can see it drying on my handy dandy silicone sheet. this lets the paint be all the way around and it still doesn’t stick. the extra paint just washes off my sheet later.

tins with lids
i then carefully glued it around the top. since the labels were coated with modgepodge already i just applied another thin layer and then stuck the cord in place. it worked perfectly, the cord stuck and no worries about extra glue showing. now my tins look like they have lids 🙂

tins in scale
and just to show the scale. here they are stacked on eilidh’s desk.

more finishing touches, tins and bottles

  • Posted on September 24, 2018 at 8:29 am

another quick project. i had some small wooden cubes and left over square doweling and decided to make some “tins”.

more finishing touches
i cut the dowel just a smidge longer than my labels, painted them all silver, then glued on labels. 4 sides and the top sides for the cubes, 4 sides for the rectangles, plain squares on all the bottoms and also the tops of the rectangles to make them smooth. the one turquoise rectangle got patterned top and bottom instead, just cause i had leftover tile that matched.

more finishing touches
once the glued dried i first set the paper with modgepodge, then painted all the plain paper silver again. voila – tins! the extras will go in the kitchen of the house i am planning next.

more finishing touches
here they are on the shelve with some tiny bottles i picked up a few years back, and found again while cleaning 🙂 they are all stuck on with fabric basting glue. hopefully that will hold, but be removable later if i find something else i’d rather use. we shall have to see if it works….

awn again off again

  • Posted on September 23, 2018 at 1:25 pm

i know that’s a bad pun, but i couldn’t resist 🙂
i thought  you said you were cleaning?
if you look way back to the original awning it was cute, but the colors were just too pale for my refurbished caravan.

awning repainted
so i painted it with more of my metallic blue/teal mix then aged it with copper and brown to get the rust back. it is a much better color now. i like how the original colors show through as just a subtle striped effect

awning on
i like the way it looks, but unfortunately it blocks too much of the light, making the interior too hard to see. since i really like all the details on the inside and want them more visible, the awning is off again. i may try it on the back side, or just use it for a completely different, and as yet unplanned project, maybe a little shop? 🙂

bench cushion

  • Posted on September 22, 2018 at 11:11 am

i decided my bench needs a bit of cushioning for travelling over rough bumpy roads.

bench pillow 1
i’m making glued ones since i wanted something fairly thin and flat. first i cut cardstock and trimmed till just a tiny bit smaller than the bench to allow room for the fabric to fold over. then cut pieces of flannel the exact size and glued them on.

bench pillow centered
the fabric is pieces of silk dupioni i cut for bed pillows and didn’t use. luckily they were perfect size for this size. all three are iridescent with a different weft and warp. i placed the cardboard/flannel combo on top but didn’t glue it.

bench pillow bottom
i glued the first edge and folded it over, then glued the long ends and folded them over as well tucking the corners in slightly so they don’t show

bench pillows top
and finished!… took me less than 15 min start to finish. most of that time was making sure the cardstock was a perfect fit. it took longer to do this blog post than it did to make the pillows!

now i just have to decide which one to use, though i may just tuck the spares away and change them up depending on what clothes the ‘pukis wear.
which color do you like best on this?

bench pillow red blue
red/blue
bench pillow purple red
purple/red
bench pillow gold pink
gold/pink

this is a table?

  • Posted on September 21, 2018 at 7:02 am

the best laid plans…
i was ready to work on my table.

bench start
i wanted some extra storage so decided to use this writing desk, instead of just a plain table.

bench cropped
the only problem was it was too big. realpuki’s are probably more of a 1/16 scale than the standard 1/12 so once again i needed to mod. i cut the legs off, planning to shorten and reattach them, but then liked the look and decided to make it into a bench instead.

bench and tiles
i decided to cover the front of the drawer and the rectangular section of the back with tile. so first i picked some tiles from my “tile file” and carefully resized them. since i don’t find the ruler on the word doc, terribly useful, i did up a couple of trials on the same page, then printed them off in grayscale on plain paper first. once i had the sizes perfect (the drawer is a bit wider than the back so i needed two sizes), i deleted the wrong ones and re-printed in color on cardstock. lastly i set them with a couple coats of clear spray varnish. i am extremely grateful that my dh decided to make a workshop in the garage last year, so it is heated and he added an exhaust fan for when i paint. now i don’t have to wait for nice weather!

bench painted
while the tile was drying i painted the bench. red for main, blue for drawer, then aged by dry brushing with antique copper. (i later painted the whole drawer blue so it wouldn’t show plain wood when my ‘puki’s leave it open.)

once the tile was dry i cut out each one individually. then a played around with them till i liked both the combo and the order before gluing them down.

bench drawer
here is the front drawer tiled. the holes were in the wrong place to attach the original drawer pulls, so i just glued on some red/blue crystal beads from my stash

bench bead cap feet
4 bead caps make filigree feet, that raise it to the perfect height

bench done
finished!

bench in situ
and put in place