You are currently browsing the archives for 2015.
Displaying 1 - 10 of 21 entries.

fireplace final installment

  • Posted on December 23, 2015 at 5:19 pm

grate painted black looks like a well used cast iron grate.
Black grate
thread fire led lights through logs btw i ended up painted the lags with my ultra matte varnish because the ash kept getting all over my hands at this step Lol
Thread fire led lights through logs
put crumpled cellophane over the lights. this was included in the kit and just needed to be cut. i’d have preferred something more orange but couldn’t find any.
Cellophane over lights
punch holes for wires in back wall. i couldn’t find my awl so i used a large yarn needle and put in three small holes instead of one larger one. it really didn’t matter in the end.
Punch holes for wires in back wall
back view of wires threaded through
Back view
attach wires red to red, black to black
Attach wires red to red, black to black
tape everything down. the little white thing is an on off switch so the lights don’t go continuously.
Tape everything down
finished!
Finished!

i took a video of the fireplace with the lights flickering and it looks awesome. but apparently i can’t upload video to flickr, so i’ll have to figure out another place to upload it and then add it in.

working on the fire

  • Posted on December 22, 2015 at 4:52 pm

i want i light saber! we just saw star wars last night and they made cutting wood look so easy. this took far too long, i broke my pull saw and froze my fingers cutting these tiny things :(. then of course i forgot to take out a tape measure and had to guess on the size.. i like the look of the bigger logs better, but they ended up being too big. the smaller logs are just perfect. so i’ll be using them. i’ll save the bigger logs for another fireplace that i plan to do later.
Logs for the fireplace
i want my logs to look like they have really burnt so i am charring them in the flame of a candle. notice that i hold them with metal tongs and burn them in my kitchen sink just in case they decide to burn more than i planned! not likely since this wood is green and fairly wet from all the snow, but you never know…
Charing the logs for realism
here’s what one of the logs look like done.
A charred log
and the pile of finished logs. i wet them down thoroughly to make sure there were no sparks since the glue i’m using is flammable. so now i have to wait for them to dry before i can proceed.
Charred logs cooling and drying

my dh is building me a grate for my fireplace out of 2-1/2″ finishing nails. he still has to add the top rack. he designed it and did all the bending and cutting with his much stronger hands :o)
The start of a grate
and with the cross pieces added.
Grate!
just waiting for the glue to harden so i can paint it black

stockings!

  • Posted on December 19, 2015 at 4:41 pm

Stockings!
made some stockings for my kids. there are too many to hang fro the fireplace, so we are going with the older tradition of hanging them on the end of the bed on christmas eve. the biggest ones are for my msd sized dolls, the littler ones for my pukifee/latiyellow/tinydelfs etc. the real tiny dolls are still waiting for appropriate sized ones.

i made a bunch of extras to list on my etsy store next year for christmas… if i remember in time 😉

getting closer

  • Posted on December 18, 2015 at 5:19 pm

the front and mantel are now attached. but it is just resting on the hearth until i get the fire installed.
Getting closer
i’m really happy with how it is turning out, though i realized as i looked at it that i ended up making a fireplace that looks more well suited for a beach cottage, than the ancient english style manor that my crew is supposed to inhabit. lol oh well, i guess i’ll just have to make another one later on..

and a better view of the distressed finish of the wood on the mantel and the side. i really like how that turned out, especially considering the side is just the painted cardboard box!
Side view of wood
the mantel is a flat piece of wood with a square dowel glued to the front to form the overhang.

back to the fireplace

  • Posted on December 17, 2015 at 2:06 pm

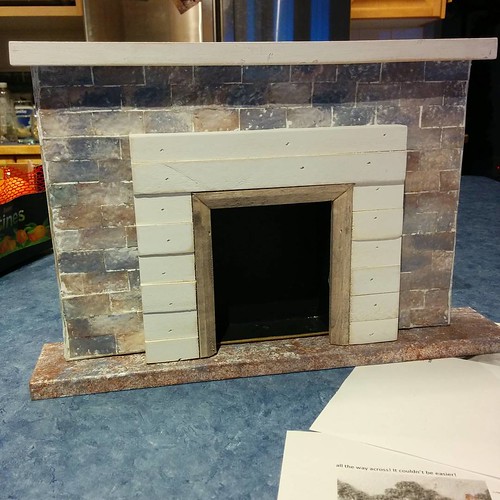
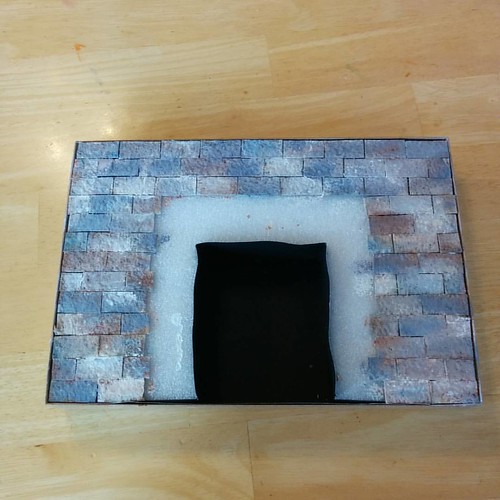
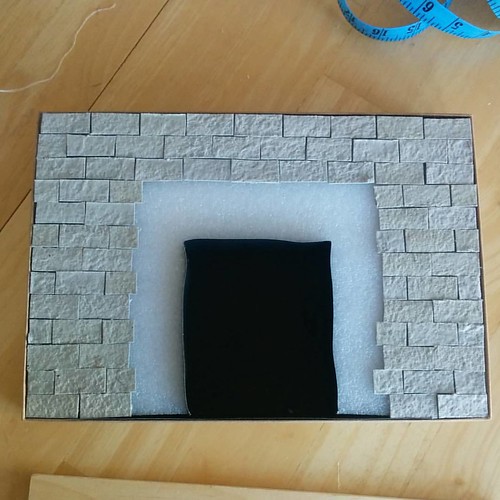
i have been varnishing the fireplace and gluing the sides flat whenever i got a moment this week, not really something that showed up in pictures. now i finally got to apply the grout and find out if all those coats of varnish sealed my tiles/bricks well enough. in a couple of hours the grout will be dry enough to try and wash the haze off. if not i guess my tiles just got more subdued, which isn’t a bad look really… and i just added grouting to my list of new things i’ve tried!
Fireplace varnished and grouted
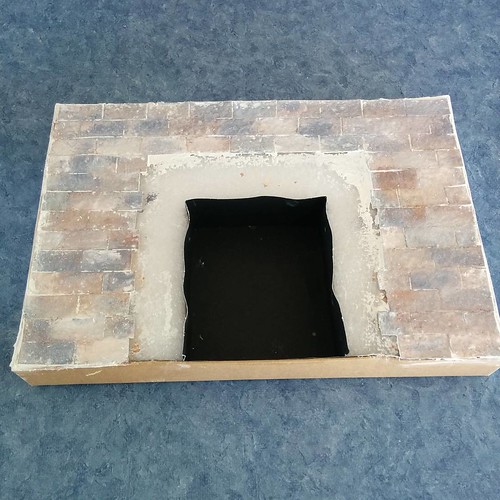
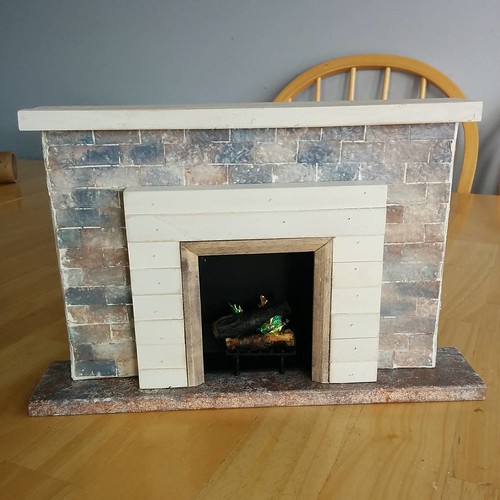
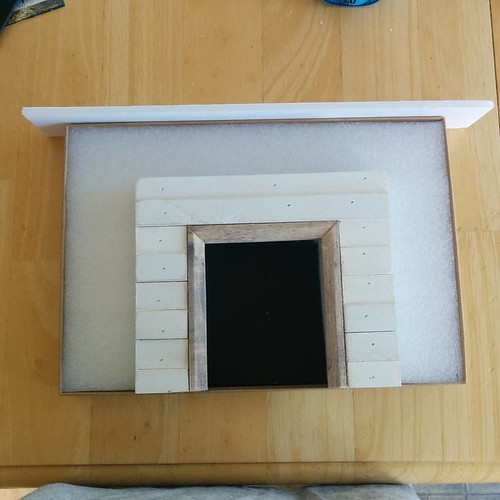
i like how much more finished the brick look now. i think if i was doing this again i would try to leave a bit more spacing between all the bricks to allow for the grouting. my bottom ones fit together a bit too closely.

edit: i went back to wipe off the haze and found i actually liked it better with some of the haze there. so ended up reapply a bit of the grout and wiping it off again to get the white back in the hollows. it has to dry overnight and then i’ll revarnish with my blend of matte and satin varnish to give a very subtle sheen.

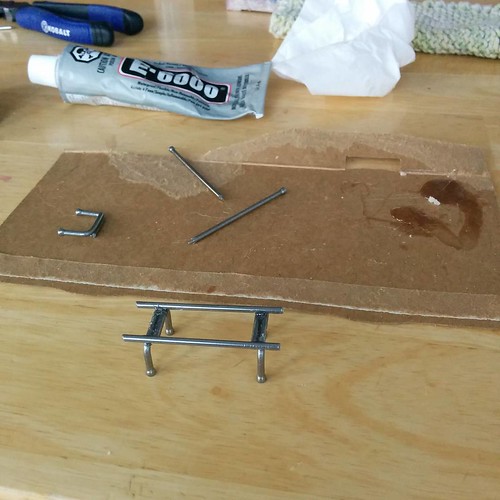
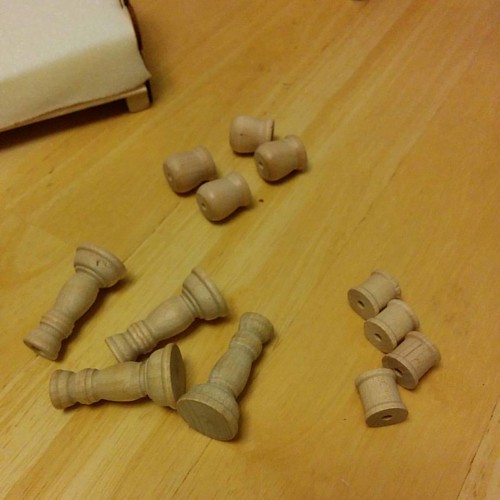
while i’m waiting its time to start painting the hearth and mantel. for the hearth i wanted a stone look that coordinated with but didn’t match the stone in the fireplace, so i gathered up most of the same colors and added them to a paint palette made of a saran covered paper plate. i’ll be applying them with a cheap kitchen sponge to a piece of white painted mdf board.
Paint palette for the hearth.

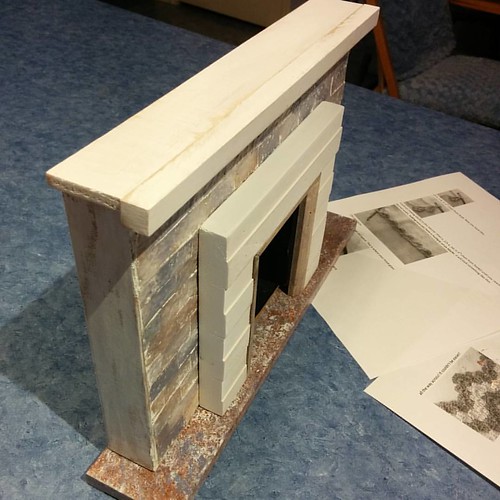
and.. the painted hearth and mantel.
Painted hearth and mantle
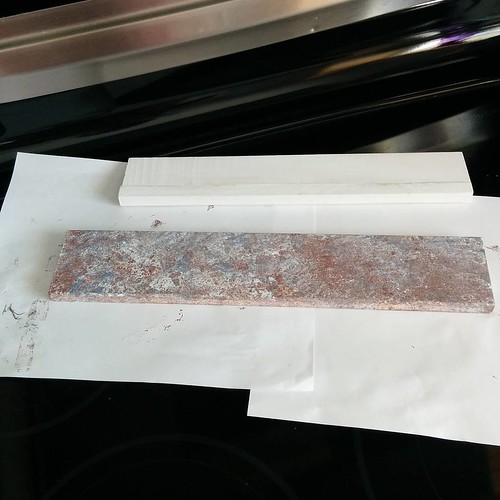
i kept dipping the sponge in the paint and applying till i got the look i wanted. i’ve done marbling on full sized walls before so this time i had an idea of what i wanted to do :)) when it dries i’ll paint it with a blend of matte and satin varnish to get a really subtle sheen since the satin is too shiny and the matte too dull.

it’s hard to see on the mantel but i painted it with white chalk paint and then when it was dry sanded it smooth and it matches the wood front almost perfectly :yay! i’ll be coating that with my ulta matte varnish to keep the worn look.

bed for a 15cm princess- pillow

  • Posted on December 16, 2015 at 12:10 pm

now onto the pillow. a necessity for a comfy sleep. cut a rectangle of cotton and one of batting, make sure you add seam allowance on all the sides. fold in half and stitch together leaving a small opening to turn.
Pillow lined with batting
turn right side out and fill with “pellets”. i used glass sand blasting pellets just cause that’s what i have on hand. i bought a huge bag years ago, when i was still making bears and i still have tons left! but you can also use seed beads, play sand (clean please) or some miniature sites also say to use salt but you would have to be sure it would never get wet!
Turn and fill with "pellets"
because my pellets are so fine and i don’t want any leakage at the seam i put a fine line of fabric glue on the inner seam. it is flexible and doesn’t show especially under the batting. after gluing it together i close the seam with a ladder stitch as usual.
Glue inside edge to seal pellets in
now take a nap on your comfy new pillow.
Take a nap
liya approves and demonstrates just how soft and squishy her new pillow is.

bed for a 15cm princess- mattress

  • Posted on December 12, 2015 at 12:30 pm

coming back to this one for a bit, while once again waiting for paint to dry on another project. (it is taking a very long time) this time i am working starting on the bedding. first the mattresses. to begin i cut out the filler. the rectangular bed got 1″ thick memory foam. that was too thick for the other two and hid too much of the head board so instead they got three layers each of warm and natural quilt batting.
Mattress filler

the covers are simple, pillow cover like. i cut a rectangle a little bigger than the filling, stitched it 1/4″ wider on each side for the smaller mattresses. 1/2″ bigger for the larger then “boxed” each corner, turned it right side out and stuffed. the small opening is closed with a ladder stitch. i had originally planned to make tufted and piped mattresses – even got one mostly done, but then realized that would mean i’d have to make bottom sheets for these tiny beds 🙁 so i tossed it and made these simple ones instead!
Mattress covers

fireplace continued

  • Posted on December 11, 2015 at 8:21 am

the rock front is painted and drying so i can varnish it. it may take quite a while to dry since my first try ended up looking way too colorful and didn’t go with whitewashed wood of the picture frame. i covered over all each brick with a combo of blue-gray and white so only hints of the colors show through and i like the effect much better. i didn’t have time to take a picture of the first try since i had to keep working while the paint was wet so all the colors would blend.
Rock painted
note to self, next time paint the rock before cutting it out. it would be much easier to get the variability in each rock!

1/4 scale fireplace

  • Posted on December 10, 2015 at 8:53 am

leaving the beds for a bit, just cause i want to get the woodworking done while i have no kids at home, and since christmas is coming, i’m going to tackle another project that has been on my list for ages…. a fireplace. i’m starting with a photo box using the lid only) a picture frame and a vague idea in my head of where i’m going….
Building a fireplace
i cut the frame down to make the front of the fire place. for the back i turned the lid over – it already was black inside which is a bonus since i may be able to leave that as is – then filled it in with a piece of packing foam. this is the same foam i used for my couch ages ago. i still have a bunch of it left over. it wasn’t quite deep enough so i put scrap pieces foam board on the back. i could have put the foam core on top but it wasn’t cutting as smoothly on the edges.
Mockup
i’ve always wanted to try doing egg carton bricks and this seemed to be the perfect place for them. unfortunately my first calculations were off and the 1/2″ x 1″ bricks i cut were just slightly too small. i ended up with either too much gapping or uneven rows and and asymmetrical pattern. so i recut them all at 1-1/8″ X 5/16″. that worked out perfectly and i got hem all cut out and glued down. however cutting two sets of bricks took all my time, and i’m out at drs again tomorrow so this gets put on hold for a couple of days most likely.
Brick "layed" and ready for painting

bed for a 15cm prince(ss) number 2 part 2

  • Posted on December 9, 2015 at 11:09 am

Possible legs?
i dug through my supply box for possible legs and came up with these. they were the ones i had enough of that looked like they might fit. after trying each set out, the spools ended up being the best for both scale and size.
Glue the chosen ones on
so i glued one to each corner
Another bed ready for bedding
flip it over and the bed is ready to go. or at east ready for bedding…