i’m behind on posting pictures but here is my blanket up to yesterday. you can see by the green that the nights are getting cooler. if the weather holds i’ll finish this in a week, there are freezing temps predicted at night by the weekend so i might have to switch back to my winter one and then hope for another week of warmer weather.
- 1:4 scale
- abandoned dock
- abjd
- abraham lake
- accessories
- adoption meme
- advent
- advent calender
- advent candles
- advent log
- advent wreath
- aerin
- afghan
- Agoseris glauca
- alberta
- albert einstein
- alice
- alys
- amberglas
- american girl
- amigurumi
- ananda
- ane
- annalise
- ant
- ante
- ante elf
- ante ws
- b&w
- baby spruce
- baby yoda
- bamboo jersey
- banff
- beargrass
- bear grass
- becca
- beezie
- berries
- bid
- big hill springs
- birch
- bird
- birds
- bjd
- bjd. diy
- black
- black and white
- blanket
- bleeding hearts
- blossoms
- board games
- bohemian
- bonnie
- books
- bory
- bottles
- bow glacier falls
- boys
- brown eyed susan. wildflower
- buffalo berries
- bunnies
- burgundy
- buttercup
- butterfly
- calgary zoo
- campfire
- camp fire
- canada post
- canada thistle
- cape
- carcross desert
- catkins
- cereza
- chair
- challenge
- charity
- chipmunk
- chloe
- christmas
- christmas hampers
- christmas lights
- christmas tree
- christmmas
- clematis
- clothes
- clouds
- cobweb weight
- cofee dye
- color
- colors
- columbine
- cone
- conservatory
- cooking pot
- cookstand
- costume
- cotton
- couch
- cowl
- cow parsnip
- crabapple blossoms
- crafts
- craft table
- creche
- cricket
- crochet
- crochet blanket
- crocheted
- cross stitch
- crowned crane
- crystal
- crystalorn
- c s lewis
- dandelion
- daylight
- deardoll
- dear doll
- decorating
- decorations
- design
- desk
- dhs elf
- diaoram
- digory
- dinosaur provincial park
- dioram
- diorama
- diy
- doll
- doll a day
- dollar store
- dollarstore
- doll blanket
- doll furniture
- dollhouse rug
- dollmore
- dolls
- doll sweater
- donations
- dovey
- dressup
- duck
- eat.sleep.knit
- eatsleepknit
- eilidh
- el
- elbow falls
- elbow lake
- elephant
- elf
- elf ante
- elf el
- elin
- ellemeno
- ellowyne
- ellyce
- ember
- embroidery
- emily/emmie
- emmie
- emrys
- enyo
- ery
- erzulie
- esk
- esk badge
- esk cal space shawl
- esk galaxy shawl cal
- eskkal
- esk space shawl cal
- etsy
- eve the cat
- face up
- faceup
- failryland
- fairylan
- fairyland
- fairyland pukifee
- fall
- fallen log
- fallen tree
- false dandelion
- fan art
- farmland
- felting
- ferns
- few flowered anemone
- fireplace
- fishing pole
- fishing rod
- flamingo
- foamflower
- fog
- food bank
- forget-me-nots
- forget me not
- fort mcmurray fire
- fossils
- fundraiser
- fungi
- fungus
- furniture
- gaillardia
- games
- garden
- giraffe
- giving
- glacier lily
- glacier national park
- glamour challenge
- gold
- golden ragwort
- gold metallic
- gray
- green
- greenhouse
- grizzly bear
- gypsy caravan
- gypsy caravanpsy caravan
- hail
- haines
- halloween
- hat
- headphones
- hoar frost
- hollyhock
- honeydelf
- honey delf
- honeythorpe
- hoodie
- hoody
- indian paintbrush
- iplehouse
- irrealdoll
- irreal doll
- irreal doll ery
- irreal dollo
- journal
- kaka
- katie
- kid delf
- kiri
- knit
- knitting
- lace
- lace knitting
- laceknitting
- lace skirt
- laceweight
- ladyslipper
- lae louise
- lake louise
- larkspur
- lati yellow
- leaf
- leaves
- letters to troops
- light
- lightbox
- linen
- littlefee
- littlefee el
- littlefee el ws
- lucy
- luka
- luna
- luts
- m-line
- madelintosh lace thunderstorm
- magpie
- makeover
- malabrigo mecha
- mas
- meadow parsnip
- meercat
- meg
- memories
- mica dam road
- minature props
- miniatre
- miniature
- miniature accessories
- miniature props
- miniatures
- mini chairs
- minifee
- mini garden
- mirwen
- mnf
- moeline
- mohair wig
- monkeyflower
- monster
- monument
- mountain heather
- mr tumnus
- msd
- msd. minifee
- mudstone
- mushrooms
- nandi
- narsha
- narsha friend
- never alone
- noah
- noni
- ocean
- old man's whiskers
- operation christmas child
- orange
- orchid
- oukifee
- pajamas
- pale yellow
- pattern
- peacock
- pearly everlasting
- penguin
- photo challenge
- photochallenge
- photography
- photo lights
- photo prop
- photoshop
- pi day
- pie day
- pink
- pio
- pipi
- pitta
- pkf
- poetry
- pom pom
- poppies
- prairie
- prairies
- prop
- props
- pukifee
- pukipuki
- pumpkin
- pupu
- purple
- pussy willows
- queen's cup
- quilt
- quilting
- quinn. bjd
- quote
- rain
- ravelry
- reafee
- realfee
- real puki
- realpuki
- red
- red panda
- red pandas
- reflection
- reflections
- remembrance day
- rockies
- rose
- rose hip
- rose hips
- roses
- rs
- ruby
- rug
- scenic
- sd
- seed
- seedhead
- sewing
- shabee
- shade garden
- shaelyn
- shawl
- sheep
- shiwoo
- shoebox gift
- shooting star
- shrubby cinquefoil
- silk hankies
- silk thread
- silky lupin
- silver
- skagway
- skylar
- sledding
- smidge
- smilga
- snow
- snowy owl
- sofa
- soom imda 3.0. collette. molly
- sophie
- sos
- soso
- souldoll
- soulkid
- soup pot
- space shawl
- sparrow
- spider web
- spring
- stitch markers
- stocking cap
- stockings
- stone
- stonecrop
- subalpine spiraea
- sunrise
- sunroom
- sun room
- sunset
- swap
- swaps
- table
- teddy
- temperature blanket
- temperature tracker
- texture
- thanksgiving
- the best laid plans.
- the great purge
- thistle
- thread crochet
- thread lace
- three flowered avens
- tiarella
- tiera
- tiger
- tin boxes
- tins
- tiny delf
- tinydelf
- tinys delf
- townsend's solitare
- toy
- travel
- tree
- treehouse
- trees
- trehouse
- tres
- tumnus
- tunic
- tutorial
- tutrial
- twinberries
- upcycle
- washboard
- water
- water drops
- waterfall
- waterton
- waterton national park
- wedge pond
- western anemone
- western spring beauty
- wheelchair
- white
- whitehorse pass
- white skin
- white wolf
- wig cap
- wigs
- wild bergamot
- wild flower
- wildflower
- wild flowers
- wildflowers
- wild heliotrope
- wild rose
- wild strawberry
- william blake
- willow
- winter
- winter fun
- winter photography
- wisp
- wooden spools
- woodland
- wood violet
- wool
- work in progress
- wren
- yarn
- yarnathon
- yellow
- yo-sd
- yukon
- zoe
- zoo
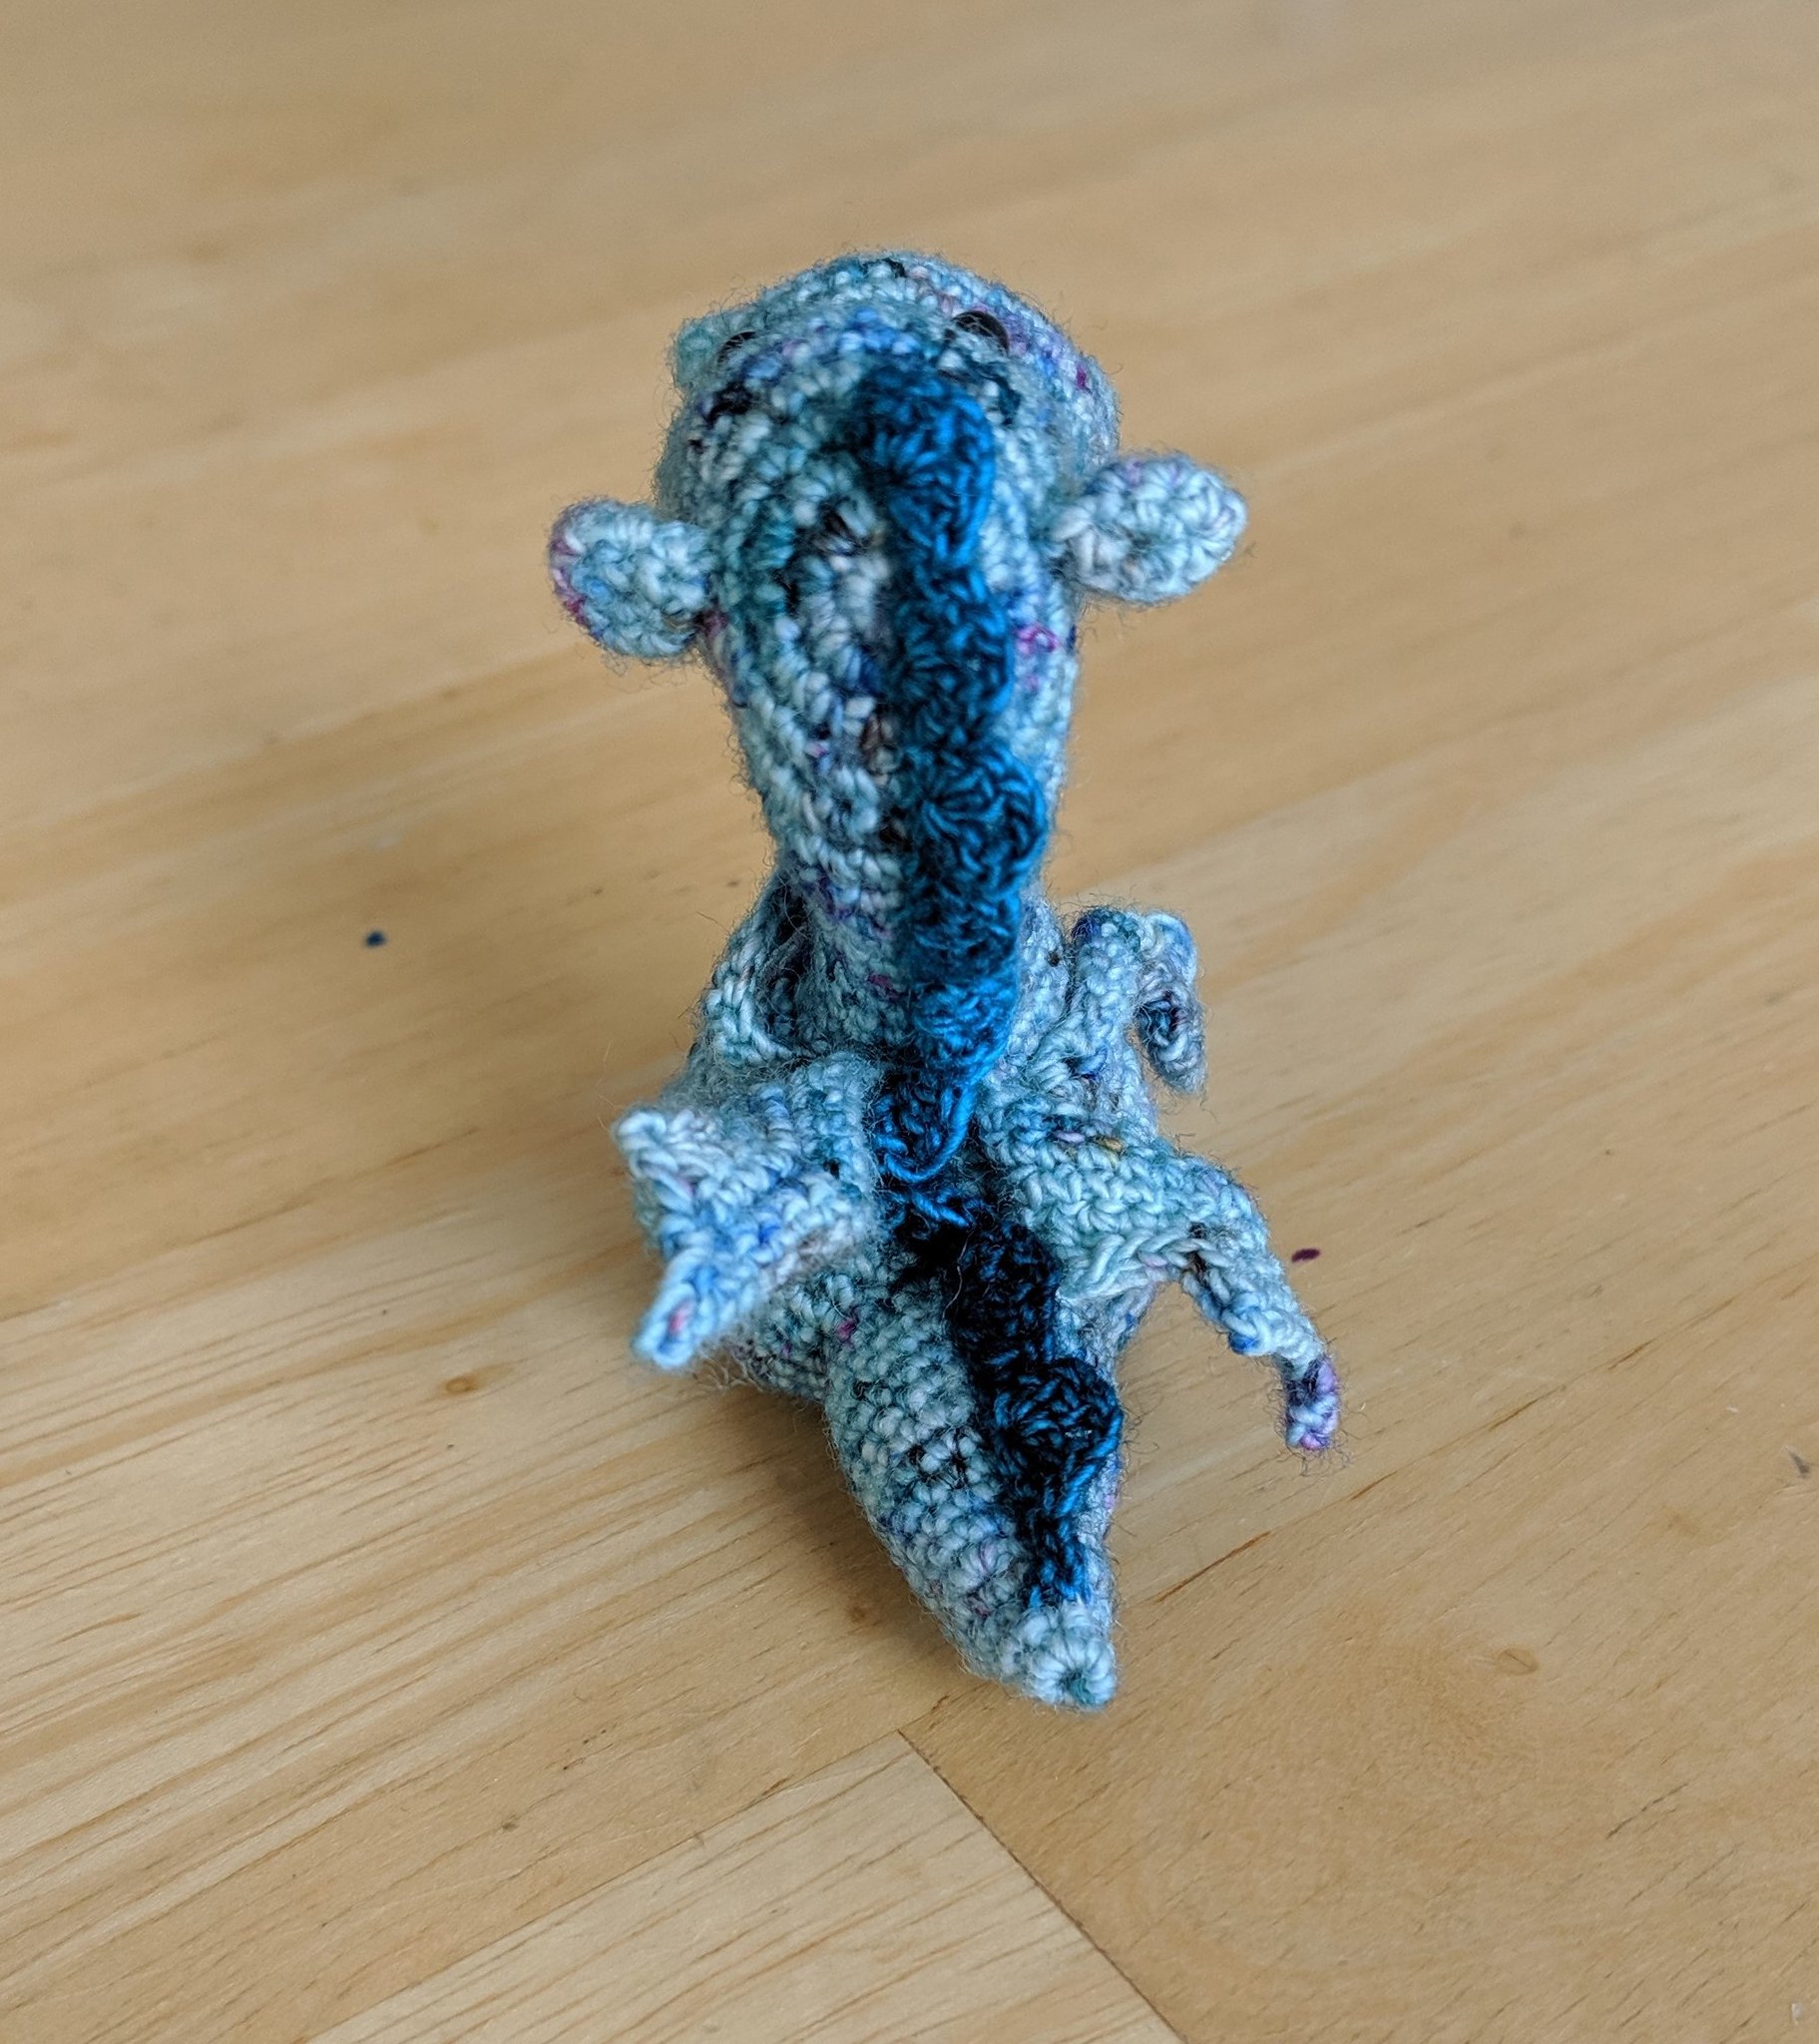
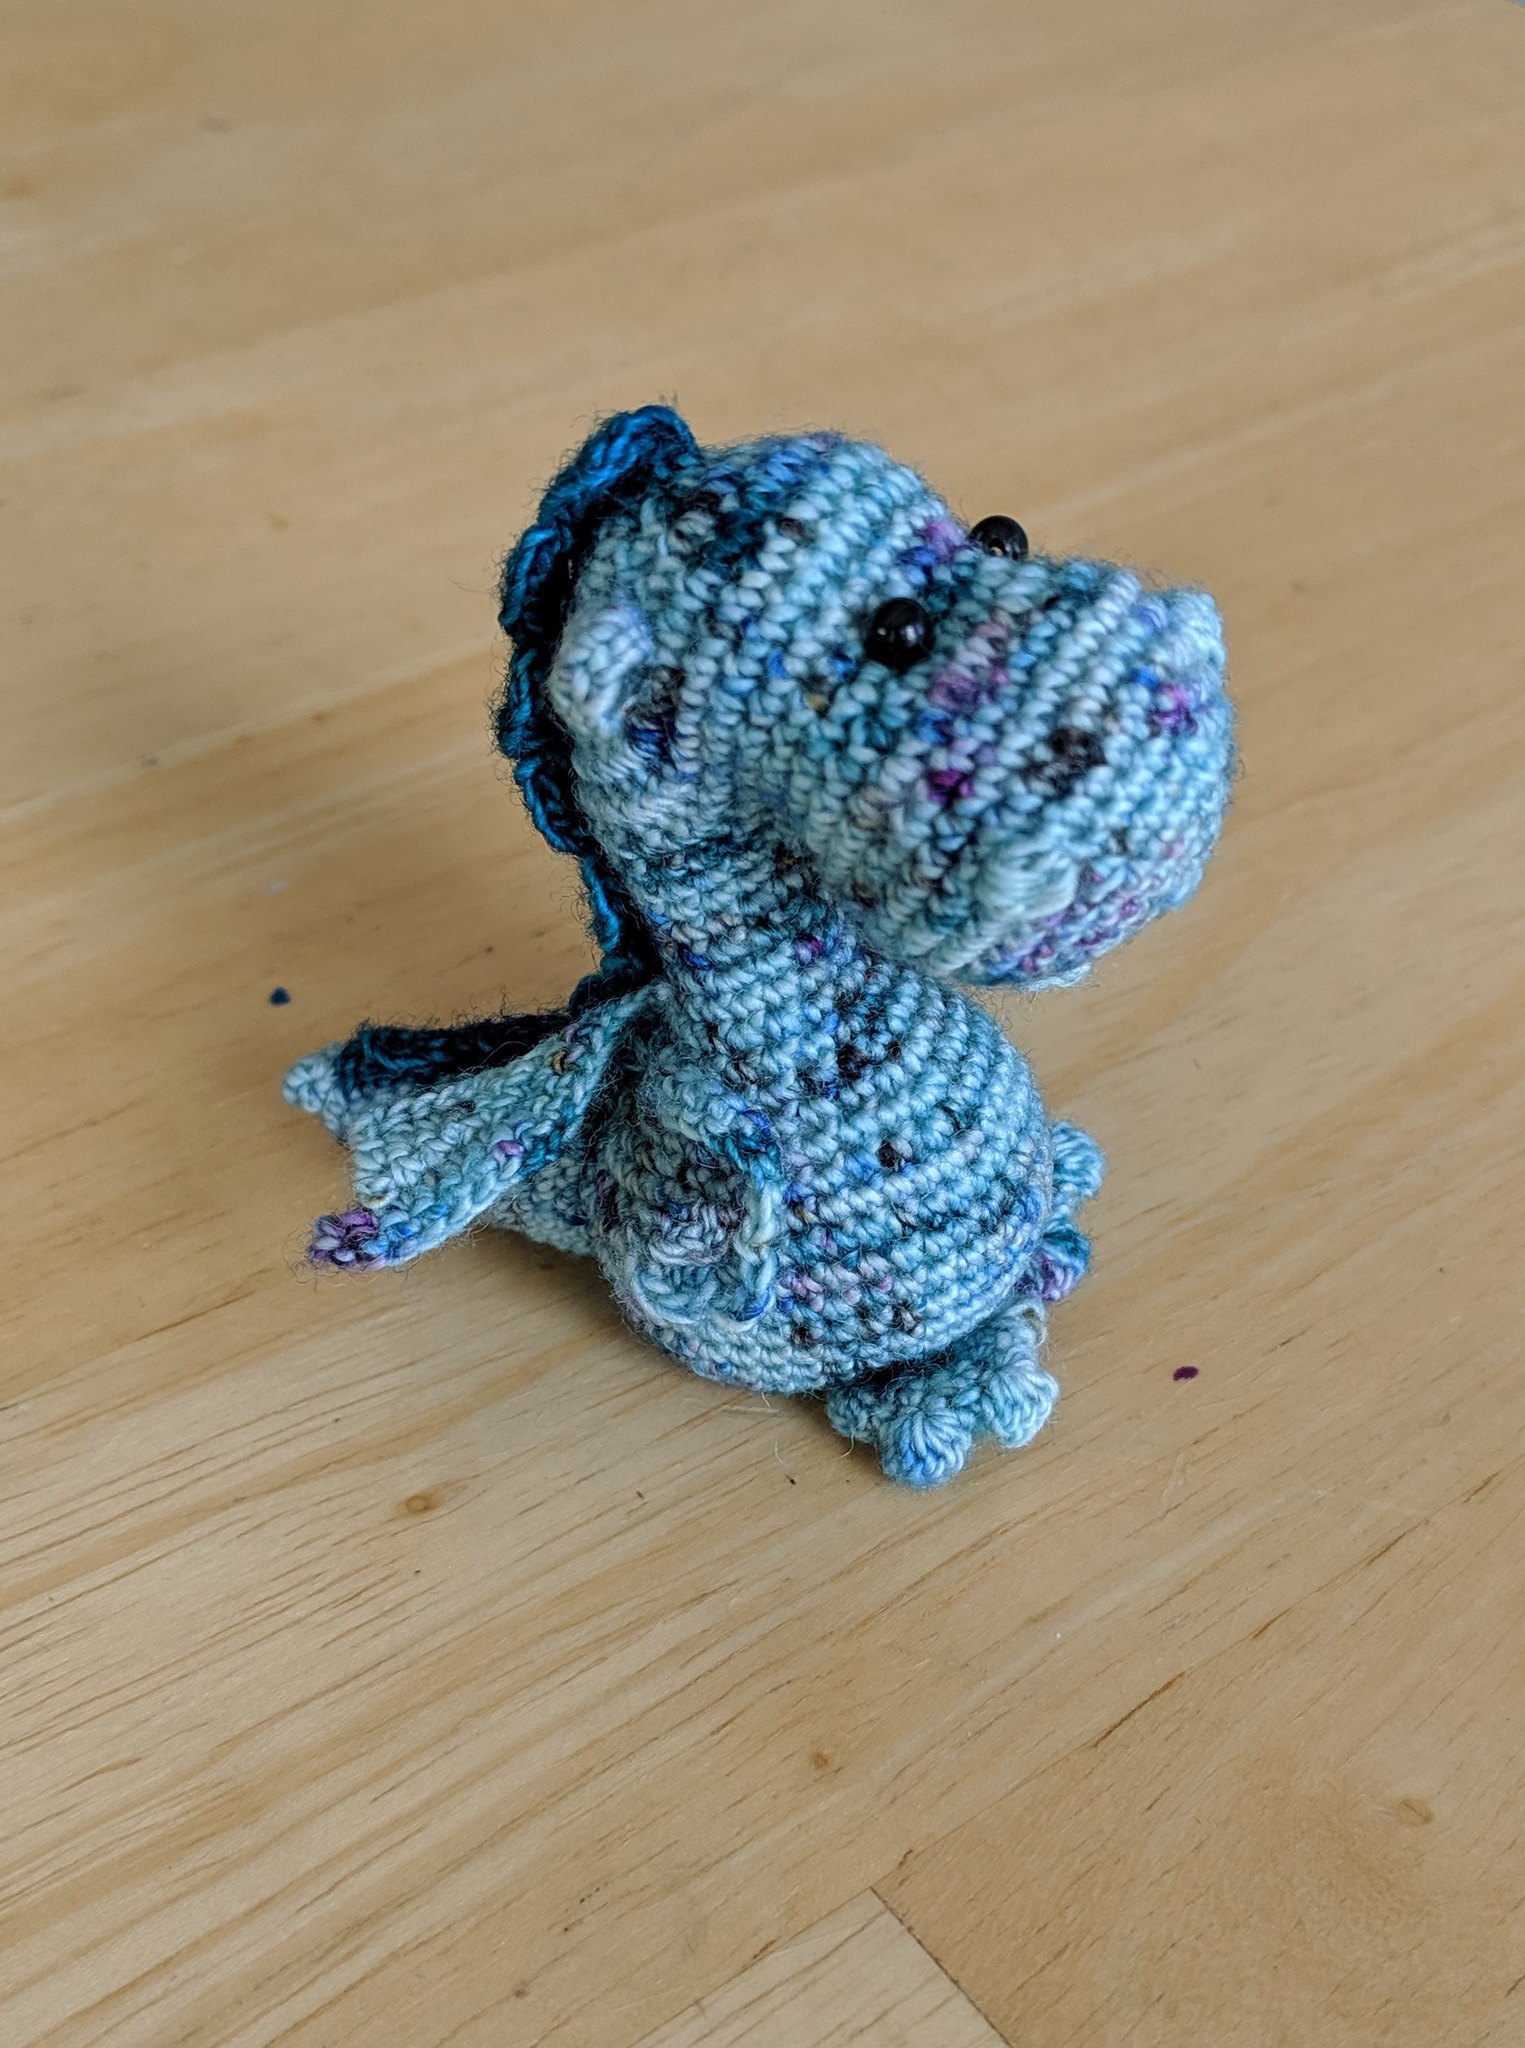
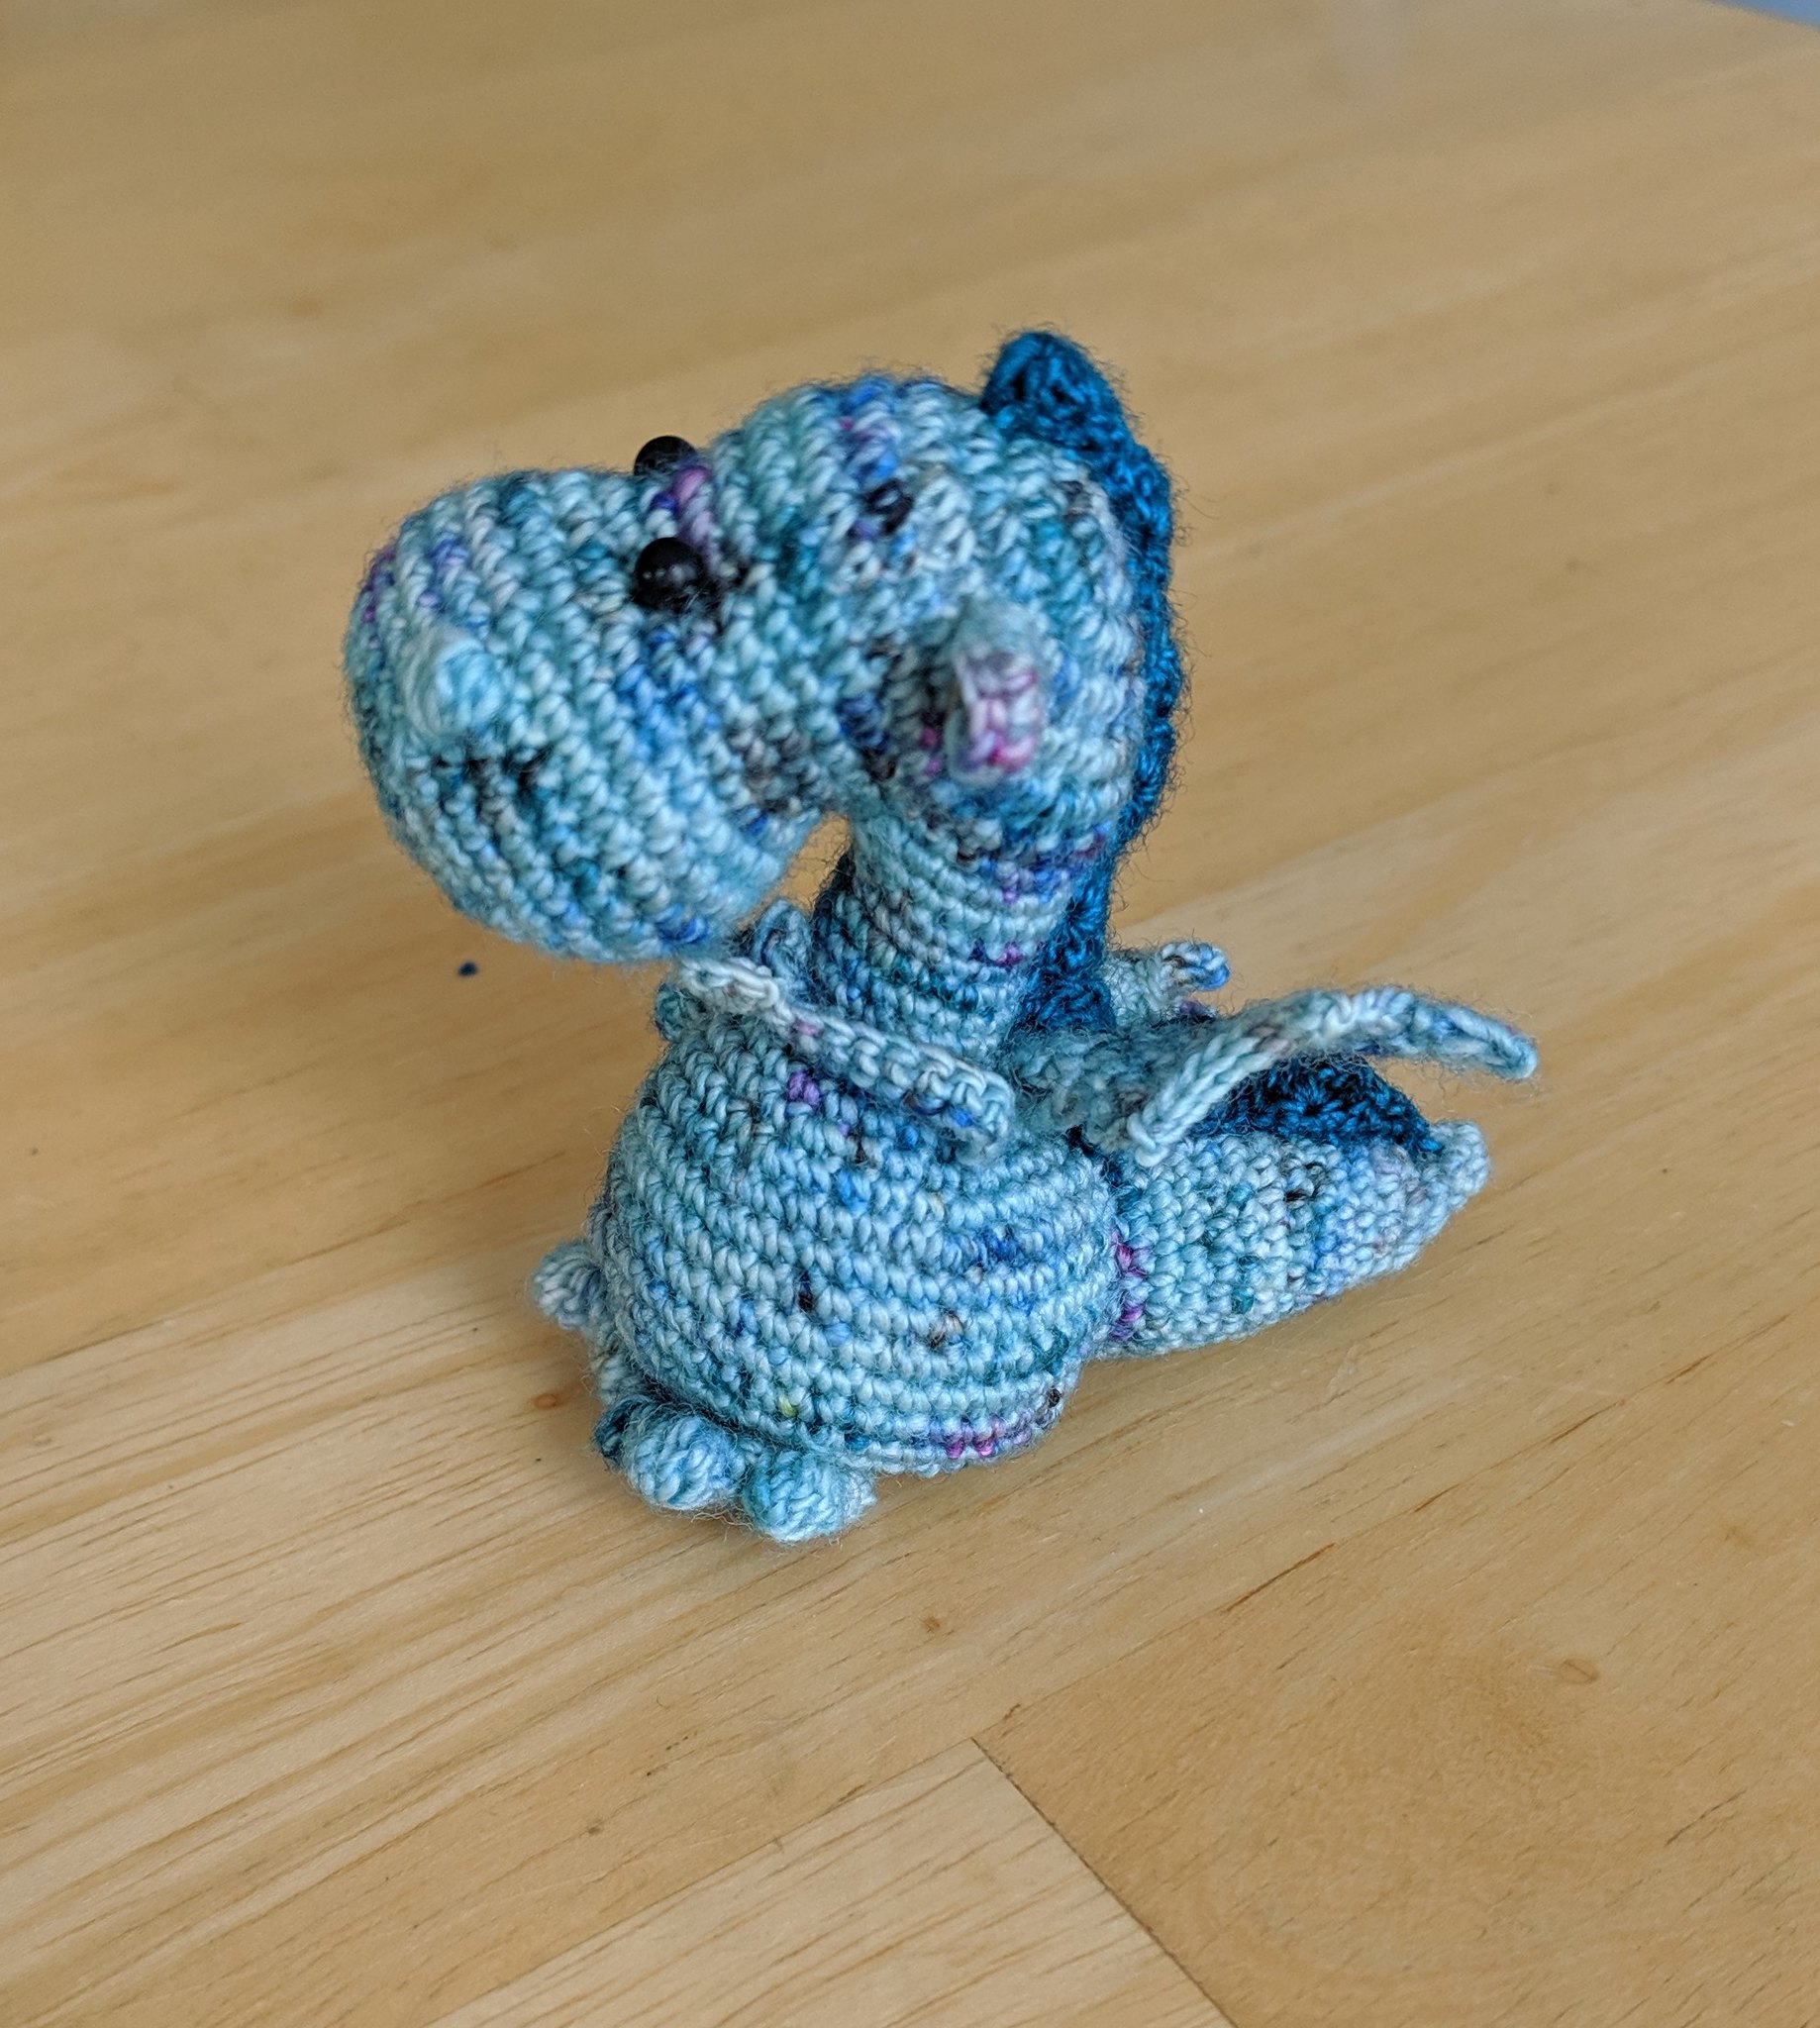
puff the magic dragon
maybe an obvious name, but one of my favorite songs as a kid…
he’s hard to take pictures of, but i am ridiculously pleased with him, and so are the kids
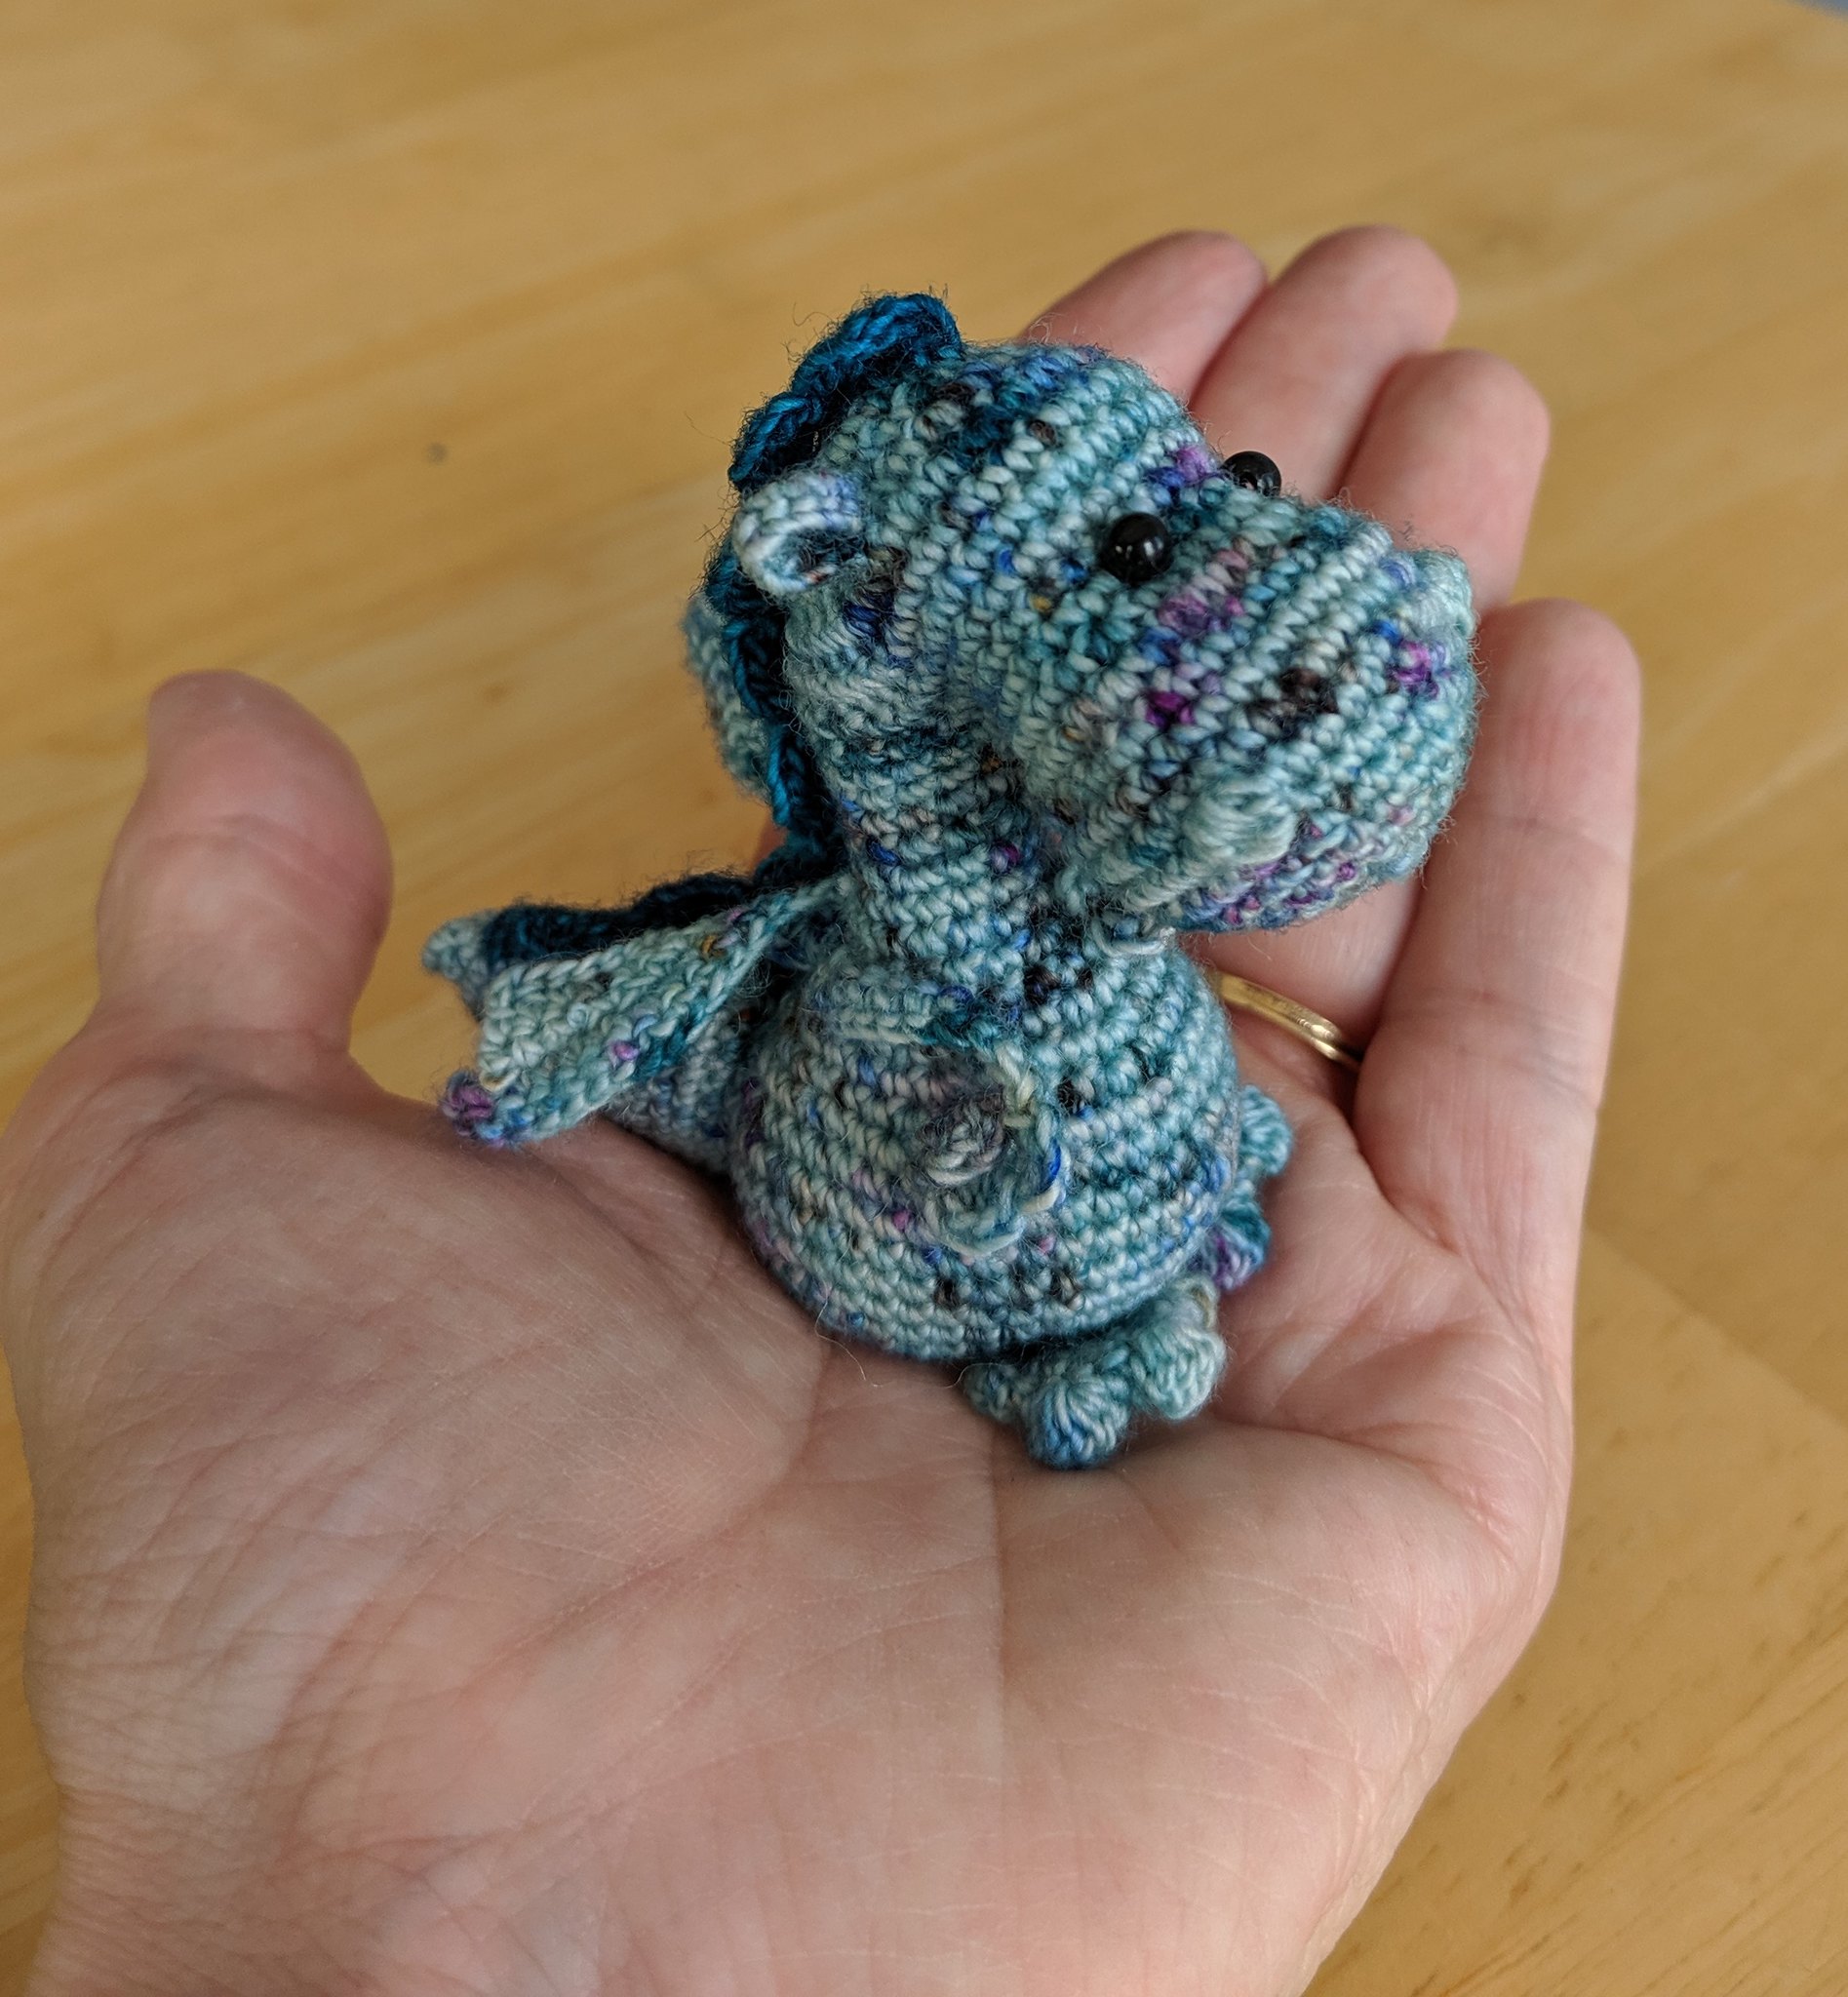
on my hand for scale
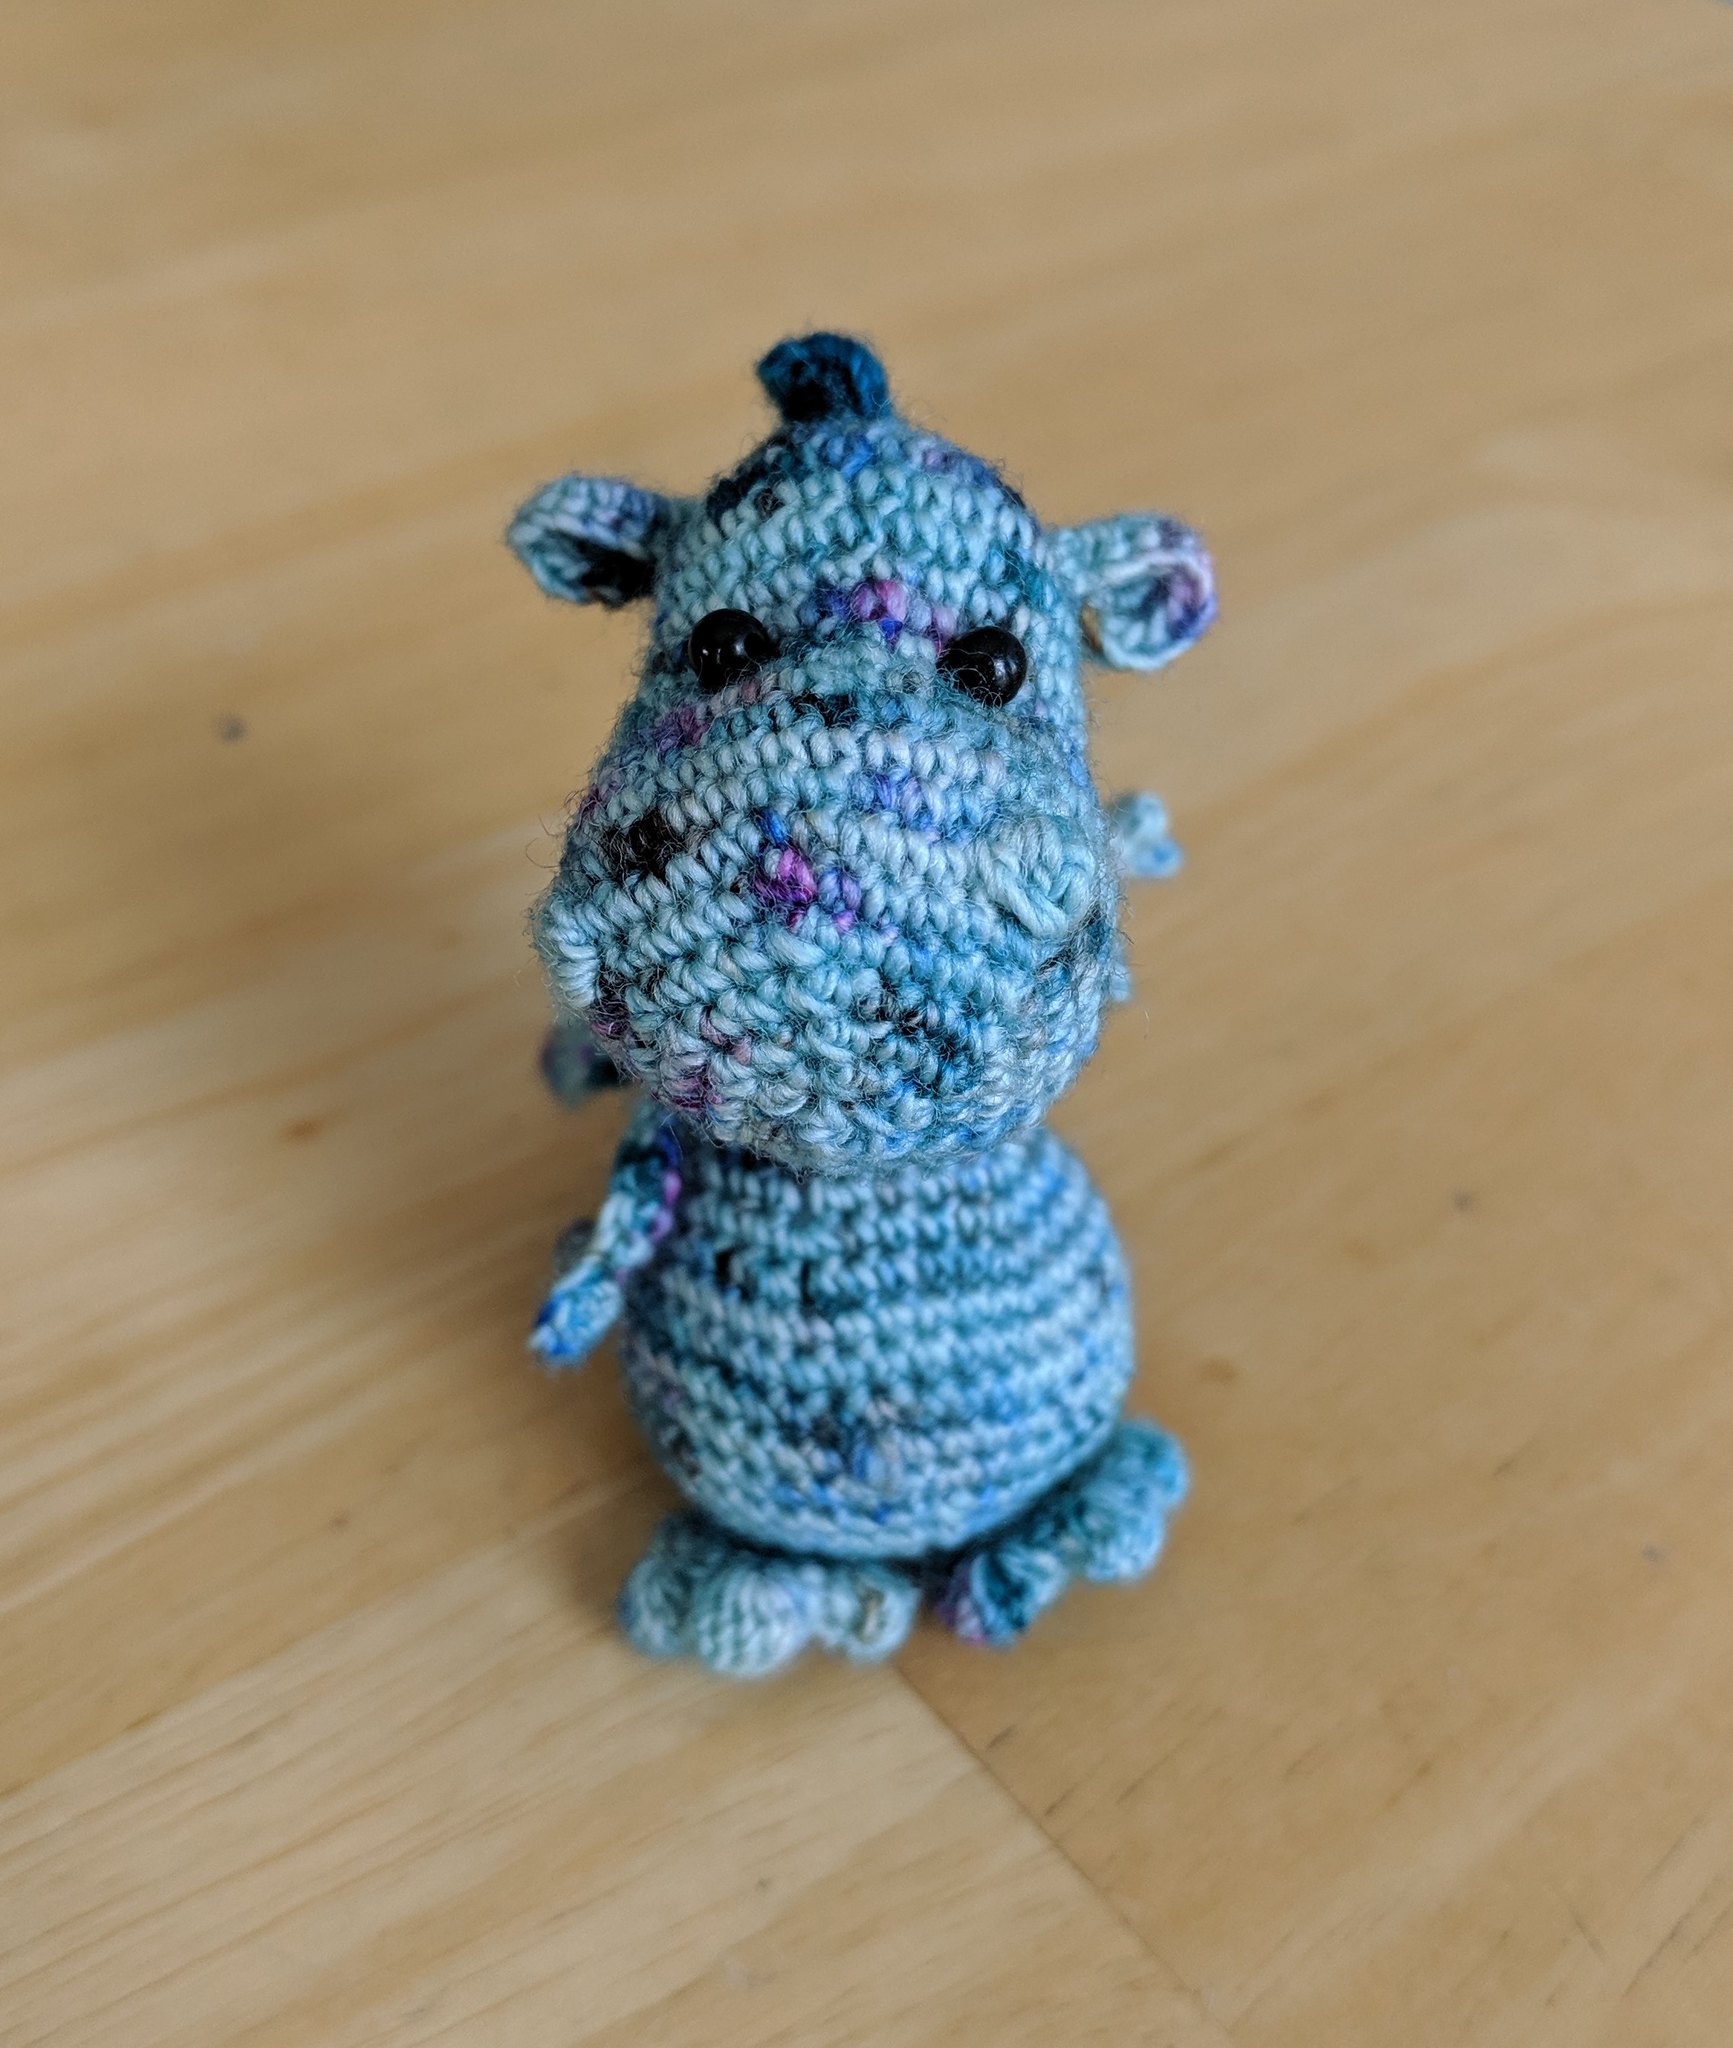
front
back
side
side
third try is the charm
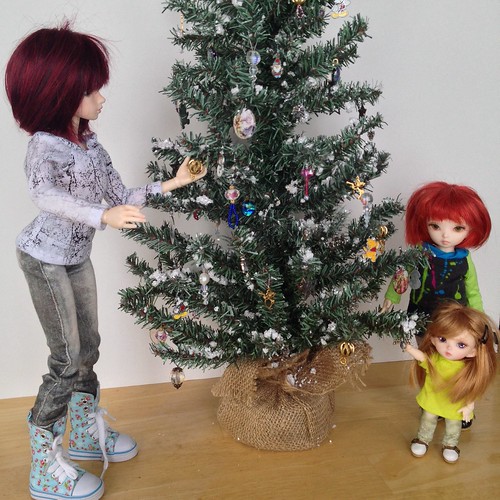
i have a 24″ mini tree i bought several years ago and have slowly been changing into a prop for my mnf and smaller girls. it is approx 24 inches tall so on the scale of a 7′ tree. i wish i had thought to take a picture of it “before”. it used to have really ugly outsized berries and huge globs of “snow”. i have removed most of that and replaced them with better scale, mostly homemade ornaments. adding a few more each year. unfortunately while i was working on it, i left it on my south facing kitchen windowsill and noticed that this year instead of having a nice green pine, it has faded to more of a blue spruce :(. not sure if it is possible to recolor it? especially since the ornies are wired on and would be hard to remove. if you have any suggestions on how to fix it, please comment below. otherwise my girls will just have a spruce tree. something that is much more common here anyway, so i guess it works?
the tree had a burlap bag around the bottom and i have wanted a tree skirt to cover it since the beginning. i had elaborate plans but never got around to doing it so today was the day!
my first attempt was to make an origami white felt skirt using a pattern i’d saved ages ago. it looked nice flat but didn’t suit my tree, so into the recycle bin it went.
second attempt was to make a lined skirt. this is the fabric i’m using
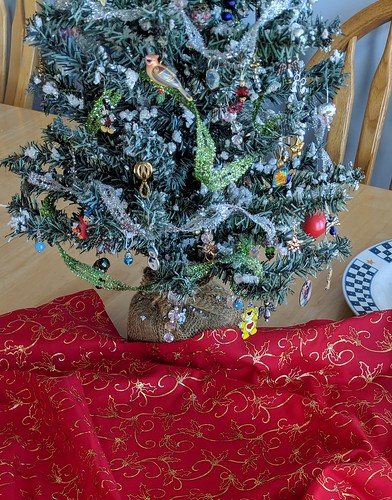
i spite of careful measuring, the lining made the skirt too stiff, it stuck out and didn’t hit the floor. so attempt two also went into the recycle bin.
this time i decided to make it just a single layer. i cut the appropriate circle, then slit up the back and trimmed the center till it was just wide enough to wrap round the trunk.
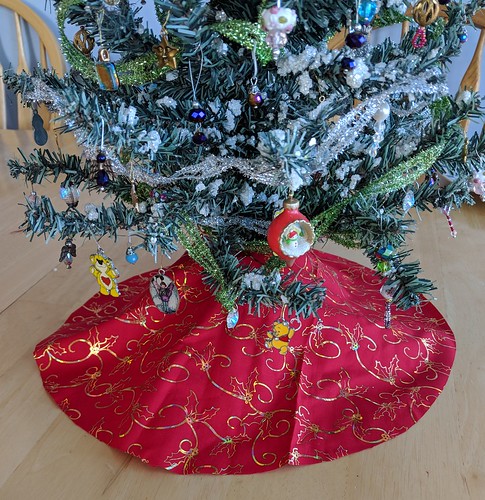
already a vast improvement. but of course i couldn’t stop there…
i went through my lace bin and found some red ruffled elastic. i folded over the outside edge about 1/4″ and pinned the elastic to that edge. then top stitched them together. the back slit and center were just turned and stitched. while looking for buttons to do up the back, i spied a bunch of floral shaped mother of pearl buttons and scattered them around the edge to see what they would look like. i liked it, so tacked them down with glue to keep track of where to put them and then sewed each one on by hand. that looked pretty good but it was still a bit sparse, so i tried adding square mop buttons and some assorted red ones. almost there…. it just needed a few green ones for pop. happy with the number and placement i glued and stitched those as well. several hours later this was the result
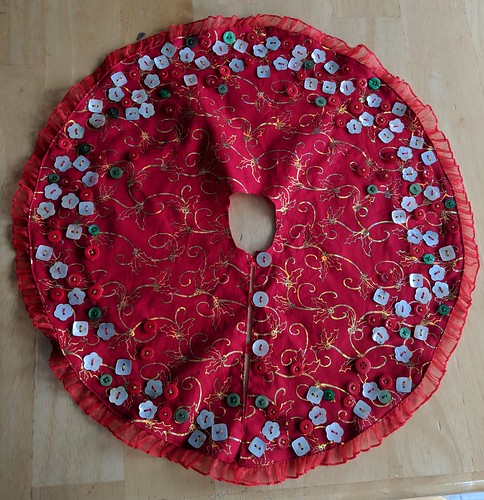
i think it is kind of fun and quirky. it’s all made from supplies unearthed in my craft purge, and should be plenty big enough to hide the battery pack from my fairy light string that will go on later this week.
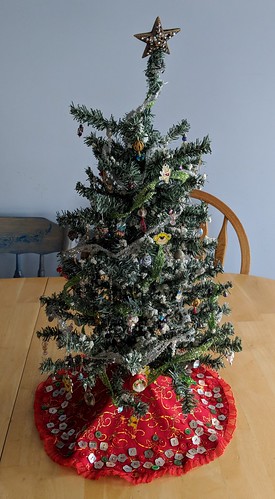
(here is a picture of the tree taken 5 years ago just so you can see the scale)
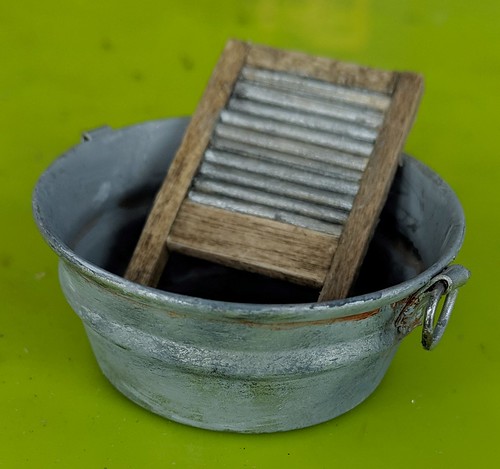
washtub
in my pre-purge days i had amassed quite a collection of sample cups – you know the ones that costco, or the groceries stores used to pass out samples of food items they want you to try? anyway every time i got a sample, if the food in it wasn’t too sticky, once iI ate the food, i would stick it in my purse or pocket instead of the garbage. at home i would wash it out and add it to my ever growing pile. One time i really scored and the lady passing out samples accidently knocked a stack onto the floor while we were there. she explained that she couldn’t use them for food anymore (obviously) and would just have to throw them out, if we had any use for them, we were welcome to them, of course i snagged them all!
anyway i use the for all sorts of things, like mixing paint colors or holding small amounts of glue when crafting. i reuse them as much as possible and then throw them out when they get too covered with stuff or crack, as they eventually do. as i was looking for something to turn into a washtub, my eyes lit on the stack of sample cups and i knew that some of them would be perfect.
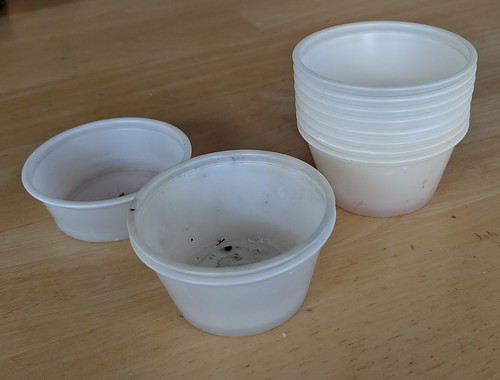
this is just a few of the ones i have at the moment. you can see they are all well used.
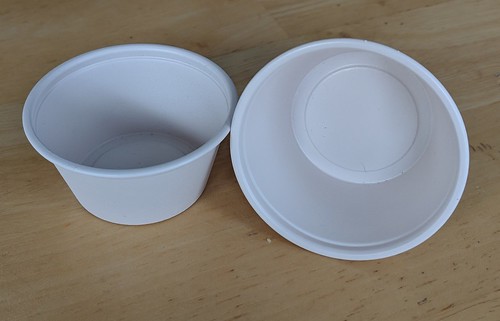
while i was making my washboard i coated the cups with off white primer. i have a good can of spray that will stick pretty much anything – wood, metal, plastic etc. i use that as my base coat so my acrylic paints will stick and not just drip or peel off.
next i sprayed on a coat of stainless silver to get the right base color…. and disaster!
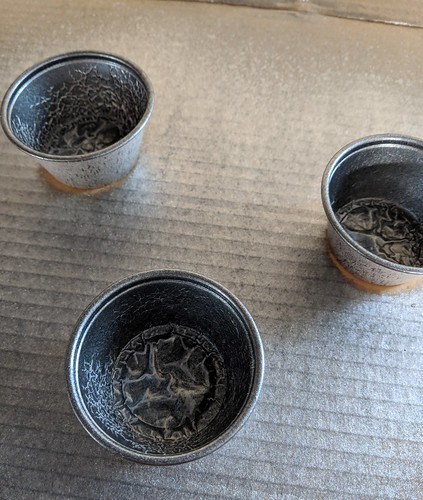
even though they were both the same kind and brand of paint. the paint peeled and buckled when i put on the first coat. so back to the drawing board.
of course this washtub fits the bigger of my two washboards, so i had to find something else for my realpuki’s anyway. as luck would have it, i was putting in an order for new saw blades at stockade wood supplies, and they had a miniature tub available, and it was smaller than any of the ones i had seen. i thought it might be the perfect size so added it to my order.
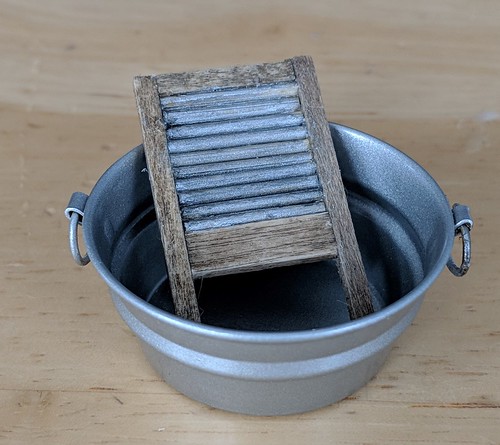
turns out it was perfect. since it was already silver i just needed to make it look worn.
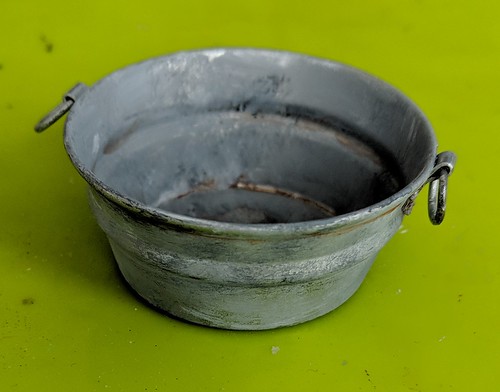
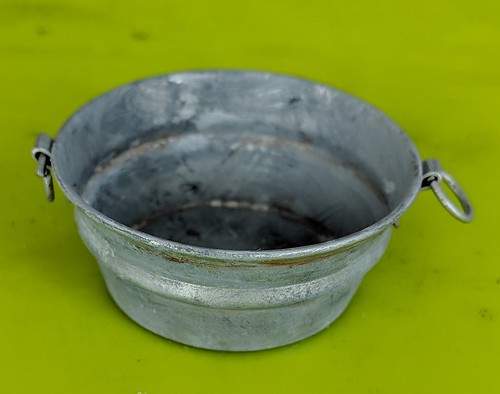
to age it, i brushed on random streaks and dabs of black and white and grays. as usual i put a bit of each color on my palette, and used a toothpick to swirl it together in the middle. this gives me black, white, and a near infinite variety of grays. i looked at several pictures of old galvanized tins and buckets from the internet, as i worked, so i could see what i was aiming for, and make sure it looked realistic.
After that paint dried, for the final touch, i added some rusty brown wood stain in the creases, and around the handles -places where rust was most likely to form. the stain is more transparent than the paint, so works better for light rusting than the thicker acrylic would.
back to the campfire
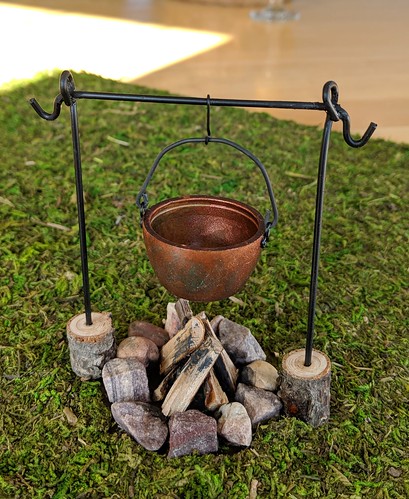
with the fire mostly done, i turned my attention back to cooking. it was now time to build the stand for my soup pot.
i started with some fairly stiff wire that i had salvaged from some packing materials. it was the right diameter, stiffness and best of all free…
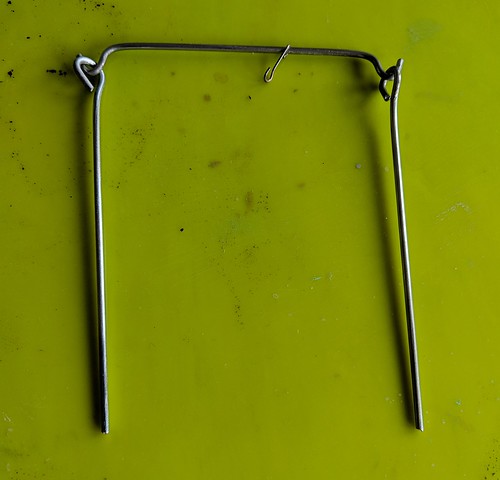
i cut it down and bent it to make two side posts with loops – i wanted to make the loops smaller, but it was too stiff to bend with the end of my pliers. this is the smallest diameter i could use and still bend it. the cross bar has turned up hooks on the end to hold extra pots and pans or a coffee pot – all still on the way. the small hook in the center was formed by trimming down an eye pin and forming it into a roughly “s” shape
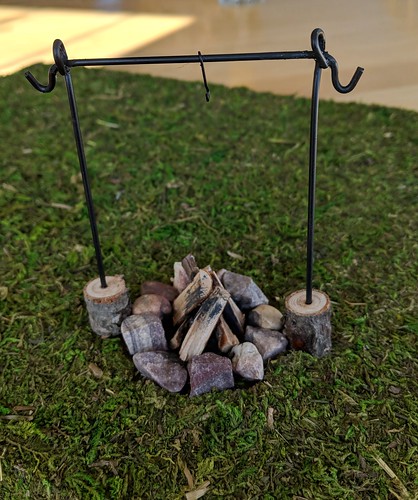
after spraying all the wire parts with several coats of flat black paint, to more closely mimic cast or forged iron bars, i cut pieces off of my dried branches to form the bottom supports, drilled holes in the center and glued it all together with e6ooo glue. because the loops were really too big, the stand fell apart easily, consequently i ended up having to glue the crossbar in place as well. since there wasn’t a lot of surface area touching, i left it to set for the full 72 hours before moving it again. lastly i touched up the glue with matte black acrylic paint to get rid of the shine. the roughness left by the glue just added to the look of cast iron -bonus!
the other problem i ran into was the bottom log supports weren’t quite wide enough to make the whole array steady on the uneven grass of the diorama, which means i had to glue them down as well. that was a little disappointing, as i had planned to make a second optional tripod structure that i could swap out for some pictures. i am quite used to things not necessarily working out according to my original ideas though, so in spite of the problems, and changes i am happy with how it came out. i’ll save the tripod idea for a campfire i’m planning later for my larger dolls.
i got wheels!
not a lot happening, since i have had multiple appointments the past couple of days but my wheels arrived 🙂
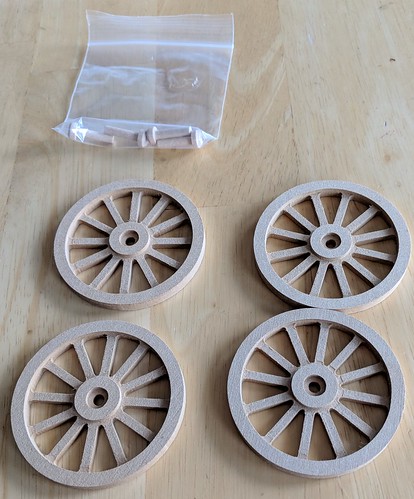
they are very nice detailed, and just need painting
i thought you were cleaning?
the purge is actually going well. i got 4+ large boxes of stuff for the charities. i’m taking a load over tomorrow for the local one and my parents are taking the others to the one out of town. now my only problem is i am running out of boxes!
but in the midst of purging, i found several of projects that i needed to decide if i would finish them or give them away. some of them are fairly involved so they went off into the do later pile, but a couple of them looked like they could be finished up relatively quickly.. or at least a good portion of the project. so i decide to get started and see if my vision was even reasonable.
the first was this birdhouse. i bought it a while back, ’cause it was on end of season clearance, and i thought it had good potential to become a caravan for my realpukis
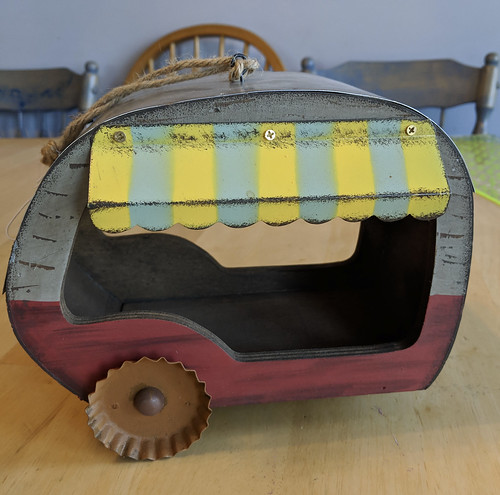
the goal is a gypsy/bohemian look so i went through my file of saved tiles and printed off this one for the floor. i sealed it with a spray coat of clear matte varnish to keep it from running or rubbing off too easily
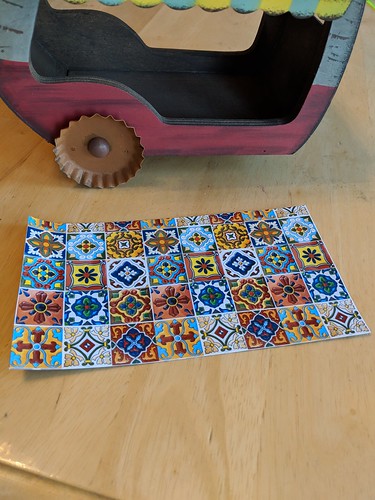
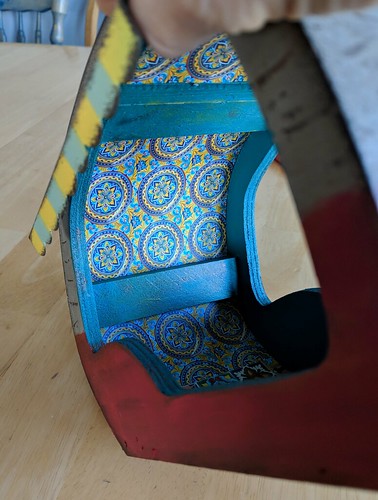
the wheels were the next to go. i thought the original ones were dorky looking and now that i have decided to finish this, i ordered spoked wooden ones instead. they should be here in a couple of weeks. the inside got painted with a coat of bright yellow. once that dried i rethought my plan and printed a yellow and blue tile instead to go between the wood beams, then painted over the yellow with a mix of blue, olive green metallic and teal metallic mixed together loosely. ie, i stirred them till they were partly, but not completely blended, then brushed them on trying not to overbrush so the color was partly streaky. i only did one coat so the yellow shows through in spots as well.
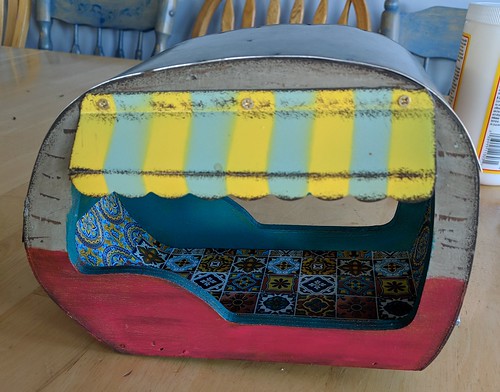
here you can see the wall and ceiling beams and tile
of course in keeping with my plan, the great craft room cleanup continued between coats of paint 🙂
fireplace final installment
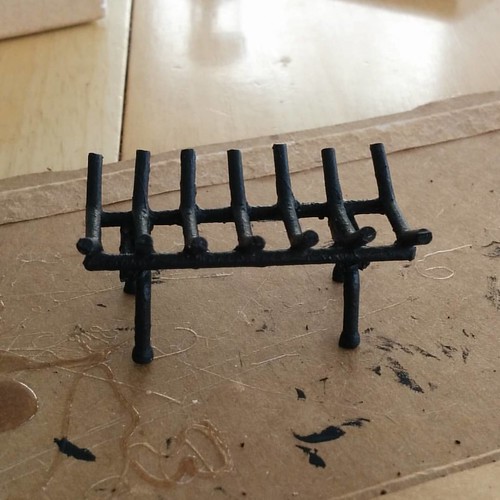
grate painted black looks like a well used cast iron grate.
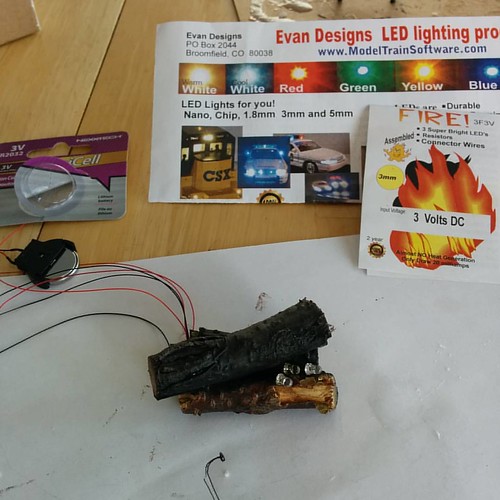
thread fire led lights through logs btw i ended up painted the lags with my ultra matte varnish because the ash kept getting all over my hands at this step Lol
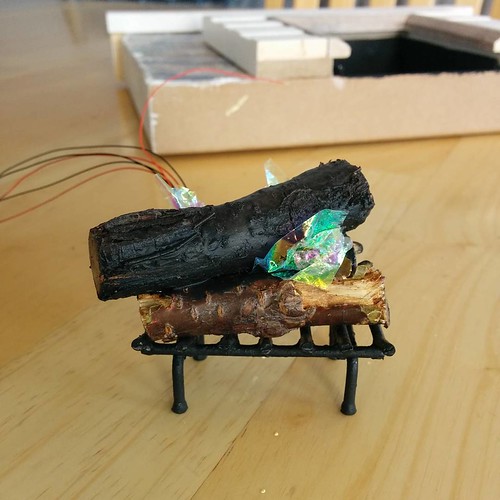
put crumpled cellophane over the lights. this was included in the kit and just needed to be cut. i’d have preferred something more orange but couldn’t find any.
punch holes for wires in back wall. i couldn’t find my awl so i used a large yarn needle and put in three small holes instead of one larger one. it really didn’t matter in the end.
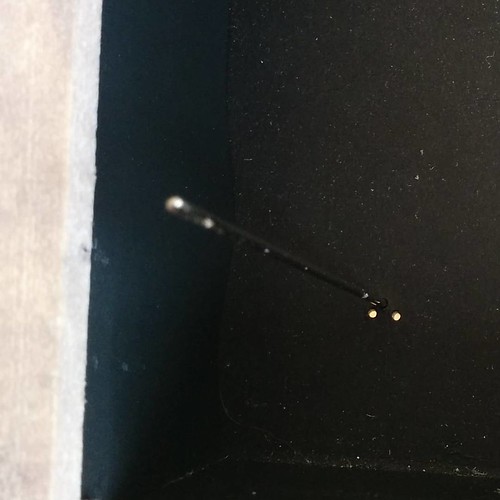
back view of wires threaded through
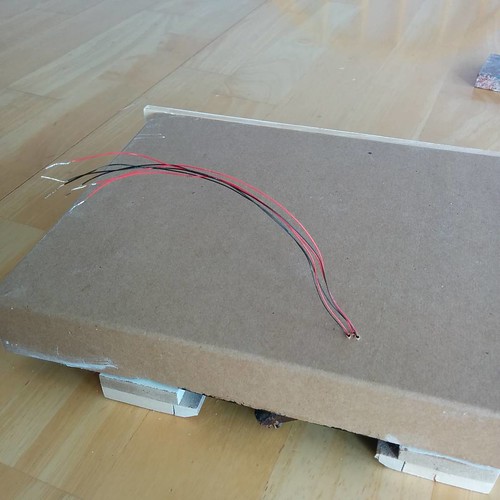
attach wires red to red, black to black
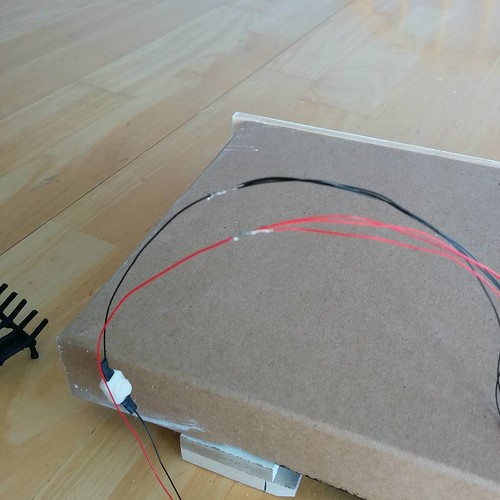
tape everything down. the little white thing is an on off switch so the lights don’t go continuously.
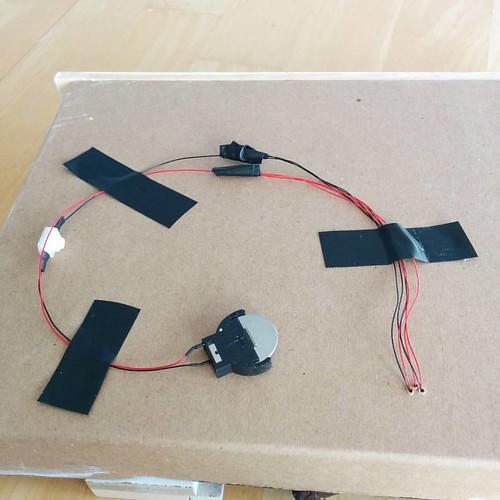
finished!
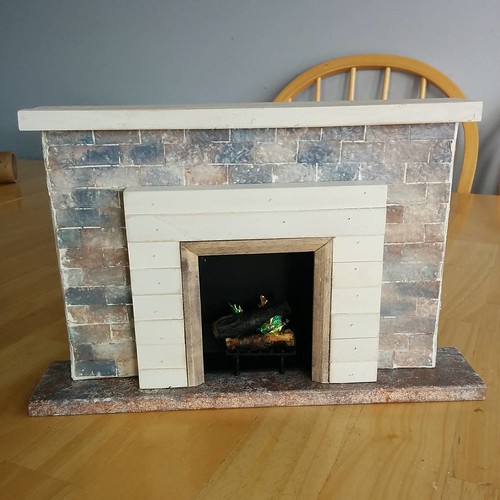
i took a video of the fireplace with the lights flickering and it looks awesome. but apparently i can’t upload video to flickr, so i’ll have to figure out another place to upload it and then add it in.
stockings!
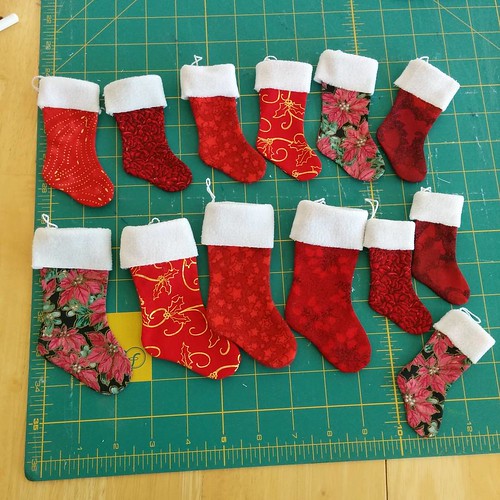
made some stockings for my kids. there are too many to hang fro the fireplace, so we are going with the older tradition of hanging them on the end of the bed on christmas eve. the biggest ones are for my msd sized dolls, the littler ones for my pukifee/latiyellow/tinydelfs etc. the real tiny dolls are still waiting for appropriate sized ones.
i made a bunch of extras to list on my etsy store next year for christmas… if i remember in time 😉


