You are currently browsing the tutorials category
Displaying 1 - 10 of 48 entries.

stitch samplers

  • Posted on January 21, 2020 at 11:41 pm

one of the kals in the yarnathon this year is to make stitch samplers. they can be any size and contain any number of stitches from one to…. the only rule is they all have to be different and they have to be some sort of rectangle. (too bad, i had some great mandalas i wanted to make, but maybe next year) i decided to finally get around to making samples of some of the stitches i would like to try designing with. i often find and intriguing stitch, and then don’t like it when i go to stitch it up in laceweight, because the scale is off for my girls. i am planning to do a bunch of them and put them in frames to decorate my craft room. as usual i have already spent more time planning and making ancillary projects than i have actually making samples. case in point. the frames…

i had a rough idea of the types of frames i liked, and that i thought would work well. i didn’t want a lot of small frames, so collage frames seemed to be the way to go. i looked at a lot of them and for the most part there was always something not quite right. my favorite was a large barnwood style frame with what looked like several clotheslines strung across it from which you could suspend several pictures using small clothepins. it had an open back so your wall color would show through. the only problem with it was that for some weird reason there were only 3 clothespins per “line” so you could only put up 2 pictures (or in my case samples) and they would have to share one of the pegs. i envisioned something more like an actual clothesline with tiny knit crocheted blankets or quilts hanging from it. i figured i could probably adapt a frame to suit, but i wanted a real wood one, not a wood- grain-painted-plastic one like most of the larger ones i could find. so i headed off to the local thrift shop to see what i could find.

generally at the thrift shop you can’t have anything definite in mind, but have to instead look beyond the surface of what there is to discover its’ potential. i had hoped to find a large frame, somewhere in the 11x16ish range. they had them, but they were cheap plastic, just what i didn’t want. at the back of one of the bins i found one that i thought had potential. it was a long narrow frame, with a mat cut so that you would stick in 3 pictures side x side or up and down. it was solid wood, with the miters so tight i could barely see the seam. i wasn’t enamored with the stain color, but i could always sand that off and re-stain it. it would mean doing one long clothesline, instead of several shorter ones, but i thought it would work, and it was only a couple of bucks.

i next went to the dollar store and picked up some narrow cord and tiny clothespins and i was in business

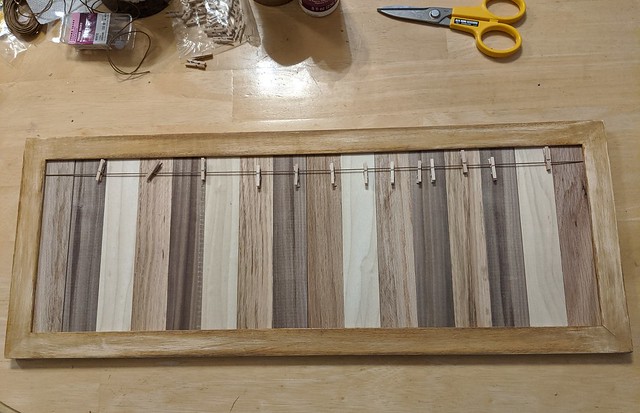
after i got it home i looked up at more frames online to see exactly how i wanted to do this and had the thought that it would look really cool with a random wood backing instead of the wall showing through, so i measured the opening and went off to the hardware store for wood strips. my first thought was to just get a few strips and stain them different colors, but when i got there i found out that by sorting through them and looking at the grain/color i could get enough variety from the natural wood. i ended up getting two polar strips 1-1/2×1/4″x4 feet long and two oak strips the same size. i also picked up a package of flat thumbtacks to tie my clothesline to.

out in the garage i measured the wood strips against the cardboard backing to make sure they would fit inside the frame and cut them to length, placing the pieces inside so that the color striped randomly. i really lucked out here and my pieces filled the frame exactly with no big gaps and no need to split any of the boards lengthwise. next i glued the cardboard back to the strips to hold them all in place and, once the glue dried, lifted it out of the frame . i took the frame and sanded it down, planning to re-stain it, but once i got the shine and some of the color off, i really liked the way it looked, so just left it. i stuck two of the thumbtacks in the back of the frame and tied on my clothesline. the pins are just placed on the line like they would be in real life, rather than strung on the line like most frames i have seen. that will give me maximum versatility, since i can add or remove the pins as necessary. the normal swivel pins that hold the back on had to be removed since they no longer worked and i didn’t want them scratching my wall. to replace them i put several more thumbtacks in the frame, just overlapping the back board enough so that the whole thing will stay together. if it is ever necessary to fix the clothesline i can always pull them out to get the back off.

of course i was so busy making this i never though of taking photos till it was all done :doh

anyway here it is. i had thought of sealing the whole thing with matte varnish, and i still may later, but for now, i like it just the way it is 🙂
quilt frame

and the back
the back
you can see the holes here i removed the original clips. also the thumbtacks to hold the frame on, and the ones set farther back for the clothesline. you can also see what the original frame color looked like
fishing pole!

  • Posted on December 27, 2018 at 8:36 am

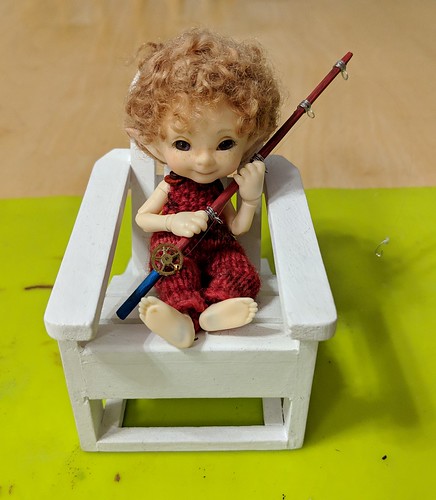
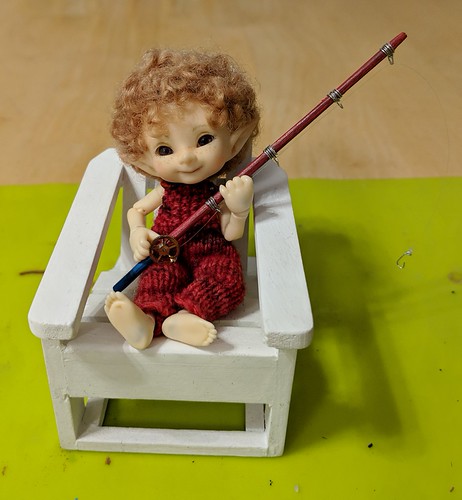
my realpuki gypsies asked for a fishing pole, so they could catch themselves some dinner, so i went looking for supplies.
fishing pole parts
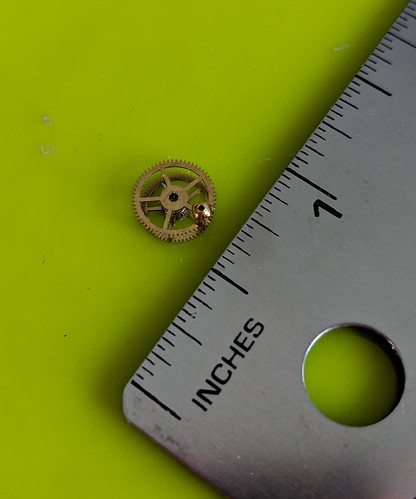
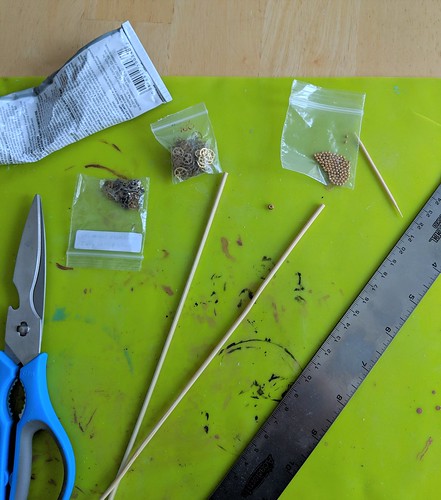
a skewer and some old watch parts, and tiny gold beads seemed like a good start. in addition i got a ruler to check the length, my e6000 glue since i would be gluing metal, a toothpick to apply the glue, and scissors to cut the rod.
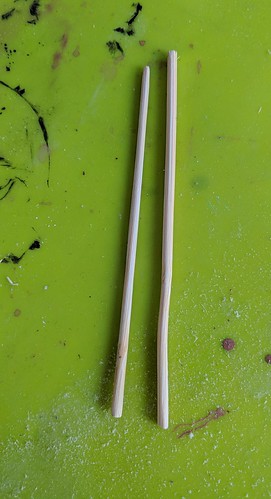
the first thing i realized was that my skewers were to thick to be in scale. my ‘pukis wanted a nice light rod, not a heavy stick! toothpicks would have been the right width, but were’t long enough so i went out to the garage to get sandpaper and carefully sanded down the skewer till it was the right diameter. i kept rolling it while i sanded to keep it round.
fishing pole sanded
the rod on the right is the original diameter, the rod on the left is how i sanded it down.
next i applied a thin layer of dark brown to the top, and light brown on the bottom for a handle. when it dried it looked to dark/dull, so i over-painted with red on top, blue on the handle. i forgot to photograph this step, but you can see the colors in the later pictures anyway.

fishing pole reel
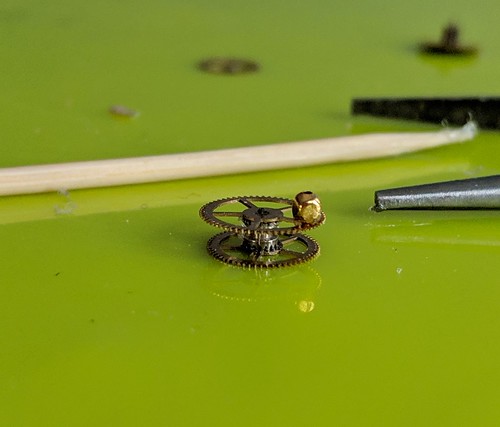
while the paint was drying i made the reel. i picked out two gears for the sides, and a small tube-like gear for the center spacer. i glued those all together and added a tiny bead for the handle.
fishing pole reel side
and a side view.

fishing pole loop guides
next i went to my craft supplies and got some very fine wire. i would have preferred brass/copper to coordinate with the reel, but all i had was silver tone, and since i am on a craft purge, whenever possible i am using what i have instead of buying new.
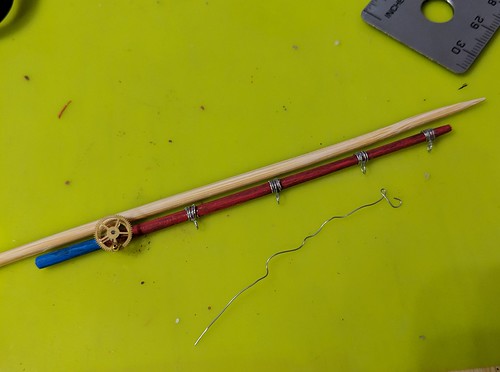
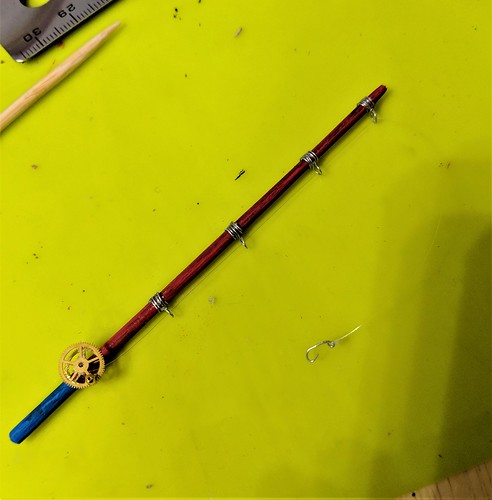
i wrapped the wire a couple of times around the rod, twisted it around a toothpick to form a loop, then wrapped it twice more around the rod, and cut off. i did this 4 times to get four loop guides. when i had them all done, i spaced them evenly along the rod, and added a touch of glue to keep them in position. then glued the reel on near the handle and let the glue set. from a small scrap of the wire, i made a fishhook shape.

fishihg pole reel finished
once the glue was set i tied a piece of invisible thread to the hook with a surgeons knot. a dab of glue made sure it wouldn’t come undone. the thread was then threaded through the loops and wrapped several times round the reel. another dab of glue kept it from un-winding. i left the ends intact till the glue set, then trimmed them as close as possible. you have to look really close to see the thread, since it is, more or less….invisible. but the scale looks perfect in real life.
tumnus approves his new rod
tumnus agrees!
tumnus approves his new rod

plant stand two

  • Posted on December 22, 2018 at 7:31 am

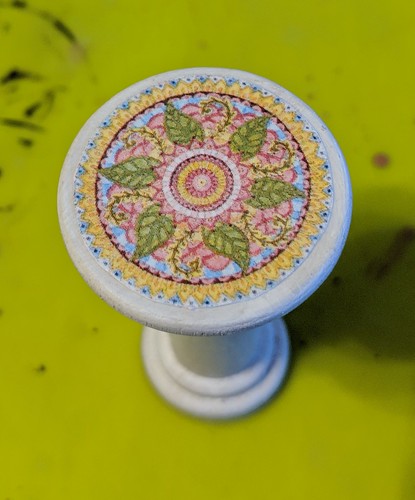
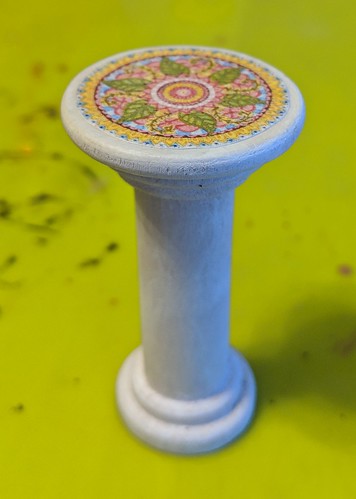
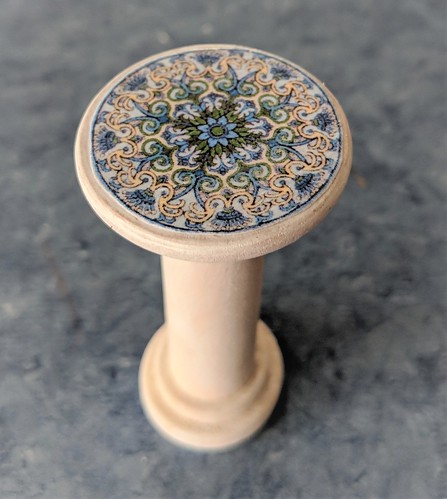
this is a repeat of the plant stand that i made for the little sunroom. the only difference is which mandala i “tiled” it with
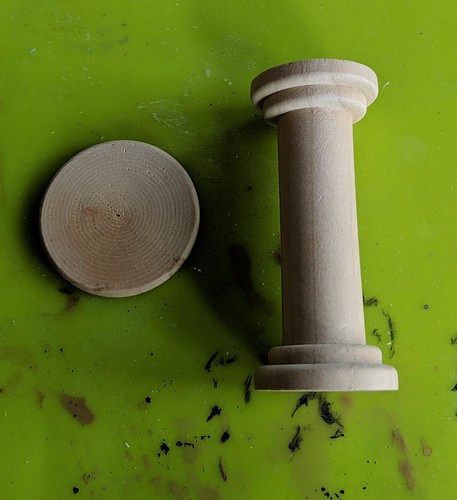
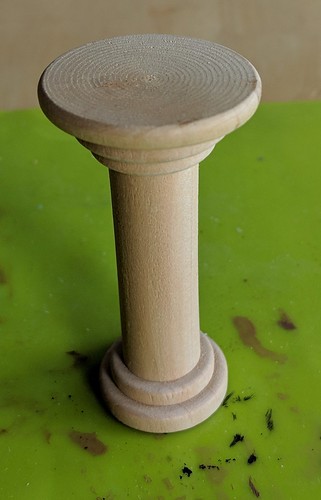
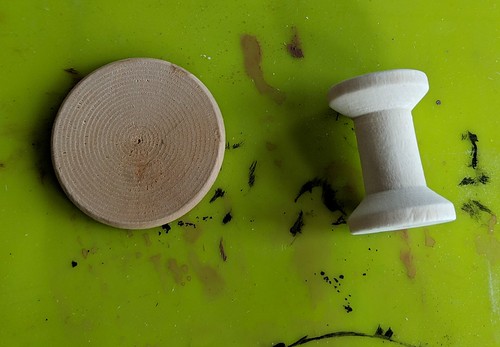
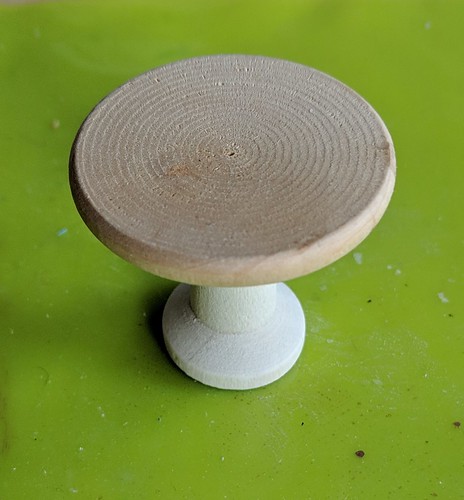
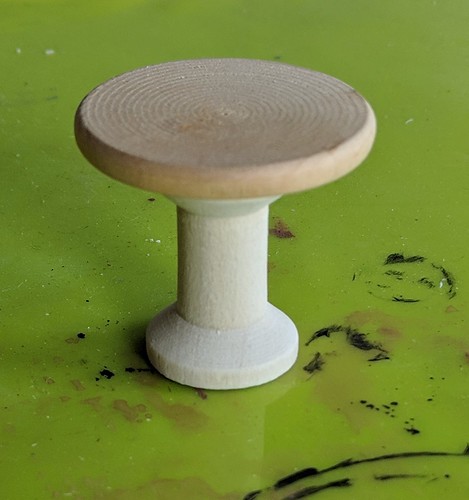
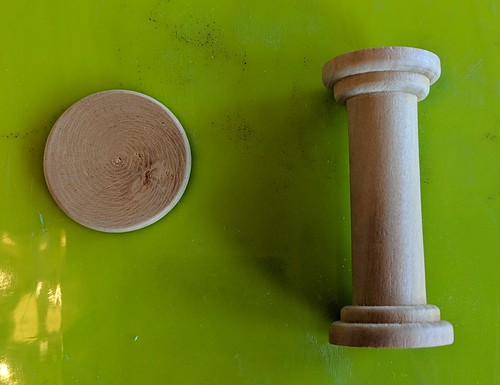
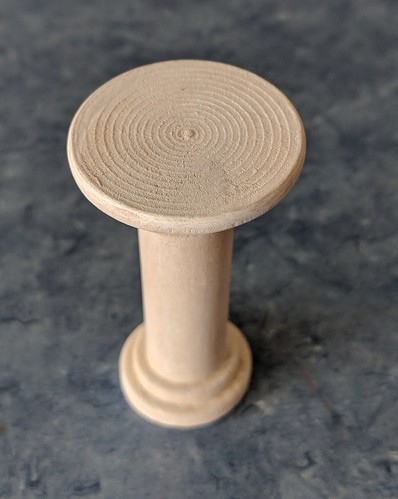
i started with a tall tall skinny spool and a wood disk ( both from michaels) the spool is 2-3/4″ (7cm) tall x 1-1/8″ (28mm) wide. the disk is 1-1/2″ (35mm) in diameter
plant stand 2
glued on the top
plant stand 2
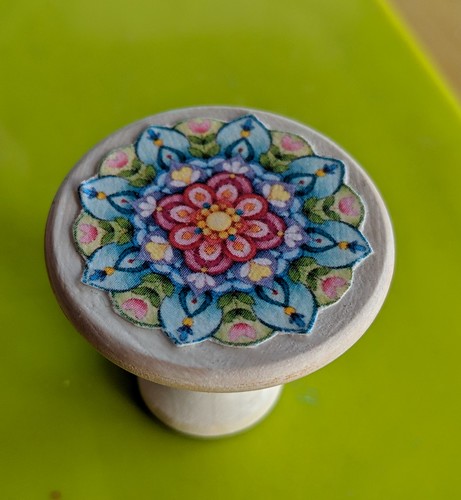
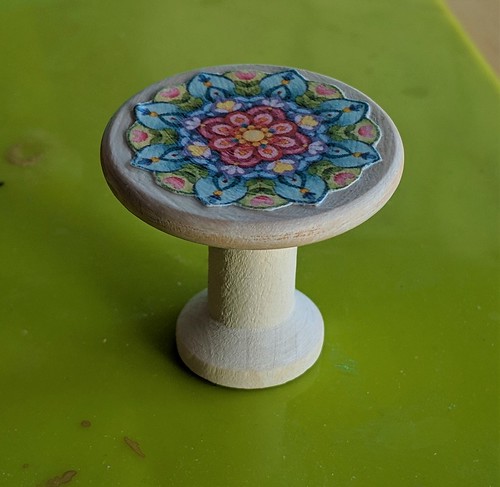
painted it white and picked another mandala for the “tiled” top
plant stand 2
plant stand 2
it’s funny how long i took to decide which mandalas to use on these first two. i wanted to be sure they looked good together and with the floor tile, even though chances are most of the mandala’s will be covered with the plant pots when the scene is done. at least i will know that they look good under the pot 😉

plant stand #1

  • Posted on December 21, 2018 at 2:38 pm

a conservatory needs lots of plant stands so that all the plants aren’t just sitting on the floor. i don’t have much time this close to christmas, but these are pretty quick so i figure i can get one done every day or so. once i get them all done, i’ll see how they fit in the greenhouse and decide which ones to use for this project and which will go in the box for future use.

the first one is just a simple wooden spool for the base and a disk for the top.
a greenhouse needs a lot of plant stands.  here is the first
to give you an idea of size, the disk is 1-1/2″ in diameter

just like the plant stand in my mini sitting room, i glued the disk on with wood glue, being careful to center it, and then let the glue dry
a greenhouse needs a lot of plant stands.  here is the first
and the side view
a greenhouse needs a lot of plant stands.  here is the first

once the glue dried i painted it with the translucent white paint. i still can’t get the paint to show up in the photos, so didn’t bother posting a picture of that step.

i picked another mandala “tile” from the pile of remaining mandalas – you can fit a LOT of 1 to 1-1/4″ circles on a single piece of card stock, so i had plenty to choose from! – then modgepodged it on top and brushed with a thin coat to seal. quick as that the first one is done.
a greenhouse needs a lot of plant stands.  here is the first

a greenhouse needs a lot of plant stands.  here is the first

making a simple plant stand

  • Posted on December 18, 2018 at 8:02 am

of course a conservatory wouldn’t be right with out at least a plant or two on plantstands. i didn’t have a lot of room in this one so decided to go fro just one.

i started with a tall tall skinny spool and a wood disk ( both from michaels) the spool is 2-3/4″ (7cm) tall x 1-1/8″ (28mm) wide. the disk is 1-1/2″ (35mm) in diameter
making a simple planter

first i glued the disk to the top of the spool, making sure it was centered.
making a simple planter

after the glue dried, i painted with translucent white paint (it doesn’t photograph that way but in real life this is whitish not just plain wood) you could get the same effect by thinning white acrylic paint with water, but i happened to have some that was pre-thinned so used that. next i did up a page of mandalas sized to fit. since i didn’t want to waste paper by only printing one circle and plan to make more planters for my second greenhouse later, i filled the page with a whole bunch of different ones. this time i printed it on plain printer paper, rather than card stock, because i wanted it to sit flush. i cut out and auditioned the various mandalas to see which i liked best. they always print in different tones than i get on my monitor, so i’m never sure which one(s) i will actually like till i try them. i chose this one because the tones work well with my floor tile. once i decided, the other circles got put away for later use and i used modge-podge to both attach and seal this one on top.
making a simple planter
the problem with zooming in, is that you see a lot of the imperfections that just aren’t noticeable when you look at them. case in point the pixelation on the tile is very hard to see in real life, and just makes for a soft, slightly worn look, perfect for the soft white stain on the wood.

a crocheted plant i made several years ago sits atop the new plant stand and the room is done. it’s too tiny to hold anything more.
finished room

while i was getting my camera, tuppence grabbed a couple of books, made herself a cup of hot tea, and claimed the room as her own.
tuppence settles in
her only complaint was that this close to christmas she thought the plant really ought to be a poinsettia or a christmas rose. i promised to look for one or make one for next year.

in spite of that i think she looks rather pleased with herself don’t you?

washtub

  • Posted on October 16, 2018 at 3:56 pm

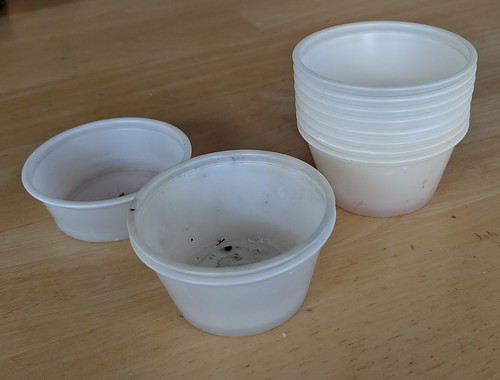
in my pre-purge days i had amassed quite a collection of sample cups – you know the ones that costco, or the groceries stores used to pass out samples of food items they want you to try? anyway every time i got a sample, if the food in it wasn’t too sticky, once iI ate the food, i would stick it in my purse or pocket instead of the garbage. at home i would wash it out and add it to my ever growing pile. One time i really scored and the lady passing out samples accidently knocked a stack onto the floor while we were there. she explained that she couldn’t use them for food anymore (obviously) and would just have to throw them out, if we had any use for them, we were welcome to them, of course i snagged them all!

anyway i use the for all sorts of things, like mixing paint colors or holding small amounts of glue when crafting. i reuse them as much as possible and then throw them out when they get too covered with stuff or crack, as they eventually do. as i was looking for something to turn into a washtub, my eyes lit on the stack of sample cups and i knew that some of them would be perfect.
stack of cups
this is just a few of the ones i have at the moment. you can see they are all well used.

sprayed with primer
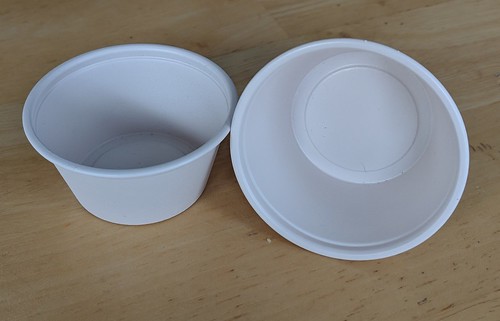
while i was making my washboard i coated the cups with off white primer. i have a good can of spray that will stick pretty much anything – wood, metal, plastic etc. i use that as my base coat so my acrylic paints will stick and not just drip or peel off.

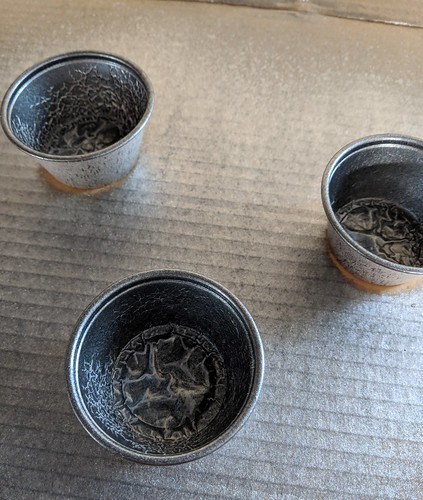
next i sprayed on a coat of stainless silver to get the right base color…. and disaster!
disaster
even though they were both the same kind and brand of paint. the paint peeled and buckled when i put on the first coat. so back to the drawing board.

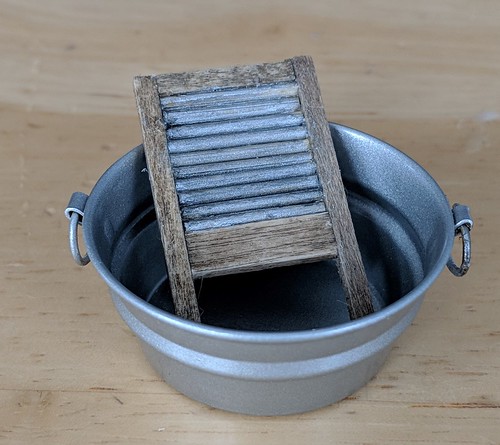
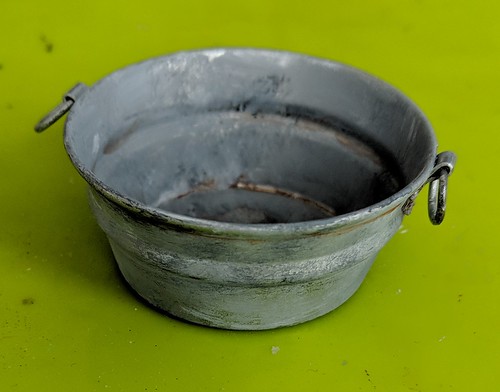
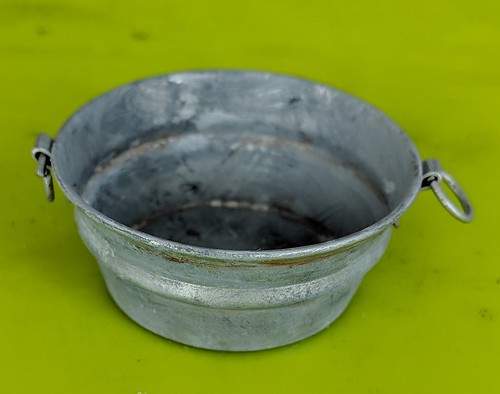
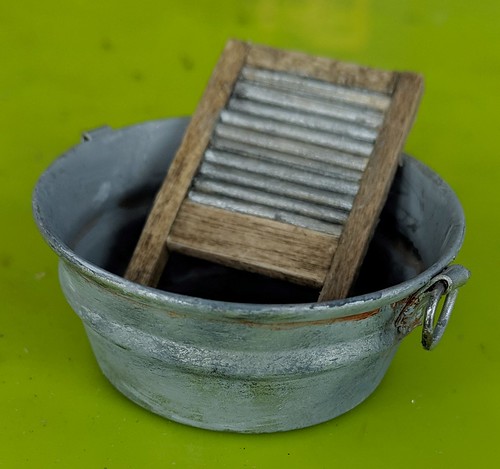
of course this washtub fits the bigger of my two washboards, so i had to find something else for my realpuki’s anyway. as luck would have it, i was putting in an order for new saw blades at stockade wood supplies, and they had a miniature tub available, and it was smaller than any of the ones i had seen. i thought it might be the perfect size so added it to my order.

wash tub new
turns out it was perfect. since it was already silver i just needed to make it look worn.
washtub painted
washtub painted
to age it, i brushed on random streaks and dabs of black and white and grays. as usual i put a bit of each color on my palette, and used a toothpick to swirl it together in the middle. this gives me black, white, and a near infinite variety of grays. i looked at several pictures of old galvanized tins and buckets from the internet, as i worked, so i could see what i was aiming for, and make sure it looked realistic.
After that paint dried, for the final touch, i added some rusty brown wood stain in the creases, and around the handles -places where rust was most likely to form. the stain is more transparent than the paint, so works better for light rusting than the thicker acrylic would.

washtub done
and ready to go

washboard

  • Posted on October 13, 2018 at 9:58 am

it’s hard to stay clean while traveling, so my ‘pukis asked for a washtub and board. i made the washboard first.

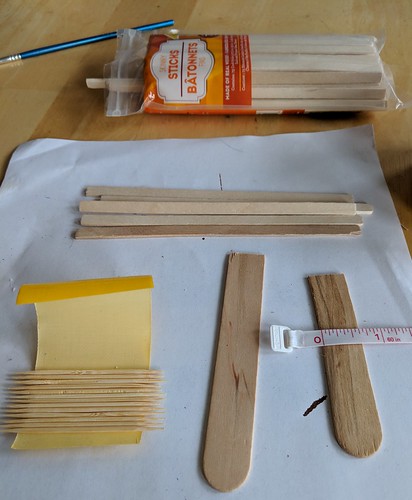
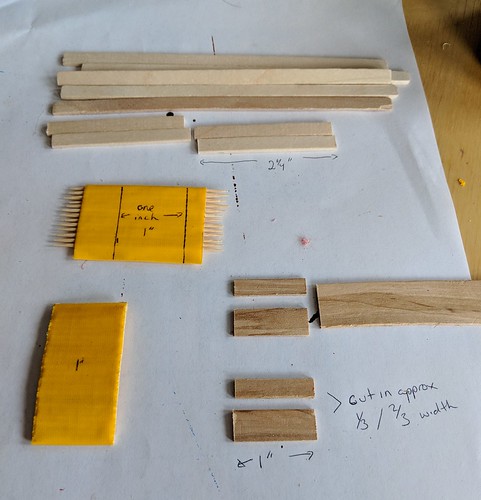
washboard supplies
i started with toothpicks – placed on duck tape to make it easier to cut them all the same size,
skinny sticks
and 5/8″ wide craft sticks.
not shown is silver and black paint, wood stain, and fast tack glue.

washboard pieces cut dimensions
here are the sizes i cut to get to approx 1/12th scale. i used a pair of heavy duty scissors to cut on the drawn line for the toothpicks, and my small saw to cut the wood. you could use a small saw for all of it, or a good cutting knife.

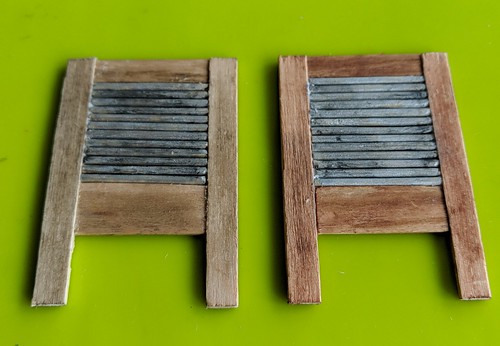
washboard done
first i pre-painted the rollers silver and stained the wood. when that was dry, i glued the top and bottom wood pieces to the top and bottom toothpick. next i lined up toothpicks till i liked the length and glued on the sides. there is no need to glue the toothpicks to each other as the side pieces hold them all in place. make sure the glue covers the whole edge except for the bottom “leg” portion.

once the glue dried, i dry brushed on black paint over the silver to age it.

there you have a quick and easy washboard!

except…. it was too big!
and done again
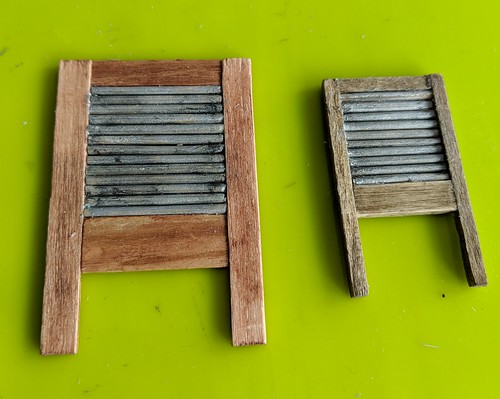
i somehow forgot that 1/12th scale is too big for my ‘puki’s :doh. the washboard was better suited for my realfees or my dream high elf so i’m thinking it’s actually more like 1/8th? anyhow i did the same thing again just cutting it all smaller.

this time i used the skinny sticks for the top and the bottom, and match sticks for the sides. the finished measurements are 1″ wide by 1-3/4″ long. the toothpicks, top and bottom pieces are cut 3/4″ wide. the bottom is a full skinny stick width, the top is a piece split roughly in half.

back to the campfire

  • Posted on October 12, 2018 at 12:53 pm

with the fire mostly done, i turned my attention back to cooking. it was now time to build the stand for my soup pot.

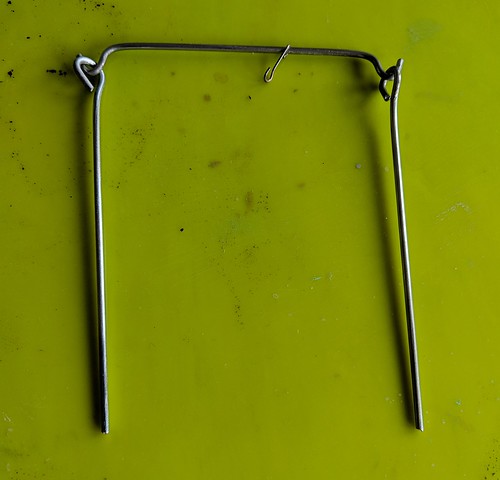
i started with some fairly stiff wire that i had salvaged from some packing materials. it was the right diameter, stiffness and best of all free…

cook stand start
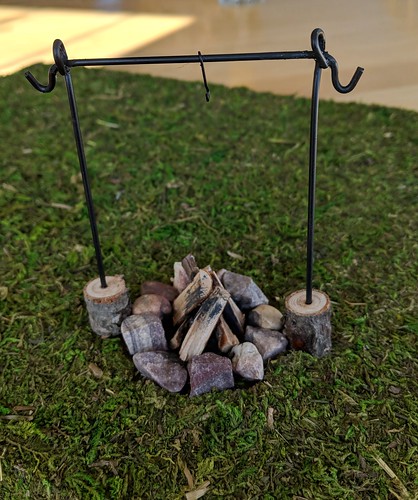
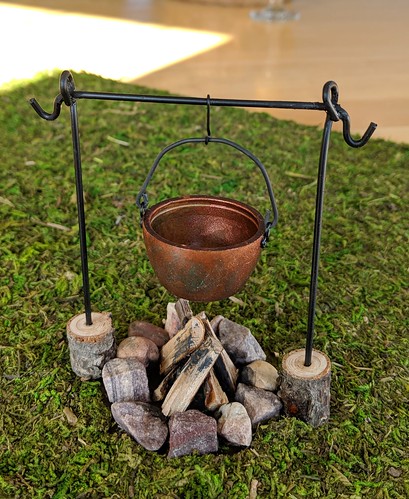
i cut it down and bent it to make two side posts with loops – i wanted to make the loops smaller, but it was too stiff to bend with the end of my pliers. this is the smallest diameter i could use and still bend it. the cross bar has turned up hooks on the end to hold extra pots and pans or a coffee pot – all still on the way. the small hook in the center was formed by trimming down an eye pin and forming it into a roughly “s” shape

cook stand done
after spraying all the wire parts with several coats of flat black paint, to more closely mimic cast or forged iron bars, i cut pieces off of my dried branches to form the bottom supports, drilled holes in the center and glued it all together with e6ooo glue. because the loops were really too big, the stand fell apart easily, consequently i ended up having to glue the crossbar in place as well. since there wasn’t a lot of surface area touching, i left it to set for the full 72 hours before moving it again. lastly i touched up the glue with matte black acrylic paint to get rid of the shine. the roughness left by the glue just added to the look of cast iron -bonus!

the other problem i ran into was the bottom log supports weren’t quite wide enough to make the whole array steady on the uneven grass of the diorama, which means i had to glue them down as well. that was a little disappointing, as i had planned to make a second optional tripod structure that i could swap out for some pictures. i am quite used to things not necessarily working out according to my original ideas though, so in spite of the problems, and changes i am happy with how it came out. i’ll save the tripod idea for a campfire i’m planning later for my larger dolls.

cook stand with pot
and here it is with the soup pot on.

campfire part 3

  • Posted on October 3, 2018 at 10:06 am

next step is adding the fire to the diorama
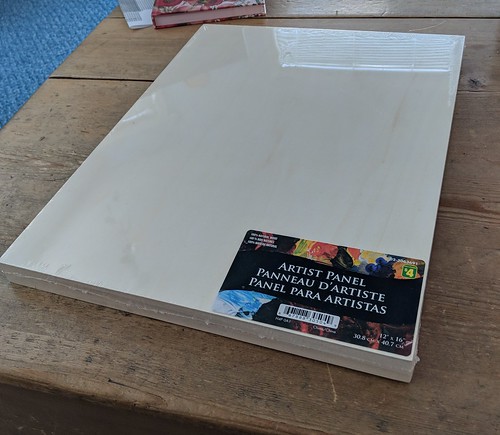
i wanted to hide all the wiring so i found a panel board at the dollerama for $4.
panel front
it is 12″ x 16″. a little small for photos, but it will fit nicely on a shelf.

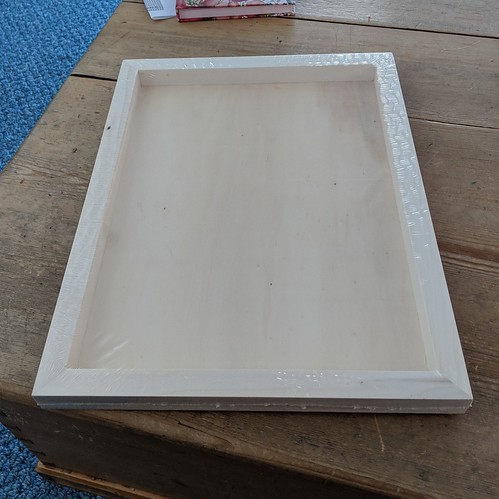
panel back
the back is hollow, with more than enough space to hide the wiring and battery

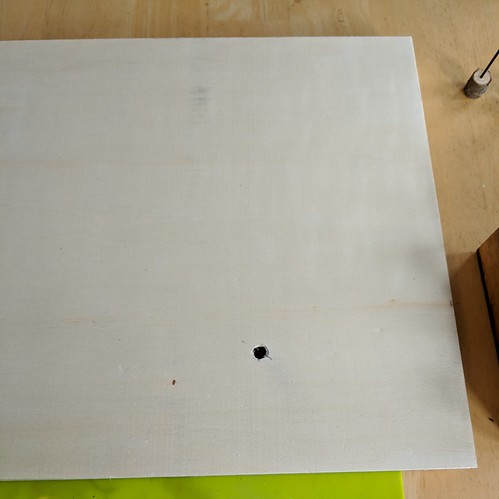
camp fire - hole for wires
after deciding where i wanted the fire to go, i marked the center with an x and then drilled a hole large enough for all the wires to fit through. i didn’t have to drill three holes this time. the top disc will keep the leds from falling through the hole.

diorama grass
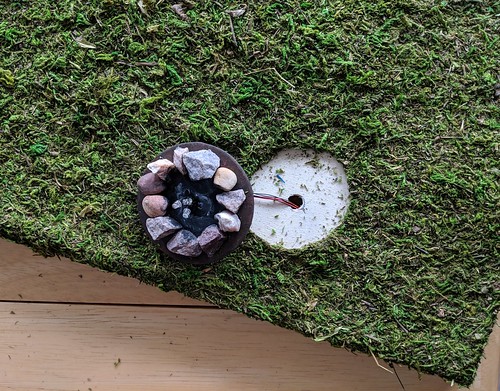
then i added the grass. first i traced around the campfire disc. this area will be left glue free. i spread glue all over the top, except for in the circle, and down the sides. then i spread a moss mat (mine was from walmart, because it was cheapest, but michael’s also has some and with a coupon the price isn’t bad.) i boxed the corners by cutting out little squares the width of the sides. this gave nice neat edges all round. As you can see, adding moss is a messy process, so best to have a broom or vacuum on hand! 😊

diorama cut out
i then poked up with a pen through the hole from underneath, to find the center, and carefully cut out the unglued moss. i cut just slightly smaller than the actual circle

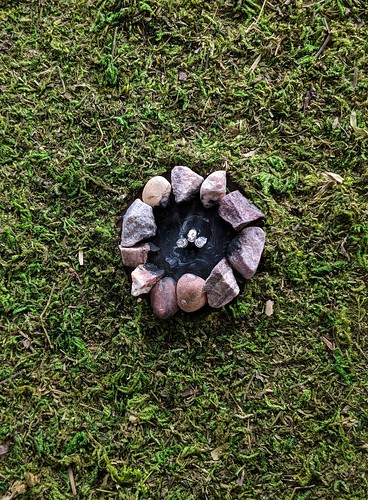
diorama campfire in place
lifting the edges i tucked the fire inside the cut out, adding bits of moss to a couple of places where i went too wide

here you can see how i painted the gray/white ash as well

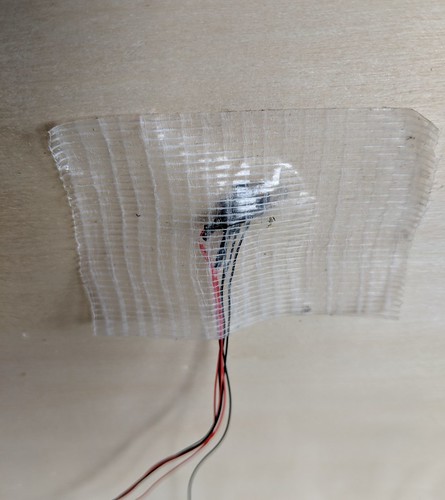
diorama underside
underneath i taped the wires with heavy duty tape.

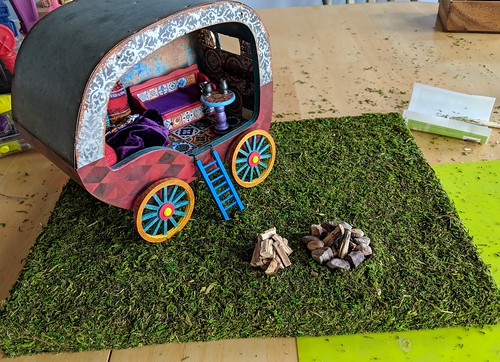
diorama
then i glued the firewood in place. the wood pile and caravan are just set on top.

almost done. i still need to add the battery. but i don’t have the right battery in the house and we are in the middle of a snow storm so it may take a day or two to go get one.

camp fire part 2

  • Posted on October 2, 2018 at 8:17 am

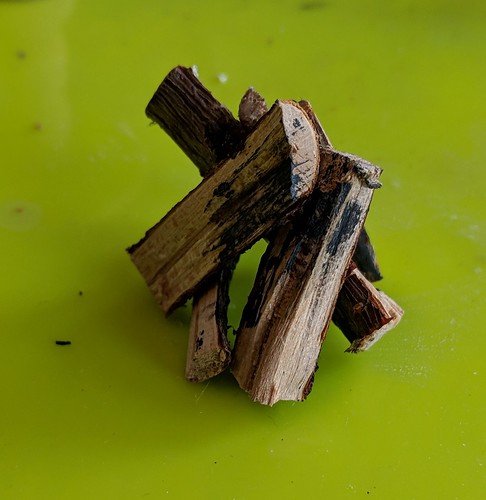
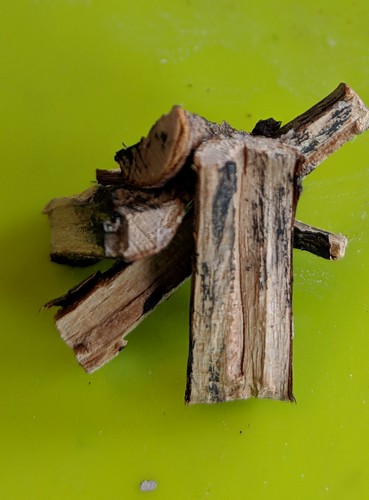
my logs are thoroughly cooked, so i cut them down to size, then used a hammer and chisel to split them. if you don’t have a chisel, you could always leave the logs whole.

camp fire logs
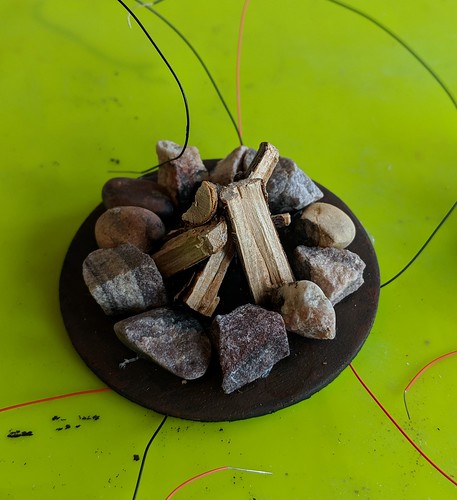
once they were the right size i arranged and re-arranged them till it looked right to me, then glued them together with fast tack glue and let it dry for 1/2 hour or so.

camp fire charring the logs
after the glue set, i carefully lifted the logs out and painted the inside with a combination of black and white paint to get the look of char and ash. to do that, i put a drop of black on my palette, then white beside it and swirled the two in the middle, with a toothpick, to get marbled shades of gray. i painted with the black first and wiped it off with a damp rag to get it nice and thin. then right at the bottom, and up the middle i dabbed on the grey swirly paint, tying not to brush so much that the colors completely blended. i also swirled some of the gray mix on the wood disc to make the fire more realistic. you can’t really see it under the logs, but i know it’s there, and you can see it if you get really close.

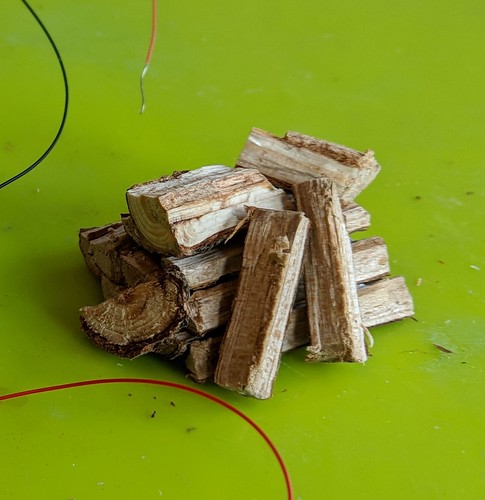
camp fire wood pile
with the extra wood, i built a little pile of firewood that my ‘pukis can use to keep their fire burning.