i cut (actually tore since it was easier to keep square) a piece of fabric big enough to just wrap around each of the third foam seat pieces, with an inch or so pressed under for a clean edgecut (or tear) a piece of fabric big enough to just wrap around the third foam seat, with an inch or so pressed under for a clean edge
also 3 pieces of warm and natural and 1 of the cover fabric each the same size as the foam
i glued them together with temporary spray adhesive (505 spray) and centered them on the cover fabric
pin basting
marking the grid
sew and tie each dot!
there are 156 on my two seats so that will take me a while…..
You are currently browsing all posts tagged with 'msd'.
Displaying 41 - 50 of 68 entries.
- 1:4 scale
- abandoned dock
- abjd
- abraham lake
- accessories
- adoption meme
- advent
- advent calender
- advent candles
- advent log
- advent wreath
- aerin
- afghan
- Agoseris glauca
- alberta
- albert einstein
- alice
- alys
- amberglas
- american girl
- amigurumi
- ananda
- ane
- annalise
- ant
- ante
- ante elf
- ante ws
- b&w
- baby spruce
- baby yoda
- bamboo jersey
- banff
- beargrass
- bear grass
- becca
- beezie
- berries
- bid
- big hill springs
- birch
- bird
- birds
- bjd
- bjd. diy
- black
- black and white
- blanket
- bleeding hearts
- blossoms
- board games
- bohemian
- bonnie
- books
- bory
- bottles
- bow glacier falls
- boys
- brown eyed susan. wildflower
- buffalo berries
- bunnies
- burgundy
- buttercup
- butterfly
- calgary zoo
- campfire
- camp fire
- canada post
- canada thistle
- cape
- carcross desert
- catkins
- cereza
- chair
- challenge
- charity
- chipmunk
- chloe
- christmas
- christmas hampers
- christmas lights
- christmas tree
- christmmas
- clematis
- clothes
- clouds
- cobweb weight
- cofee dye
- color
- colors
- columbine
- cone
- conservatory
- cooking pot
- cookstand
- costume
- cotton
- couch
- cowl
- cow parsnip
- crabapple blossoms
- crafts
- craft table
- creche
- cricket
- crochet
- crochet blanket
- crocheted
- cross stitch
- crowned crane
- crystal
- crystalorn
- c s lewis
- dandelion
- daylight
- deardoll
- dear doll
- decorating
- decorations
- design
- desk
- dhs elf
- diaoram
- digory
- dinosaur provincial park
- dioram
- diorama
- diy
- doll
- doll a day
- dollar store
- dollarstore
- doll blanket
- doll furniture
- dollhouse rug
- dollmore
- dolls
- doll sweater
- donations
- dovey
- dressup
- duck
- eat.sleep.knit
- eatsleepknit
- eilidh
- el
- elbow falls
- elbow lake
- elephant
- elf
- elf ante
- elf el
- elin
- ellemeno
- ellowyne
- ellyce
- ember
- embroidery
- emily/emmie
- emmie
- emrys
- enyo
- ery
- erzulie
- esk
- esk badge
- esk cal space shawl
- esk galaxy shawl cal
- eskkal
- esk space shawl cal
- etsy
- eve the cat
- face up
- faceup
- failryland
- fairylan
- fairyland
- fairyland pukifee
- fall
- fallen log
- fallen tree
- false dandelion
- fan art
- farmland
- felting
- ferns
- few flowered anemone
- fireplace
- fishing pole
- fishing rod
- flamingo
- foamflower
- fog
- food bank
- forget-me-nots
- forget me not
- fort mcmurray fire
- fossils
- fundraiser
- fungi
- fungus
- furniture
- gaillardia
- games
- garden
- giraffe
- giving
- glacier lily
- glacier national park
- glamour challenge
- gold
- golden ragwort
- gold metallic
- gray
- green
- greenhouse
- grizzly bear
- gypsy caravan
- gypsy caravanpsy caravan
- hail
- haines
- halloween
- hat
- headphones
- hoar frost
- hollyhock
- honeydelf
- honey delf
- honeythorpe
- hoodie
- hoody
- indian paintbrush
- iplehouse
- irrealdoll
- irreal doll
- irreal doll ery
- irreal dollo
- journal
- kaka
- katie
- kid delf
- kiri
- knit
- knitting
- lace
- lace knitting
- laceknitting
- lace skirt
- laceweight
- ladyslipper
- lae louise
- lake louise
- larkspur
- lati yellow
- leaf
- leaves
- letters to troops
- light
- lightbox
- linen
- littlefee
- littlefee el
- littlefee el ws
- lucy
- luka
- luna
- luts
- m-line
- madelintosh lace thunderstorm
- magpie
- makeover
- malabrigo mecha
- mas
- meadow parsnip
- meercat
- meg
- memories
- mica dam road
- minature props
- miniatre
- miniature
- miniature accessories
- miniature props
- miniatures
- mini chairs
- minifee
- mini garden
- mirwen
- mnf
- moeline
- mohair wig
- monkeyflower
- monster
- monument
- mountain heather
- mr tumnus
- msd
- msd. minifee
- mudstone
- mushrooms
- nandi
- narsha
- narsha friend
- never alone
- noah
- noni
- ocean
- old man's whiskers
- operation christmas child
- orange
- orchid
- oukifee
- pajamas
- pale yellow
- pattern
- peacock
- pearly everlasting
- penguin
- photo challenge
- photochallenge
- photography
- photo lights
- photo prop
- photoshop
- pi day
- pie day
- pink
- pio
- pipi
- pitta
- pkf
- poetry
- pom pom
- poppies
- prairie
- prairies
- prop
- props
- pukifee
- pukipuki
- pumpkin
- pupu
- purple
- pussy willows
- queen's cup
- quilt
- quilting
- quinn. bjd
- quote
- rain
- ravelry
- reafee
- realfee
- real puki
- realpuki
- red
- red panda
- red pandas
- reflection
- reflections
- remembrance day
- rockies
- rose
- rose hip
- rose hips
- roses
- rs
- ruby
- rug
- scenic
- sd
- seed
- seedhead
- sewing
- shabee
- shade garden
- shaelyn
- shawl
- sheep
- shiwoo
- shoebox gift
- shooting star
- shrubby cinquefoil
- silk hankies
- silk thread
- silky lupin
- silver
- skagway
- skylar
- sledding
- smidge
- smilga
- snow
- snowy owl
- sofa
- soom imda 3.0. collette. molly
- sophie
- sos
- soso
- souldoll
- soulkid
- soup pot
- space shawl
- sparrow
- spider web
- spring
- stitch markers
- stocking cap
- stockings
- stone
- stonecrop
- subalpine spiraea
- sunrise
- sunroom
- sun room
- sunset
- swap
- swaps
- table
- teddy
- temperature blanket
- temperature tracker
- texture
- thanksgiving
- the best laid plans.
- the great purge
- thistle
- thread crochet
- thread lace
- three flowered avens
- tiarella
- tiera
- tiger
- tin boxes
- tins
- tiny delf
- tinydelf
- tinys delf
- townsend's solitare
- toy
- travel
- tree
- treehouse
- trees
- trehouse
- tres
- tumnus
- tunic
- tutorial
- tutrial
- twinberries
- upcycle
- washboard
- water
- water drops
- waterfall
- waterton
- waterton national park
- wedge pond
- western anemone
- western spring beauty
- wheelchair
- white
- whitehorse pass
- white skin
- white wolf
- wig cap
- wigs
- wild bergamot
- wild flower
- wildflower
- wild flowers
- wildflowers
- wild heliotrope
- wild rose
- wild strawberry
- william blake
- willow
- winter
- winter fun
- winter photography
- wisp
- wooden spools
- woodland
- wood violet
- wool
- work in progress
- wren
- yarn
- yarnathon
- yellow
- yo-sd
- yukon
- zoe
- zoo
couch tutorial part 2 making the seat covers
Continue reading couch tutorial part 2 making the seat covers »
my next project and a step by step tutorial in excrutiating detail ;o)
i’m starting a new project, one i’ve been wanting to do for ages, and just for fun i’m going to post step by step pictures in case it works and anyone else wants to try it 😉 it started off with these great sheets of packing foam that came round a new monitor my husband got last year when our old one died.
i could see the potential in them for building some great doll stuff, so i snagged them and stuffed them in the closet where they sat till i finally pulled them out to start working.
first i cut 3 pieces 6-1/2″ X 15″, and 3 pieces 6-1/2″ x 13″ for the seats. i’m using inches instead of cm this time, just because i’m using my quilting ruler to cut with and it is in inches.
then i cut 1 piece each 3-1/2″x15″, 3-1/2″x13″ & 3-1/2″x5-1/2″ for the seat backs
this is the rough shape of my couch/sofa. i’m just not sure whether i want the back of the short side to extend all the way out, like my mock up, or only go half-way out like some other couches i’ve seen. any thoughts?
glue 2 only of each of the seat pieces together in pairs then weight them flat to dry
Continue reading my next project and a step by step tutorial in excrutiating detail ;o) »
ember and shaelyn
here’s a quick comparison of ember and shaelyn, taken together ’cause someone commented that the girls looked a lot alike. when you see them together the similarities are mostly superficial – they both have heart shaped faces, but not much else the same.
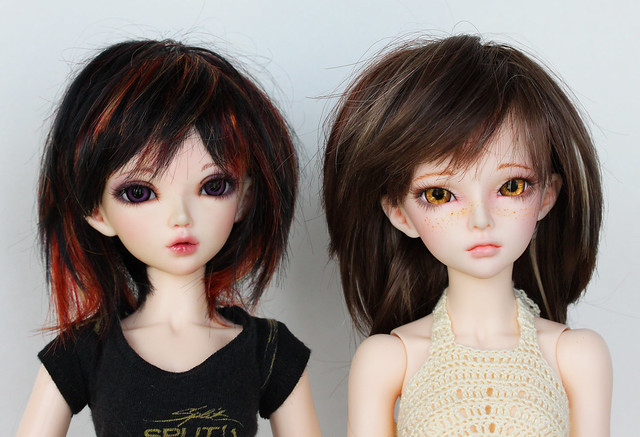
they haven’t been getting a lot of camera time lately. both of them are on really gimpy bodies that need fixing but i’ve had a lot of time and health issues this year and haven’t been able to attend to theirs. hopefully we will get that cleared up one of these days, because they both are lovely girls and deserve more time.
margaret lake
the trip today was to margaret lake. one of the new girls ananda (nandi) came along.
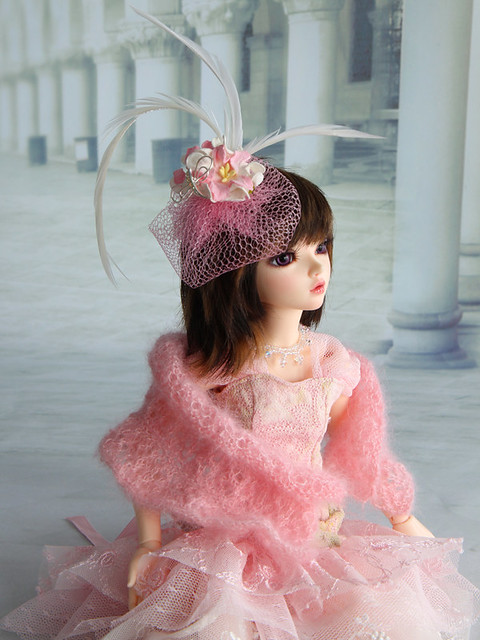
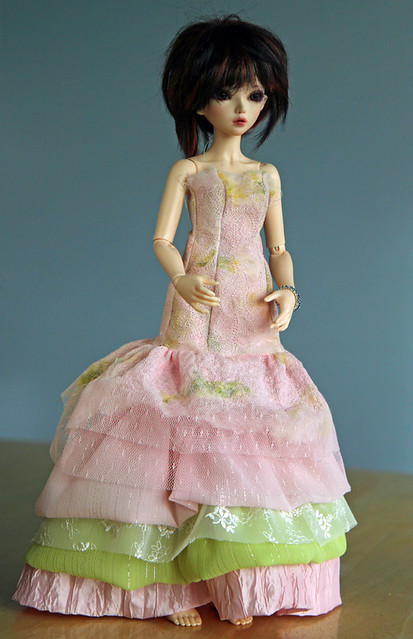
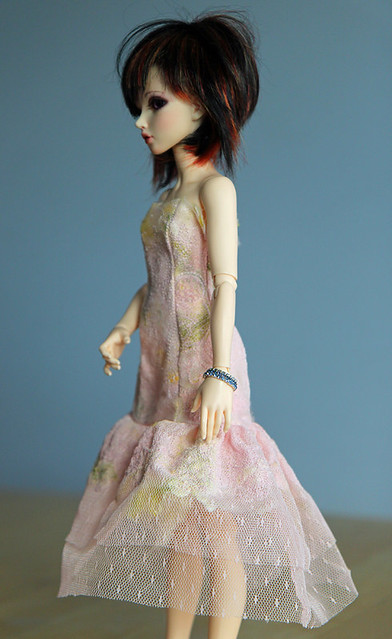
glamour challenge
at the last minute i decided i didn’t like the way the skirt was going so remade the fabric and started over. the bodice was right but i changed the skirt ruffles around
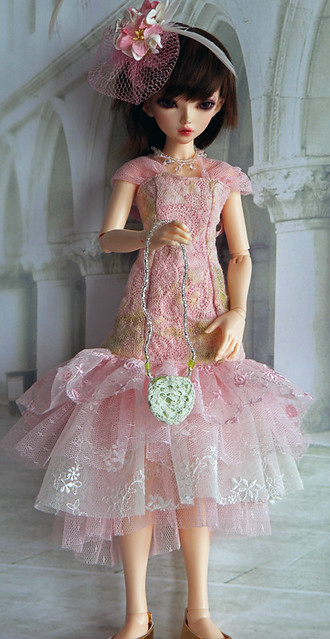
and i redid the underskirt as well to give it an airier and less substantial feel
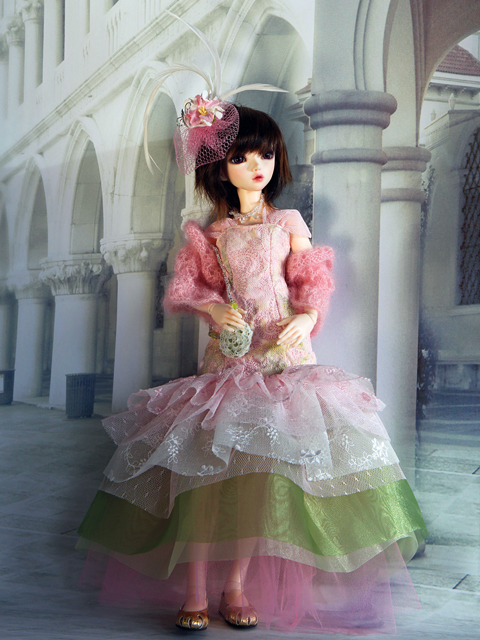 i had major problems convincing ember to pose properly. she looks very awkward when standing.
i learned how to make a collage in photoshop to focus in on the details
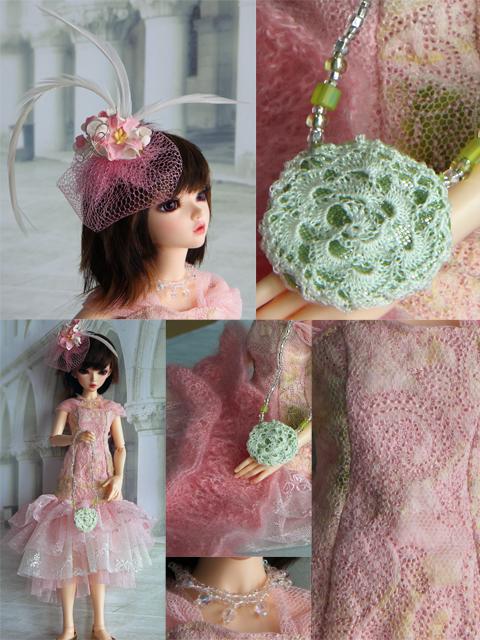
and since she hated standing we did her glamour shot sitting down, which i think was particularly effective
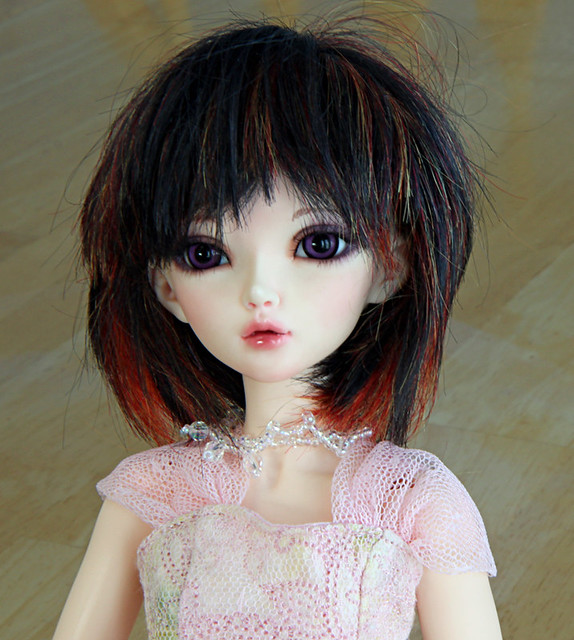
glamour challenge accessories….
once again i took a break from making the dress to work on something else, in this case beading a necklace to go with it. after several attempts that yielded nice necklaces that just didn’t work with the dress i finally made one that i think will work
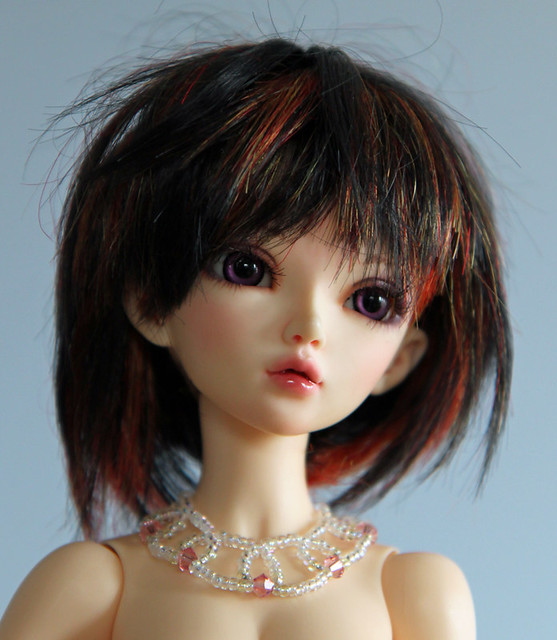
the white looking beads are actually clear aurora borealis beads and look much prettier in person. even if it doesn’t end up working with this dress i am happy with the result
eyelash heaven
i love doing face ups and seeing how i improve with practice, but always hated adding the lashes ’cause i just couldn’t seem to get the hang of it. it would usually take half an hour of fighting and glue everywhere! not to mention i would be unhappy with the result. so when trying on a dress caused ember’s lashes to come partly unstuck i decided to try andreja’s method and it worked amazingly. who would have guessed that cutting them in pieces and using tweezers instead of trying to push a full length strip into place with a toothpick made such a difference. less than a minute per eye and i have perfect lashes!
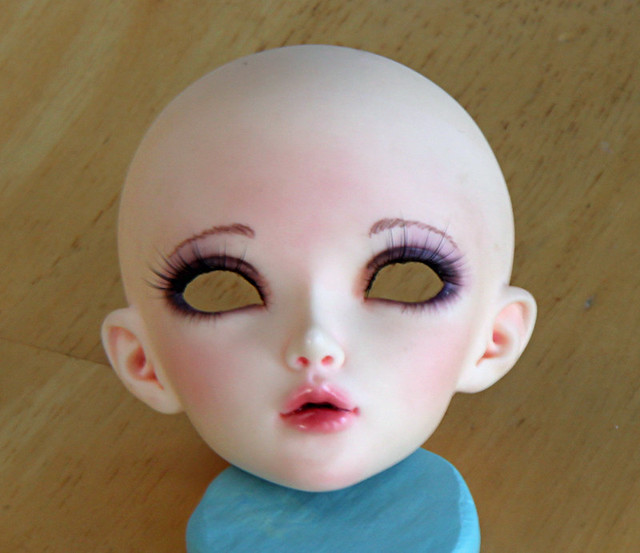
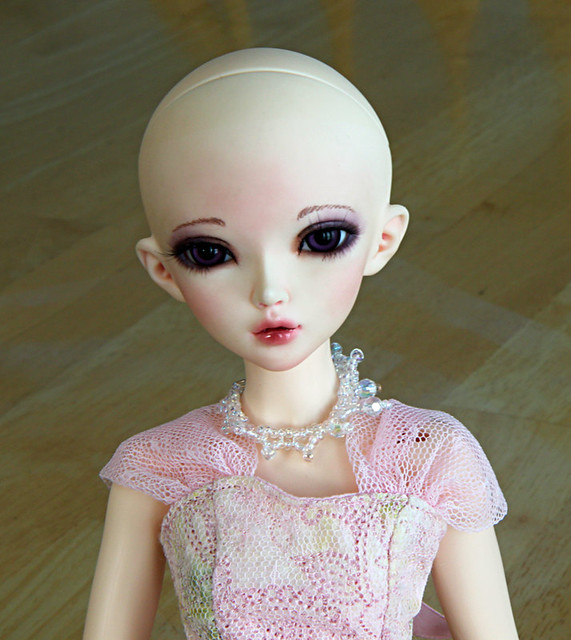
for anyone else who would like to see how she does it here is a link to her video
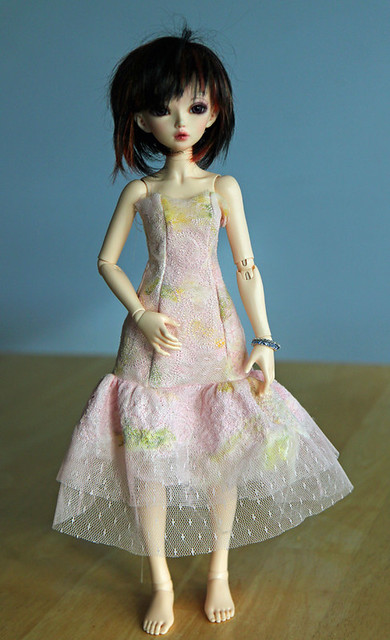
glamour challenge underskirt
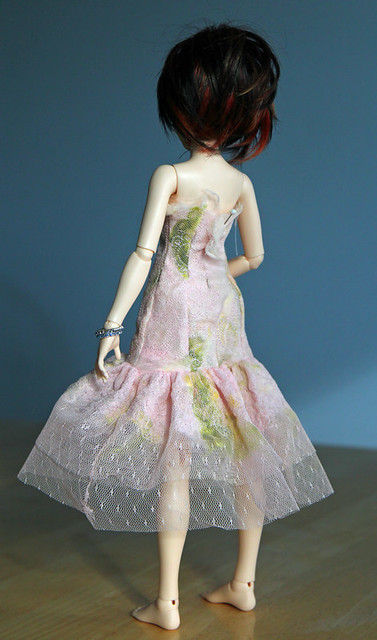
i decided to go with the underskirt idea to add the bottom ruffles. i made a net underskirt with just enough volume to allow movement and gathered it to a waistband, which i finished with a hook and sewn eye.
the skirt is raised in the front so that it is easier to walk without stepping on it, and flares to a slight train in the back
next step will be to finish the top…
glamour challenge:the skirt
i started on the skirt for the dress. the first layer of skirt ruffle is done, and that is the end of my “art quilted” fabric. i’m happy with how it is coming out so far. i made the ruffle to be flat in front and increasing in fullness to the back. i’m thinking now i may make the rest of the ruffles as a separate skirt so that the dress can be worn long or short. as long as i keep the top part narrow and soft, it shouldn’t wreck the lines of the over skirt.
here is a side view
and a back view
it is just pinned in place at the back as i still haven’t decided on the closure and also need to add the top ruffle.
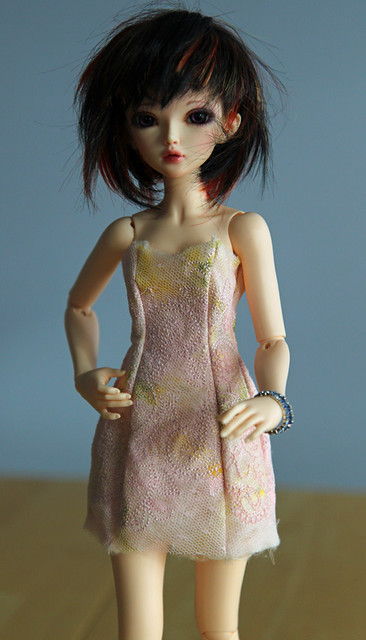
glamour challenge: the bodice
i finally got a chance to sew the bodice together from my “art quilted” silk. i have to find time to work on this or the challenge will be over before i’m done. so today i put it together and tried it on ember for final fittings. it’s hard to see in the photo, but the bust is a little big, and needs to be pulled in. the tiniest change in cutting out the pieces shows up when sewing this small, as does changes in the fabric. it will look better after a good press, but i want to fix the bust first. i also need to be careful not to stretch out the top edge which has nothing to hold it in place yet.
here is the bust line fixed. the underarm seam looks a bit high, but that should be right once the lining is attached. the extra height is just my seam allowance. my “quilting” lines are showing up nicely on the bodice now. i don’t know if its the angle or the light that makes the difference, but i’m very pleased with the result.
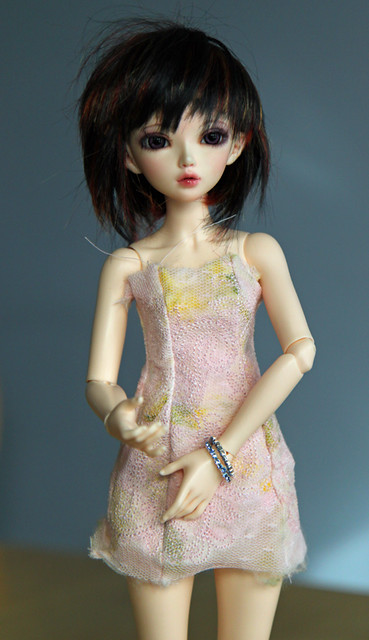
i also have to somehow fix her posing. she was pretty “kicky” today, i’m almost sorry i switched her from a cutie bust to a small bust. her old body posed better, but wouldn’t really suit an evening gown, she just looked too young to me. however she is going to be hard to pose in the requisite “glamour” shot if i don’t figure something out.