on the second sunday of advent kiri and annalise lit the second candle.

The second candle represents faith and is called “Bethlehem’s Candle.” Micah had foretold that the Messiah would be born in Bethlehem, which is also the birthplace of King David. lighting this candle symbolizes the preparations being made to receive the Christ child.
You are currently browsing all posts tagged with 'littlefee'.
Displaying 11 - 20 of 73 entries.
- 1:4 scale
- abandoned dock
- abjd
- abraham lake
- accessories
- adoption meme
- advent
- advent calender
- advent candles
- advent log
- advent wreath
- aerin
- afghan
- Agoseris glauca
- alberta
- albert einstein
- alice
- alys
- amberglas
- american girl
- amigurumi
- ananda
- ane
- annalise
- ant
- ante
- ante elf
- ante ws
- b&w
- baby spruce
- baby yoda
- bamboo jersey
- banff
- beargrass
- bear grass
- becca
- beezie
- berries
- bid
- big hill springs
- birch
- bird
- birds
- bjd
- bjd. diy
- black
- black and white
- blanket
- bleeding hearts
- blossoms
- board games
- bohemian
- bonnie
- books
- bory
- bottles
- bow glacier falls
- boys
- brown eyed susan. wildflower
- buffalo berries
- bunnies
- burgundy
- buttercup
- butterfly
- calgary zoo
- campfire
- camp fire
- canada post
- canada thistle
- cape
- carcross desert
- catkins
- cereza
- chair
- challenge
- charity
- chipmunk
- chloe
- christmas
- christmas hampers
- christmas lights
- christmas tree
- christmmas
- clematis
- clothes
- clouds
- cobweb weight
- cofee dye
- color
- colors
- columbine
- cone
- conservatory
- cooking pot
- cookstand
- costume
- cotton
- couch
- cowl
- cow parsnip
- crabapple blossoms
- crafts
- craft table
- creche
- cricket
- crochet
- crochet blanket
- crocheted
- cross stitch
- crowned crane
- crystal
- crystalorn
- c s lewis
- dandelion
- daylight
- deardoll
- dear doll
- decorating
- decorations
- design
- desk
- dhs elf
- diaoram
- digory
- dinosaur provincial park
- dioram
- diorama
- diy
- doll
- doll a day
- dollar store
- dollarstore
- doll blanket
- doll furniture
- dollhouse rug
- dollmore
- dolls
- doll sweater
- donations
- dovey
- dressup
- duck
- eat.sleep.knit
- eatsleepknit
- eilidh
- el
- elbow falls
- elbow lake
- elephant
- elf
- elf ante
- elf el
- elin
- ellemeno
- ellowyne
- ellyce
- ember
- embroidery
- emily/emmie
- emmie
- emrys
- enyo
- ery
- erzulie
- esk
- esk badge
- esk cal space shawl
- esk galaxy shawl cal
- eskkal
- esk space shawl cal
- etsy
- eve the cat
- face up
- faceup
- failryland
- fairylan
- fairyland
- fairyland pukifee
- fall
- fallen log
- fallen tree
- false dandelion
- fan art
- farmland
- felting
- ferns
- few flowered anemone
- fireplace
- fishing pole
- fishing rod
- flamingo
- foamflower
- fog
- food bank
- forget-me-nots
- forget me not
- fort mcmurray fire
- fossils
- fundraiser
- fungi
- fungus
- furniture
- gaillardia
- games
- garden
- giraffe
- giving
- glacier lily
- glacier national park
- glamour challenge
- gold
- golden ragwort
- gold metallic
- gray
- green
- greenhouse
- grizzly bear
- gypsy caravan
- gypsy caravanpsy caravan
- hail
- haines
- halloween
- hat
- headphones
- hoar frost
- hollyhock
- honeydelf
- honey delf
- honeythorpe
- hoodie
- hoody
- indian paintbrush
- iplehouse
- irrealdoll
- irreal doll
- irreal doll ery
- irreal dollo
- journal
- kaka
- katie
- kid delf
- kiri
- knit
- knitting
- lace
- lace knitting
- laceknitting
- lace skirt
- laceweight
- ladyslipper
- lae louise
- lake louise
- larkspur
- lati yellow
- leaf
- leaves
- letters to troops
- light
- lightbox
- linen
- littlefee
- littlefee el
- littlefee el ws
- lucy
- luka
- luna
- luts
- m-line
- madelintosh lace thunderstorm
- magpie
- makeover
- malabrigo mecha
- mas
- meadow parsnip
- meercat
- meg
- memories
- mica dam road
- minature props
- miniatre
- miniature
- miniature accessories
- miniature props
- miniatures
- mini chairs
- minifee
- mini garden
- mirwen
- mnf
- moeline
- mohair wig
- monkeyflower
- monster
- monument
- mountain heather
- mr tumnus
- msd
- msd. minifee
- mudstone
- mushrooms
- nandi
- narsha
- narsha friend
- never alone
- noah
- noni
- ocean
- old man's whiskers
- operation christmas child
- orange
- orchid
- oukifee
- pajamas
- pale yellow
- pattern
- peacock
- pearly everlasting
- penguin
- photo challenge
- photochallenge
- photography
- photo lights
- photo prop
- photoshop
- pi day
- pie day
- pink
- pio
- pipi
- pitta
- pkf
- poetry
- pom pom
- poppies
- prairie
- prairies
- prop
- props
- pukifee
- pukipuki
- pumpkin
- pupu
- purple
- pussy willows
- queen's cup
- quilt
- quilting
- quinn. bjd
- quote
- rain
- ravelry
- reafee
- realfee
- real puki
- realpuki
- red
- red panda
- red pandas
- reflection
- reflections
- remembrance day
- rockies
- rose
- rose hip
- rose hips
- roses
- rs
- ruby
- rug
- scenic
- sd
- seed
- seedhead
- sewing
- shabee
- shade garden
- shaelyn
- shawl
- sheep
- shiwoo
- shoebox gift
- shooting star
- shrubby cinquefoil
- silk hankies
- silk thread
- silky lupin
- silver
- skagway
- skylar
- sledding
- smidge
- smilga
- snow
- snowy owl
- sofa
- soom imda 3.0. collette. molly
- sophie
- sos
- soso
- souldoll
- soulkid
- soup pot
- space shawl
- sparrow
- spider web
- spring
- stitch markers
- stocking cap
- stockings
- stone
- stonecrop
- subalpine spiraea
- sunrise
- sunroom
- sun room
- sunset
- swap
- swaps
- table
- teddy
- temperature blanket
- temperature tracker
- texture
- thanksgiving
- the best laid plans.
- the great purge
- thistle
- thread crochet
- thread lace
- three flowered avens
- tiarella
- tiera
- tiger
- tin boxes
- tins
- tiny delf
- tinydelf
- tinys delf
- townsend's solitare
- toy
- travel
- tree
- treehouse
- trees
- trehouse
- tres
- tumnus
- tunic
- tutorial
- tutrial
- twinberries
- upcycle
- washboard
- water
- water drops
- waterfall
- waterton
- waterton national park
- wedge pond
- western anemone
- western spring beauty
- wheelchair
- white
- whitehorse pass
- white skin
- white wolf
- wig cap
- wigs
- wild bergamot
- wild flower
- wildflower
- wild flowers
- wildflowers
- wild heliotrope
- wild rose
- wild strawberry
- william blake
- willow
- winter
- winter fun
- winter photography
- wisp
- wooden spools
- woodland
- wood violet
- wool
- work in progress
- wren
- yarn
- yarnathon
- yellow
- yo-sd
- yukon
- zoe
- zoo
a bjd christmas – dec 8 faith candle
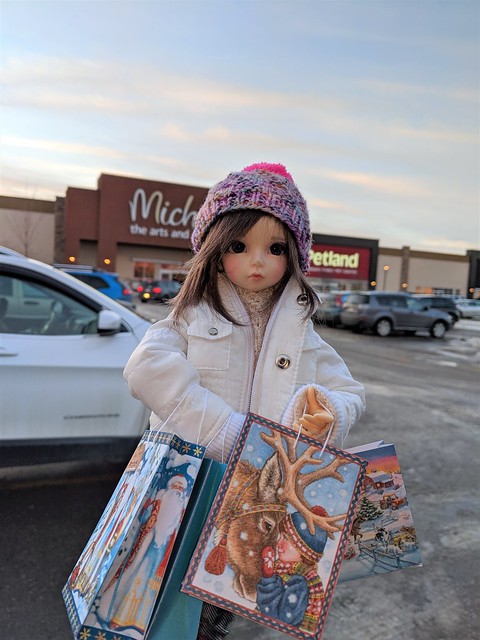
a bjd advent – dec 4 the very long day
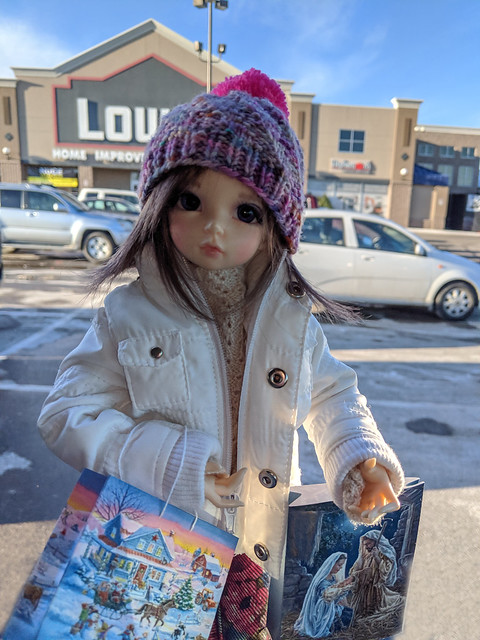
meg had a lot of christmas shopping left to do, so she decided to make a day of it

first stop chapters to get books for all the kids, she especially wanted to find a boxed set of the narnia books for eilidh
to pass the time while she was gone, the little girls worked on a giant christmas puzzle

koko decided to “help”
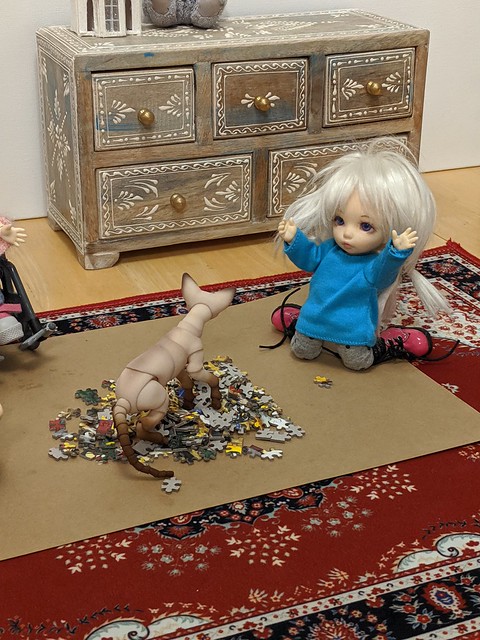
no no! bad kitty!

next stop toysrus, for toys of course
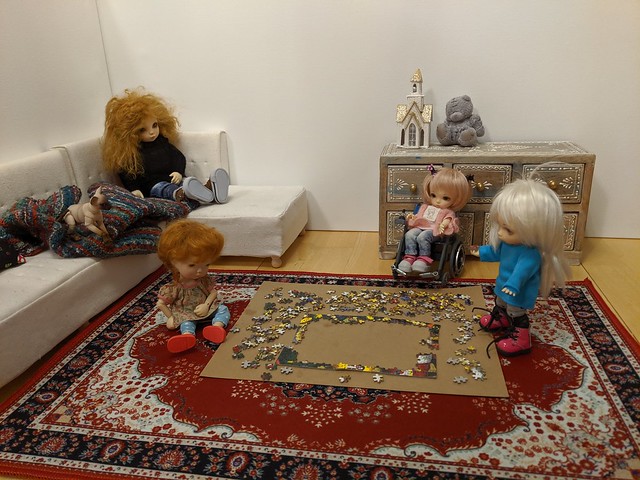
dovey pointed out pieces for the other girls to put in. she had a good top view from her chair

then she headed over to the fabric store to get material to make christmas aprons

as the day passed the puzzle started to come together

winners was next – the kids are growing fast and all need new clothes
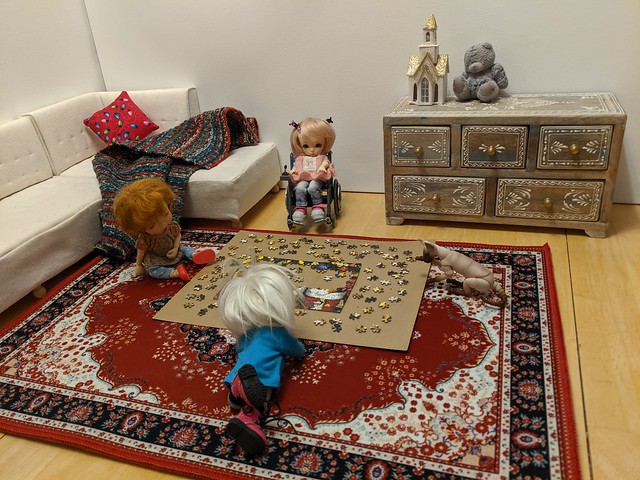
they got farther…
some of the christmas light strings got broken last year, so she stopped at the hardware store for new ones

and farther…
more shopping at the craft store to get supplies for the advent crafts, and a few more for stocking stuffers

till at last they were done!

as the afternoon was ending meg headed to the yarn shop for some last minute christmas knitting

they were so excited about finishing that they woke eilidh up from her nap
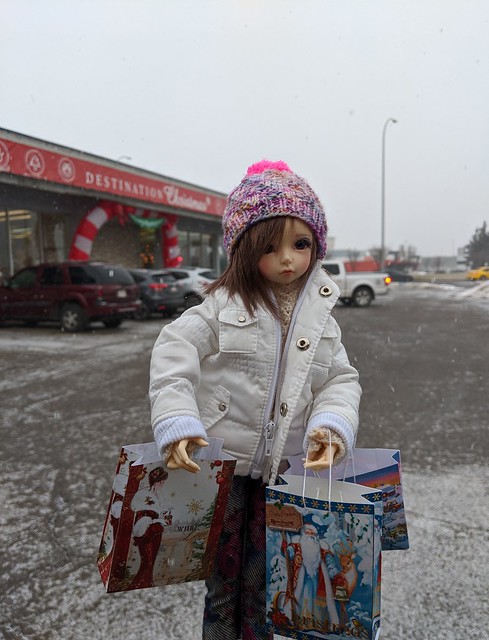
last stop of the day was a store called “destination christmas” for some extra christmas decorations. with the snow starting to fall, meg headed home

“megs been gone a very long time, do you think she is ever coming back?”
“i’m sure she will be home soon”
eildih replied

just then a voice called out “i’m home!” and in came meg with arms full of bags

a bjd advent dec 3 – christmas stories
after a busy day playing, the girls were happy to cuddle up with eilidh and listen to one of their favorite books, “the best christmas pageant ever”

a bjd advent – dec 2 operation christmas child boxes
the girls got together today and packed shoe boxes for operation christmas child
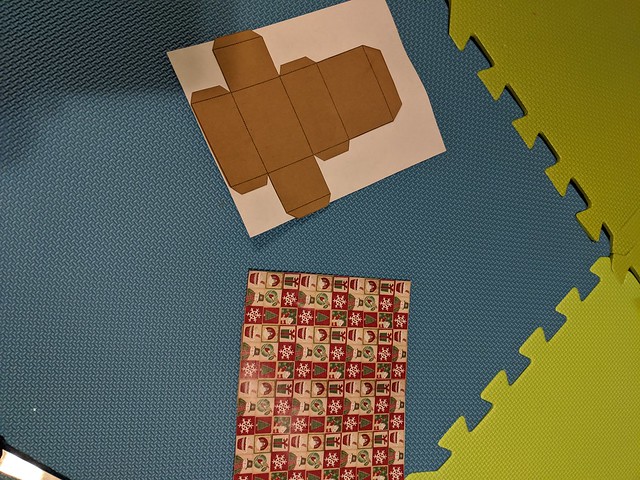
first they covered the boxes with wrapping paper.
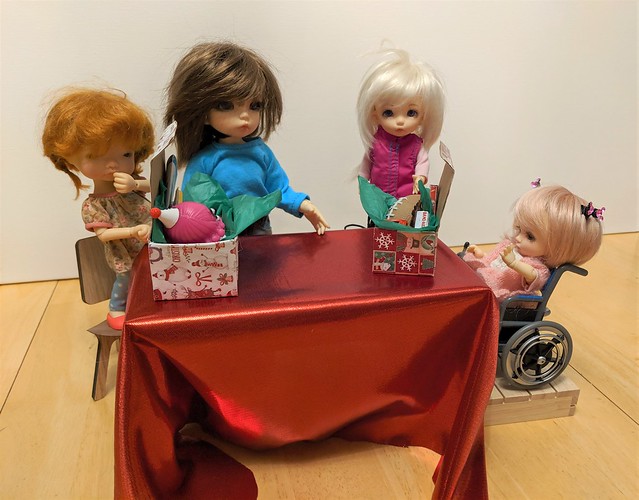

then they filled them to the brim with toys and goodies. they had lots of fun deciding what to put in, and trying to make it all fit!

they packed a girl box
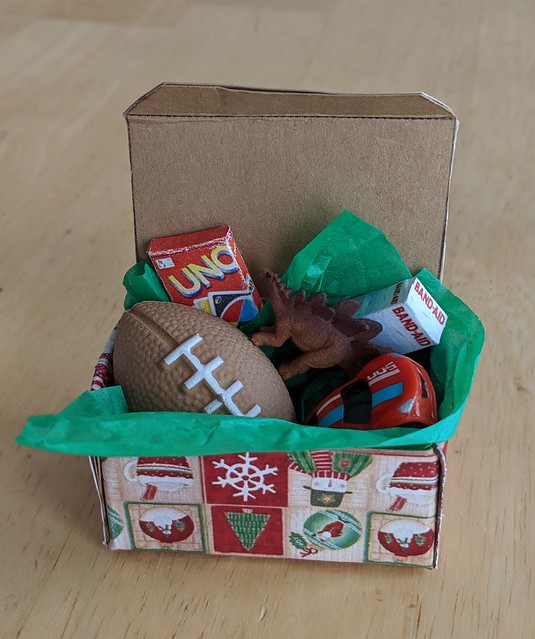
and a boy box
Continue reading a bjd advent – dec 2 operation christmas child boxes »
2 comments on a bjd advent – dec 2 operation christmas child boxes »
a bjd advent – dec 1 hope candle
starting the 24 days of advent
dec 1 is the first sunday of advent , so they lit the first candle tonight.

eilidh explanis to crystal that “The first candle symbolizes hope and is called the “Prophet’s Candle.” The prophets of the Old Testament, especially Isaiah, waited in hope for the Messiah’s arrival. lighting this candle opens the period that anticipates Christmas and remembers those who first spoke the promise of the coming Christ child.”
an advent wreath.. er log
the kids are getting very excited for christmas so meg has planned 24 days worth of activities to help them wait. tomorrow is the start of advent so she needed to make an advent wreath so the girls could light the candles (no the boys will not be allowed to help, honestly would any sane person let noah or emrys anywhere NEAR fire?)
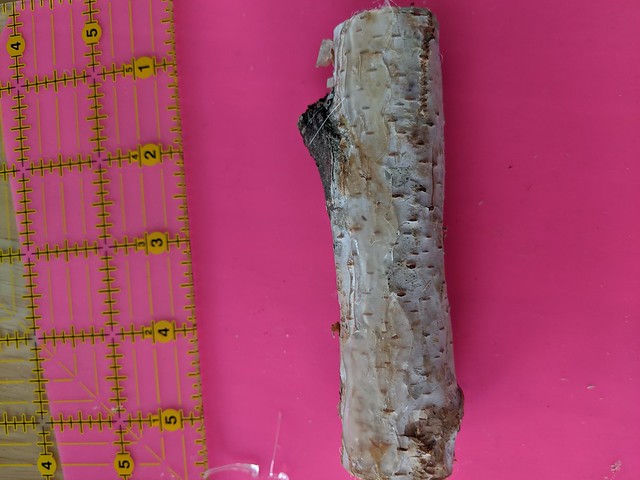
i know it supposed to be a circular wreath, but she decided a birch log would make a cool option so here goes…

first lay the candles out to decide how long the log should be
before cutting the log i put a couple of rows of hot glue on the bottom and then squished it flat on my silicone sheet, this made it a bit more stable and less likely to roll. i could have cut a piece off the bottom to make it flat instead, but this was easier.
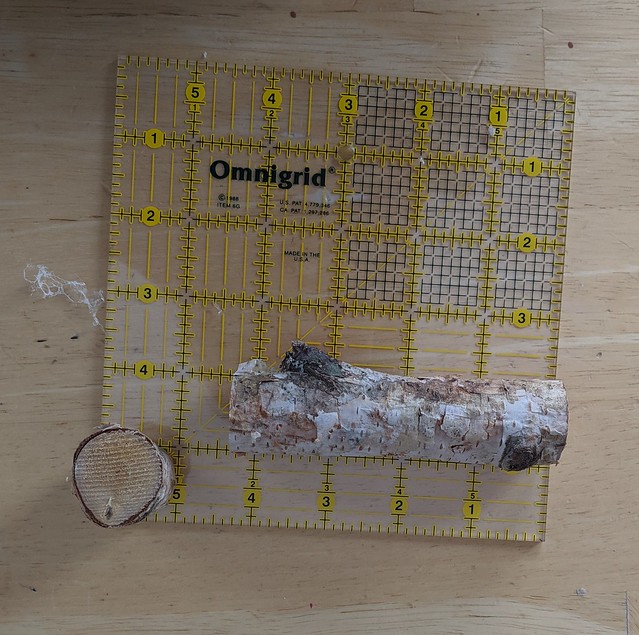
here are the dimensions we used

i marked the candle positions with a tiny x, then drilled the holes using progressively bigger drill bits til the hole fit. working up that way helps keep the birch bark from shattering or the log from splitting. the final size for these (birthday) candles was a 7/32 drill bit.
as you can see the candle rolled on me in spite of the hot glue, and the last hole is a bit wonky, but it doesn’t show if i photograph straight on
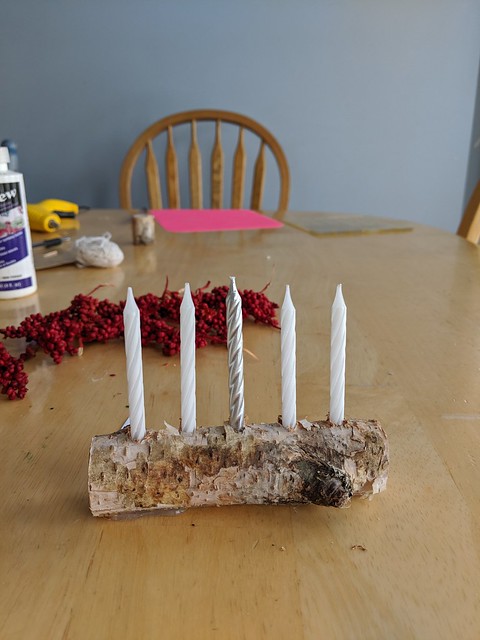
here it is with the candles. we couldn’t find the traditional purple and pink, so went with white and silver instead, because it looks nice 😉
next i needed to decorate it
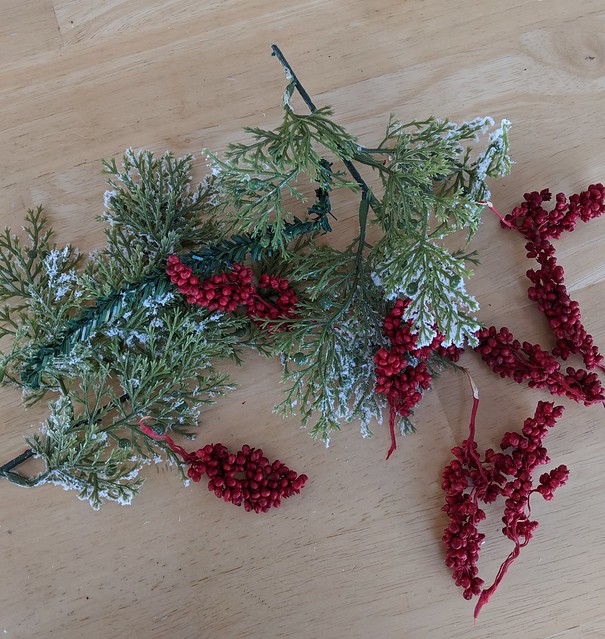
tiny red berries from a potpourri mix, and greenery pulled of a dollar store wreath

cut to size, glued on and it’s done
the boys rebel
the boys were complaining that all my blankets were too girly, so they picked the colors out for this one. the round is a mat for beside the bed

third try is the charm
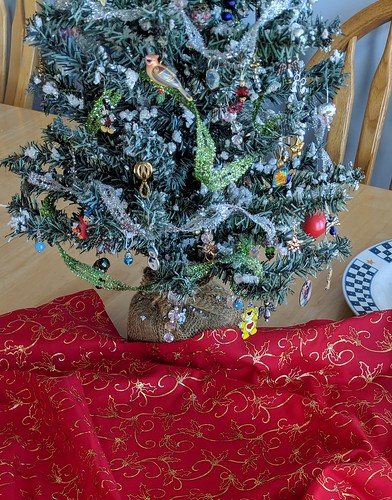
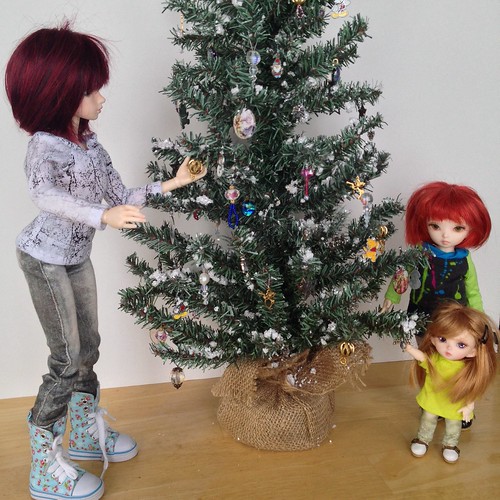
i have a 24″ mini tree i bought several years ago and have slowly been changing into a prop for my mnf and smaller girls. it is approx 24 inches tall so on the scale of a 7′ tree. i wish i had thought to take a picture of it “before”. it used to have really ugly outsized berries and huge globs of “snow”. i have removed most of that and replaced them with better scale, mostly homemade ornaments. adding a few more each year. unfortunately while i was working on it, i left it on my south facing kitchen windowsill and noticed that this year instead of having a nice green pine, it has faded to more of a blue spruce :(. not sure if it is possible to recolor it? especially since the ornies are wired on and would be hard to remove. if you have any suggestions on how to fix it, please comment below. otherwise my girls will just have a spruce tree. something that is much more common here anyway, so i guess it works?
the tree had a burlap bag around the bottom and i have wanted a tree skirt to cover it since the beginning. i had elaborate plans but never got around to doing it so today was the day!
my first attempt was to make an origami white felt skirt using a pattern i’d saved ages ago. it looked nice flat but didn’t suit my tree, so into the recycle bin it went.
second attempt was to make a lined skirt. this is the fabric i’m using
i spite of careful measuring, the lining made the skirt too stiff, it stuck out and didn’t hit the floor. so attempt two also went into the recycle bin.
this time i decided to make it just a single layer. i cut the appropriate circle, then slit up the back and trimmed the center till it was just wide enough to wrap round the trunk.
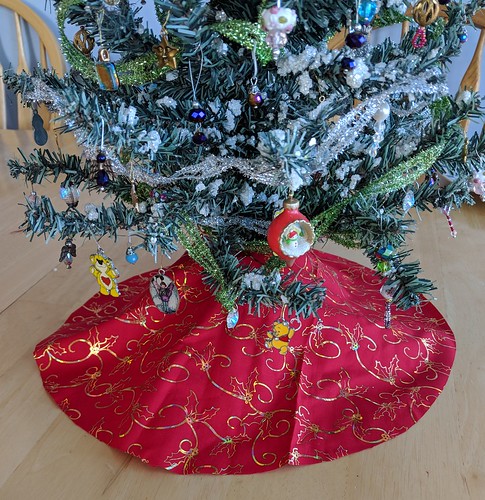
already a vast improvement. but of course i couldn’t stop there…
i went through my lace bin and found some red ruffled elastic. i folded over the outside edge about 1/4″ and pinned the elastic to that edge. then top stitched them together. the back slit and center were just turned and stitched. while looking for buttons to do up the back, i spied a bunch of floral shaped mother of pearl buttons and scattered them around the edge to see what they would look like. i liked it, so tacked them down with glue to keep track of where to put them and then sewed each one on by hand. that looked pretty good but it was still a bit sparse, so i tried adding square mop buttons and some assorted red ones. almost there…. it just needed a few green ones for pop. happy with the number and placement i glued and stitched those as well. several hours later this was the result
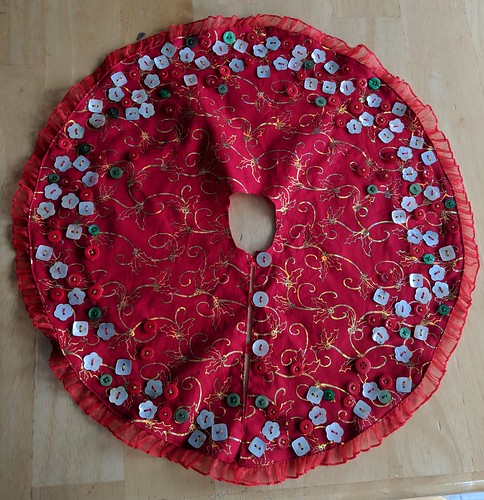
i think it is kind of fun and quirky. it’s all made from supplies unearthed in my craft purge, and should be plenty big enough to hide the battery pack from my fairy light string that will go on later this week.
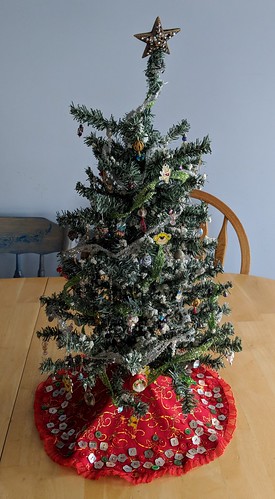
(here is a picture of the tree taken 5 years ago just so you can see the scale)
littlefee craft table
i’m still working on both the craft clean-up and my realpuki caravan, but the next bits aren’t at the point where i can put up pictures or posts yet. so here is another quick and easy littlefee/yosd sized prop.

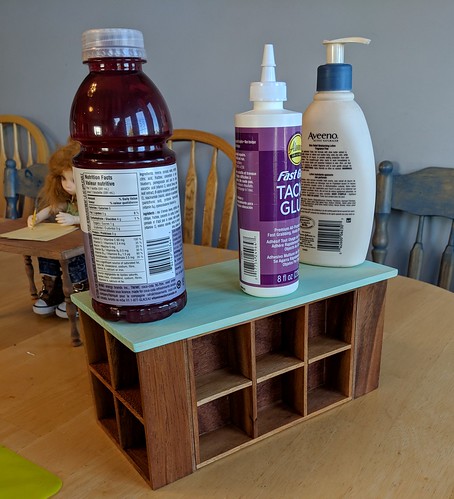
i have a bunch of these little shelving units, in various sizes and configurations. they were actually gift boxes that held wooden brain teasers. i have bought several over the years. the brain teasers themselves become stocking stuffers for various family members, or go in to shoe boxes for operation christmas child (they make great gifts for boys 10-14.) i had planned to use them in my pukifee bedroom, but ended up with way more than i needed, so what to do with the extras? these 3 turned out to be exactly the same height and are going to get re-purposed as a craft table. the top is a pine board from michaels. the width was perfect and it just needed to be shortened slightly.
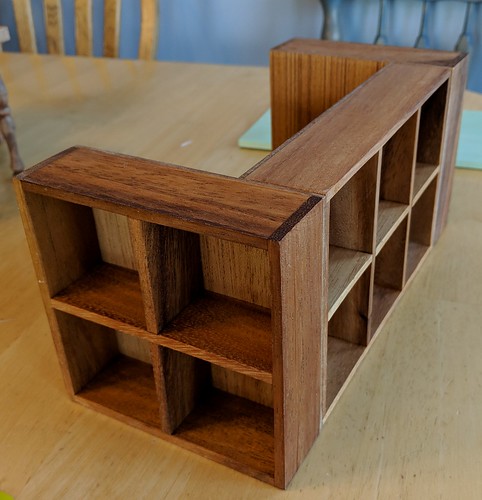
here is how i plan to set it up. at first i was just going to place them together so that the pieces could be used elsewhere if needed. but they separated too easily, so i glued them together with white glue instead (fast tack to be exact)
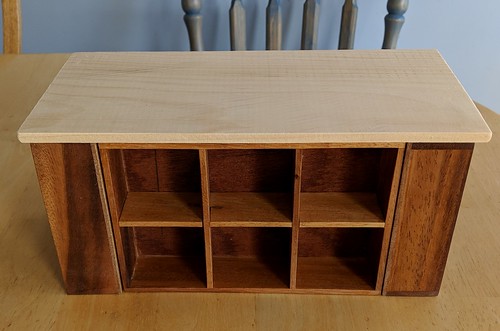
checking to make sure the table top fits. after i trimmed it i sanded all the edges and rounded them slightly.
waiting for the glue to set.
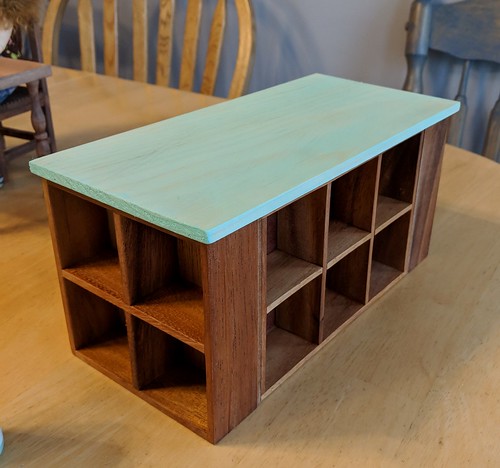
and all finished!
because the bottom was pre-stained and the top unstained, it was going to be almost impossible to match the colors, so i didn’t even try. instead i stained the top with ‘beach glass” water color paint. i really like the contrast.
tin boxes larger…
i liked how the little tin boxes came out so well, that i decided to make some bigger ones for my littlefee-minifee sized dolls
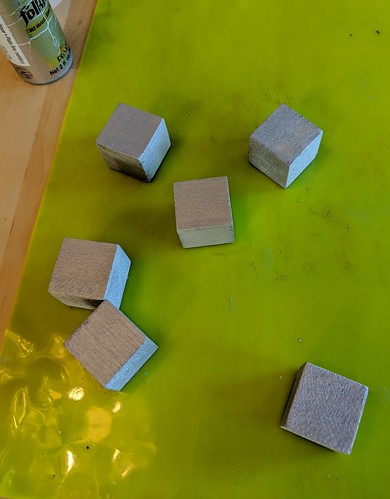
this time instead of 15mm (9/16″) cubes, i started with 25mm (1″) cubes
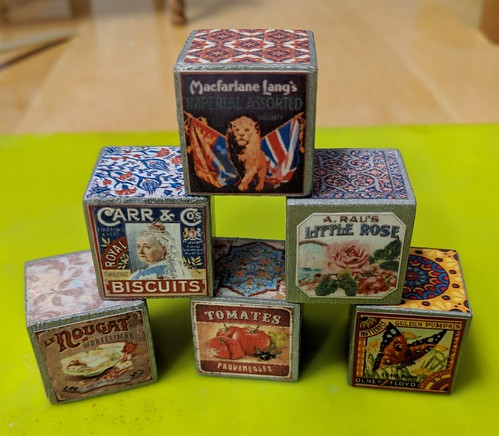
i picked coordinating tiles to make patterned lids instead of plain.
they were nice, but at this scale there wasn’t quite enough detail to be realistic. so after thinking a bit, i got some fine cord from my embroidery thread bin, estimated how much i would need by wrapping loosely around one cube 6 times, and then painted it silver.
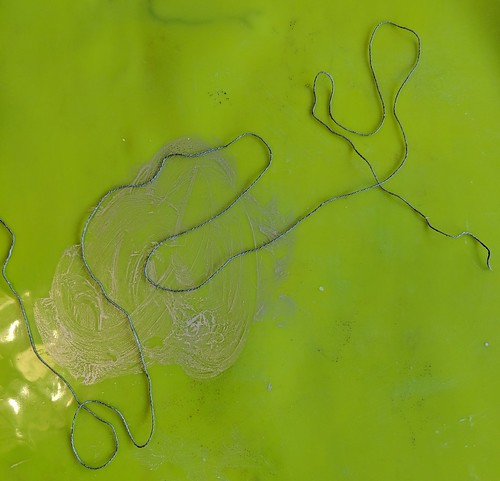
here you can see it drying on my handy dandy silicone sheet. this lets the paint be all the way around and it still doesn’t stick. the extra paint just washes off my sheet later.
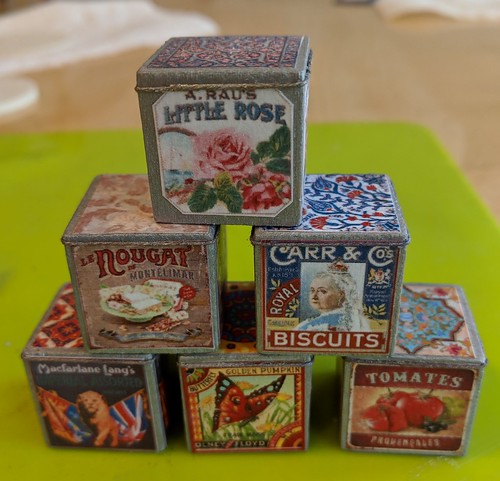
i then carefully glued it around the top. since the labels were coated with modgepodge already i just applied another thin layer and then stuck the cord in place. it worked perfectly, the cord stuck and no worries about extra glue showing. now my tins look like they have lids 🙂
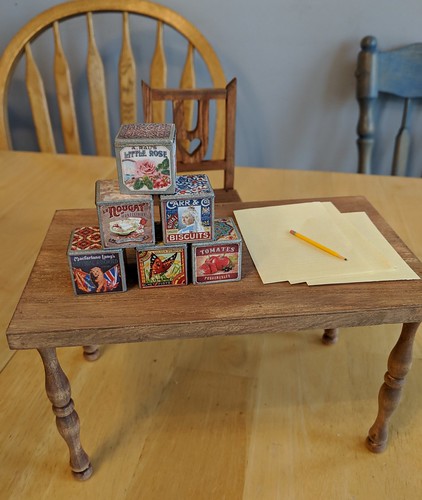
and just to show the scale. here they are stacked on eilidh’s desk.