i’m re-reading the benni harper mystery series (by earlene fowler) and was inspired to crochet a quilt, this is the complete color repeat, but i need to add a couple more rows before it is big enough to start squaring of the corners

i’m re-reading the benni harper mystery series (by earlene fowler) and was inspired to crochet a quilt, this is the complete color repeat, but i need to add a couple more rows before it is big enough to start squaring of the corners
while looking for crochet hooks at michaels’ today i spied these cute metal chairs in the spring decor section. since they were buy one get one free i figured we should snag a couple. with the sale they were only $9 each, quite a bargain, since they are pretty much a perfect size for my minifees and i think, my littlefees, though i haven’t shown the chairs to the ltf’s yet.
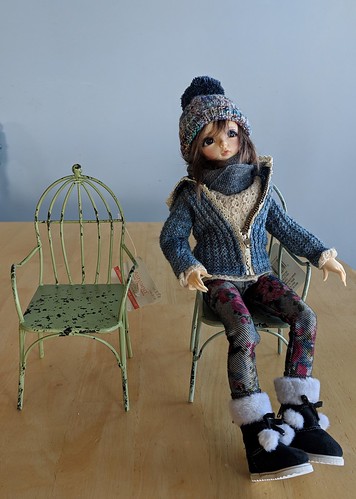
there is still snow on the ground, but they have meg dreaming of summer!
i needed to take pictures of a monument in my hometown for the esk yarnathon but i don’t live in a town, and i didn’t want to post where i actually live, so i am starting a series of pictures within driving distance instead.
in all these pictures meg is wearing a hat made from esk yarn last year, a cowl made this year and a jacket made from one of my first orders made back in 2010…
here are the first three…

milk river ab
commemorates the fact that many dinosaur fossils were found in this area, digs are still going on
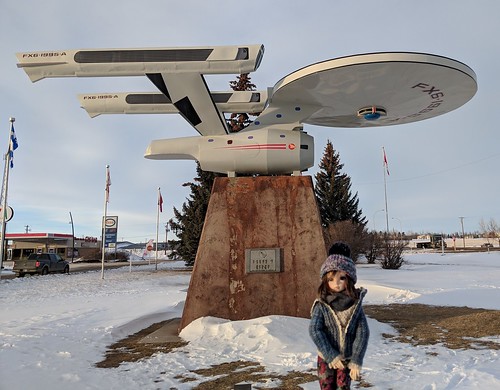
vulcan ab no explanation needed i trust? this is my dh’s home town!
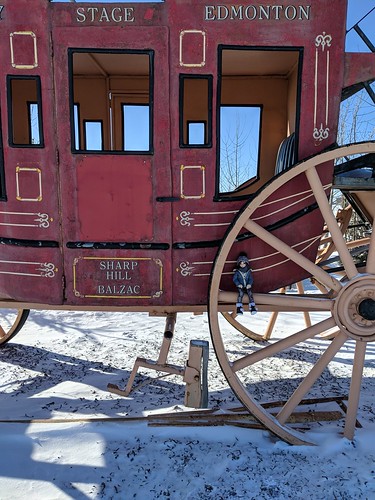
this is a stagecoach marking the site of the only stagecoach robbery in alberta history
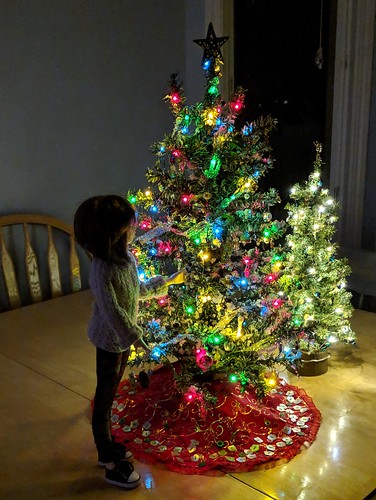
that is my son’s comment every time he sees lights. since it is december i promised him we would set up the tree, but life intruded and we just haven’t done it yet. as a compromise i decided to add lights to the mini tree and put them out on the table. he seems happy for now.
i had dental surgery today and apparently did some rather odd things while under the sedation, but i’d recovered enough by tonight that meg said she would help me untangle the lights. i was grateful for her help because they were rather a mess. the little tree wasn’t too bad. it was 16 feet long, and while it uncoiled like a spring when we took it off the cardboard, it was at least in more or less a straight line. we wrapped it round the tree, looping around the branches and the length was pretty much perfect!
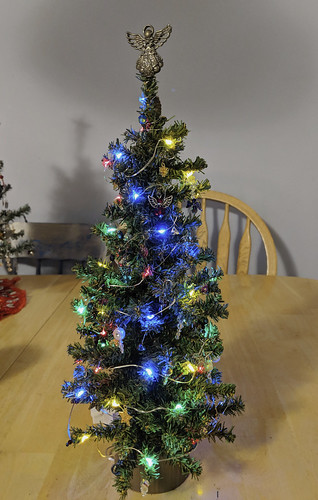
the lights can be either white or multicolored and have an option of several different patterns solid, blinking, fade in and out etc. the lights on colored mode are a little pale, but i like the concept.
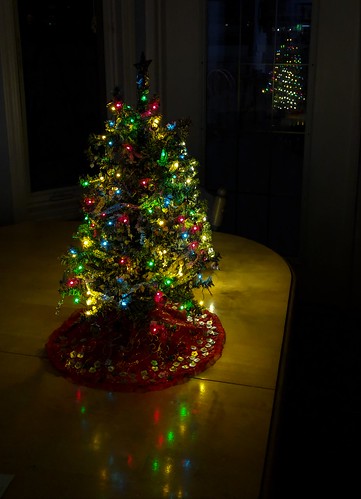
the larger sting was more of a challenge. it was 33 feet long, which i figure would be about right. but they had wrapped it double around the cone so first we had to untwist the whole length which was springy and kept trying to re-twist. then get it wrapped evenly around the tree without tangling again! the whole thing reminds me why our full-sized trees are pre-lit. these one are going to get stored pre-decorated as well.
finally after much work, and several cup of cocoa on megs part, and ice-cream fudge bars on mine (dental surgery, remember, no hot liquids 🙁 ) we were done and the results were definitely worth it. the string would have been perfect if it just had 3 more lights, but i doubt anyone will notice, other than meg and me.
this tree has lots of different patterns in the lights as well, but they are always colored, since the covers give the color not the leds. as a result they are much brighter.
when i am feeling better, we plan to set the tree up in front of the fire place and try and corral the littles for some christmas pics (if we can get them out from behind the tree where the controls are!)
in the mean time, we’ll leave you with one last picture of our lovely lit trees
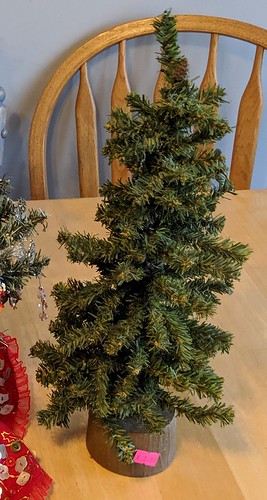
i finished up the ornaments on my mini tree (see post earlier this month) and in keeping with my resolution to purge i bundled up most of the extra beads and dropped them off at the charity store, yesterday. i was planning to just drop and run, but they had a big sign up front that all their christmas stuff was now out… so i just had to go take a look. on one of the tables was an 15″ tree, one of the ones with perfect scale tiny branches and it was marked at only $2. of course i immediately decided my girls needed a second tree. the 24″ one is a bit big for some of the smaller kids.
once i got home and confirmed that this indeed was a perfect tree, i panicked. i realized that i had just given away all the extra ornaments :doh you see why i so seldom purge?
i found some lovely angel charms on sale for cyber monday and quickly ordered a few. but luckily before i went too crazy reordering ornaments i took a look through the beads and charms that i had decided to keep and found i had a lot more than i thought. enough to pretty much fill the tree, which is what i did this morning.
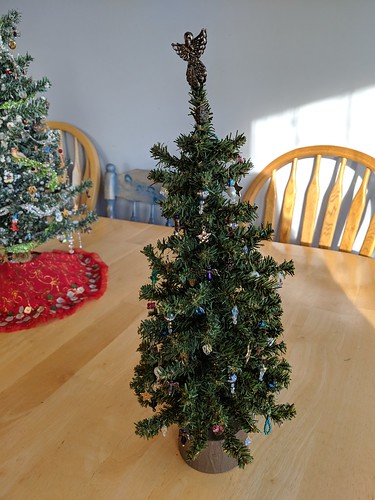
i have a few spots left for the angel charms when they come, the angel on top desparately needs repainting, and of course i will need to add lights (which i have in my box) and make another tree skirt. but overall i’m happy and my desire to purge is back on track 🙂
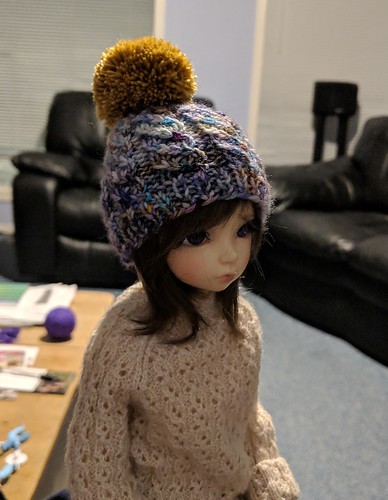
i hat a little bit of yarn left over from my lost and wandering socks. i figured there was just enough to make a couple of hats for the girls. turns out i had enough to make 4 with less than 30cm of yarn left over when i was done! they made cute beanies but meg insisted she want BIG pompoms on them. we went through the stash and she chose 4 colors to coordinate with the hats. while watching tv i managed to make and trim down the first three, and she happily modeled the hats for me as i finished. it was actually the perfect activity to do while huge flakes of snow fell steadily outside.
she picked gold to go with the first of the purplier ones
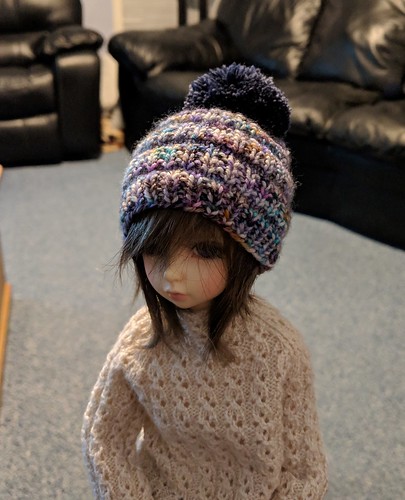
navy with the other
and purple with the first pinker one

i still have one more pom to make. but i ran out of time.
i think she did a great job of picking colors, but i’m not so sure about the size of the pompoms. i think they look a bit big (in spite of my trimming) but she assures me that they are right on trend, and just what she wanted! she’s going to wear one tomorrow when we go out and wrap the others as gifts for nandi, ember and shaelyn… as soon as i get that last pompom done…
in my pre-purge days i had amassed quite a collection of sample cups – you know the ones that costco, or the groceries stores used to pass out samples of food items they want you to try? anyway every time i got a sample, if the food in it wasn’t too sticky, once iI ate the food, i would stick it in my purse or pocket instead of the garbage. at home i would wash it out and add it to my ever growing pile. One time i really scored and the lady passing out samples accidently knocked a stack onto the floor while we were there. she explained that she couldn’t use them for food anymore (obviously) and would just have to throw them out, if we had any use for them, we were welcome to them, of course i snagged them all!
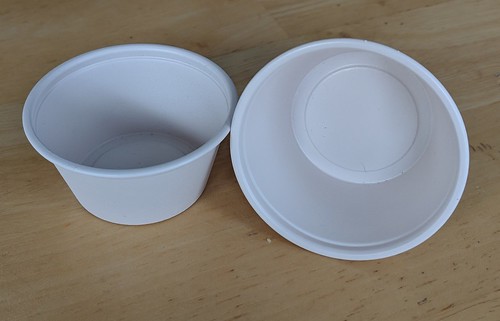
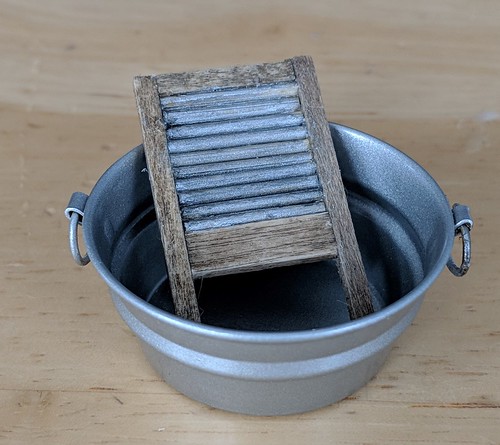
anyway i use the for all sorts of things, like mixing paint colors or holding small amounts of glue when crafting. i reuse them as much as possible and then throw them out when they get too covered with stuff or crack, as they eventually do. as i was looking for something to turn into a washtub, my eyes lit on the stack of sample cups and i knew that some of them would be perfect.
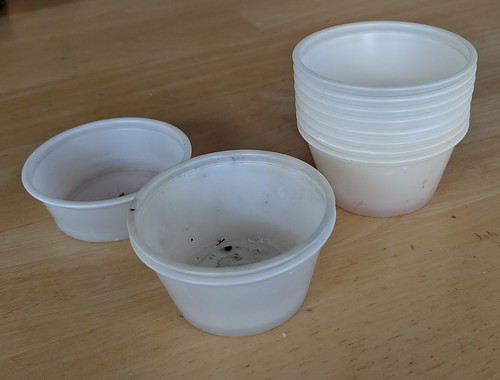
this is just a few of the ones i have at the moment. you can see they are all well used.
while i was making my washboard i coated the cups with off white primer. i have a good can of spray that will stick pretty much anything – wood, metal, plastic etc. i use that as my base coat so my acrylic paints will stick and not just drip or peel off.
next i sprayed on a coat of stainless silver to get the right base color…. and disaster!

even though they were both the same kind and brand of paint. the paint peeled and buckled when i put on the first coat. so back to the drawing board.
of course this washtub fits the bigger of my two washboards, so i had to find something else for my realpuki’s anyway. as luck would have it, i was putting in an order for new saw blades at stockade wood supplies, and they had a miniature tub available, and it was smaller than any of the ones i had seen. i thought it might be the perfect size so added it to my order.
turns out it was perfect. since it was already silver i just needed to make it look worn.
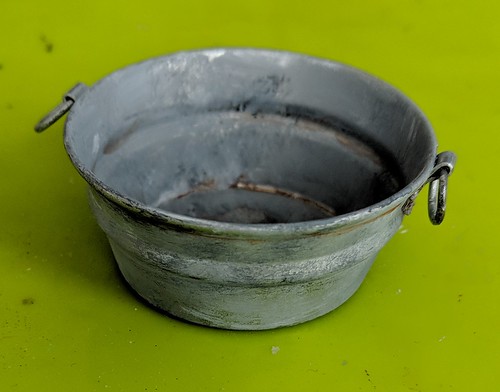
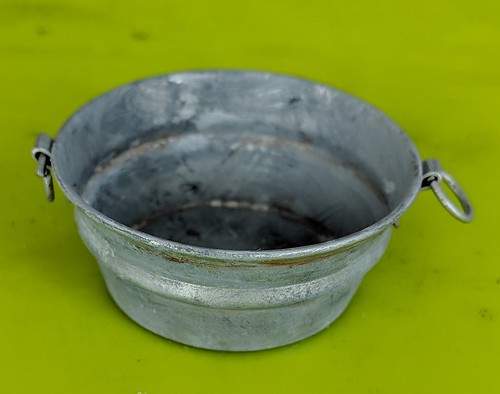
to age it, i brushed on random streaks and dabs of black and white and grays. as usual i put a bit of each color on my palette, and used a toothpick to swirl it together in the middle. this gives me black, white, and a near infinite variety of grays. i looked at several pictures of old galvanized tins and buckets from the internet, as i worked, so i could see what i was aiming for, and make sure it looked realistic.
After that paint dried, for the final touch, i added some rusty brown wood stain in the creases, and around the handles -places where rust was most likely to form. the stain is more transparent than the paint, so works better for light rusting than the thicker acrylic would.
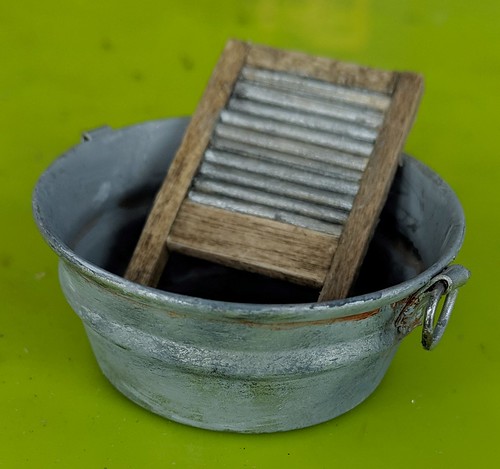
and ready to go
to bring you a minifee sized desk.
we have so much snow that school was cancelled the last couple of days, and it’s hard to work on the diorama when my son is home. instead i decided on a quick and easy project – redoing a wooden jewelry box i picked up a while back. it is the perfect size for my minifee’s bedroom…
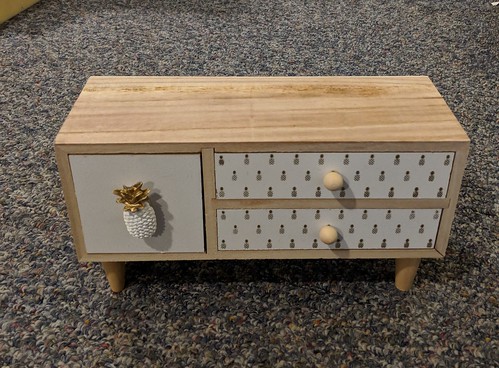
but those pineapples have to go!
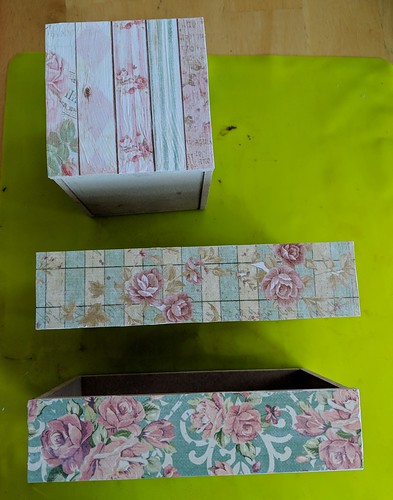
pulling off the handles left some largish holes so i covered them with printed cardstock
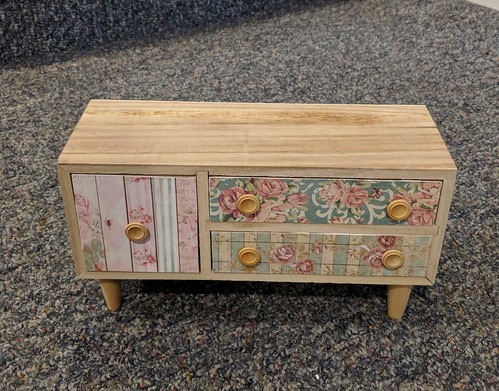
glue on some buttons for handles and i’m done!
the original plan was rhinestone buttons for handles, but i didn’t have enough of any of them, and they didn’t go together well enough to mix and match, so used these wooden ones instead. in the end i rather like the more subtle look.
next step is adding the fire to the diorama
i wanted to hide all the wiring so i found a panel board at the dollerama for $4.
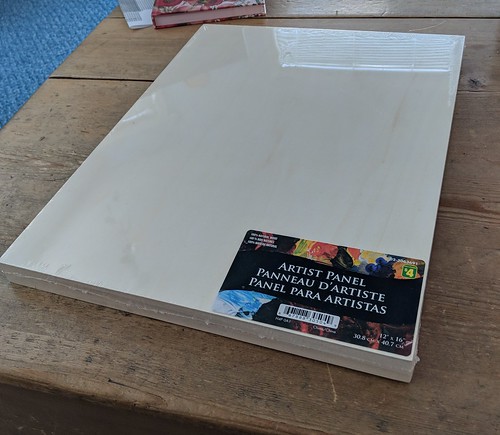
it is 12″ x 16″. a little small for photos, but it will fit nicely on a shelf.
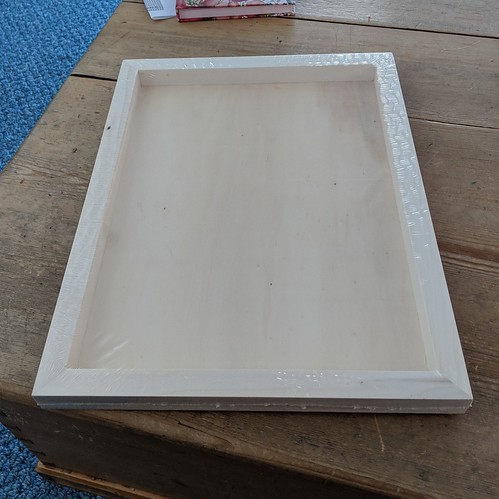
the back is hollow, with more than enough space to hide the wiring and battery
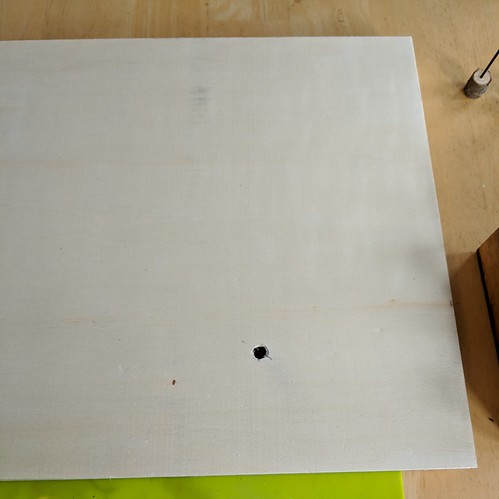
after deciding where i wanted the fire to go, i marked the center with an x and then drilled a hole large enough for all the wires to fit through. i didn’t have to drill three holes this time. the top disc will keep the leds from falling through the hole.

then i added the grass. first i traced around the campfire disc. this area will be left glue free. i spread glue all over the top, except for in the circle, and down the sides. then i spread a moss mat (mine was from walmart, because it was cheapest, but michael’s also has some and with a coupon the price isn’t bad.) i boxed the corners by cutting out little squares the width of the sides. this gave nice neat edges all round. As you can see, adding moss is a messy process, so best to have a broom or vacuum on hand! 😊
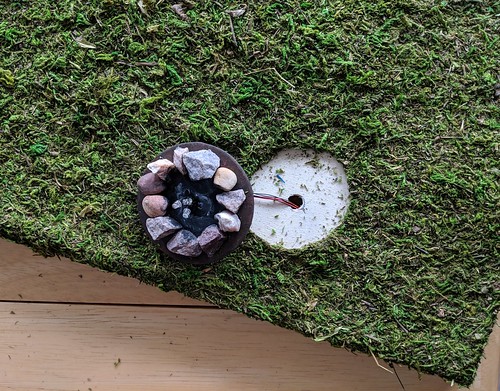
i then poked up with a pen through the hole from underneath, to find the center, and carefully cut out the unglued moss. i cut just slightly smaller than the actual circle
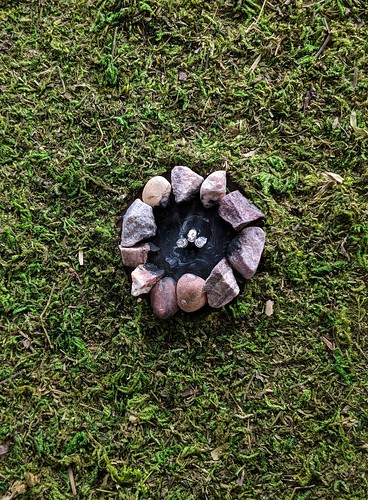
lifting the edges i tucked the fire inside the cut out, adding bits of moss to a couple of places where i went too wide
here you can see how i painted the gray/white ash as well

underneath i taped the wires with heavy duty tape.
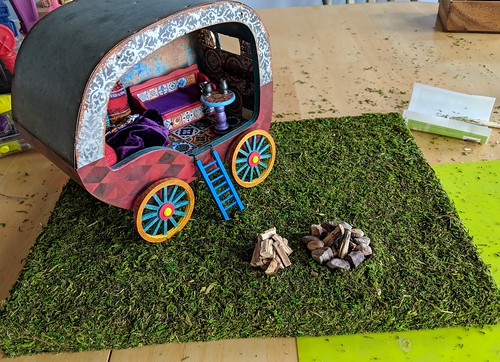
then i glued the firewood in place. the wood pile and caravan are just set on top.
almost done. i still need to add the battery. but i don’t have the right battery in the house and we are in the middle of a snow storm so it may take a day or two to go get one.
i’m ready to start making the camp fire now. i’m going to use an evans design led fire size 3mm. a 1.8mm would probably have been big enough, but i already had the 3mm and am trying to use what i have in hand before buying new.
the other things i need so far are a 3 inch diameter, flat, wood disk from michaels, and some small rocks from the gravel pad outside, (i picked out ones i liked for color shape and size and washed them to get rid of any bugs or dirt). also acrylic paint in black, dark brown, rust and white, and glue suitable for gluing rocks to wood, i used e6000.
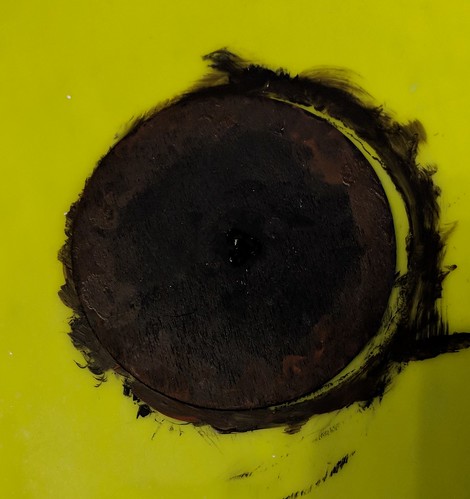
first i painted the top of the wood disk solid black for the charcoal, then while still wet swirled and blended in some dark brown and rusty brown to get the look of dirt around the edge. my realpukis are safety conscious 🙂
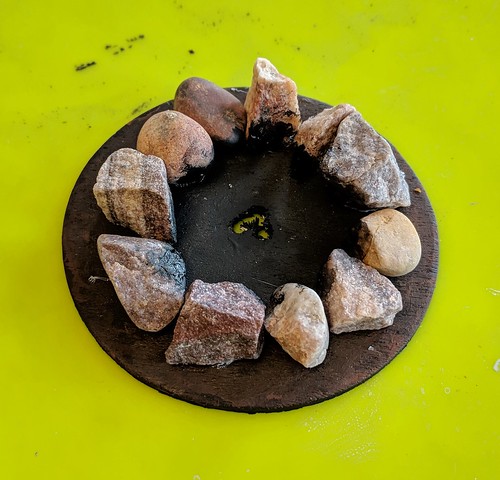
i drilled a set of three holes in the center to thread my leds through. i should have done that before painting since i had to repaint around the holes with my black paint. when it dried again i arranged the rocks till i liked the look and then glued them down with e6000 glue. i let that set a bit and then painted the inner surface of the rocks to make them look soot covered.
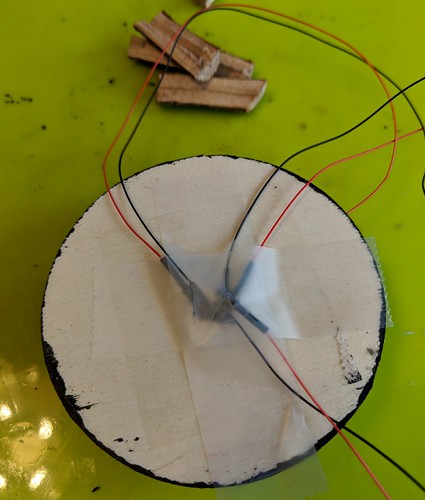
finally i threaded the leds through the holes and taped them down in the back with a bit of tape. i just used regular tape since it doesn’t have to hold for long.
next step will be building the fire itself, but first i have to dry my “logs” in the oven. i took pruned, dead branches that have been sitting in my burn pile all summer (we have had a fire ban most of the summer so they never got burned). it is pouring rain so they are all wet, and i assume have bugs. i am going to bake them at 200F for 2-4 hours to make sure any bugs are good and dead! i’ll check them every 15 min or so to make sure they don’t catch fire. i wouldn’t mind if they got a bit scorched, but i would rather not burn my house down! 😉