You are currently browsing the archives for 2018.
Displaying 21 - 30 of 52 entries.

third try is the charm

  • Posted on November 18, 2018 at 3:13 pm

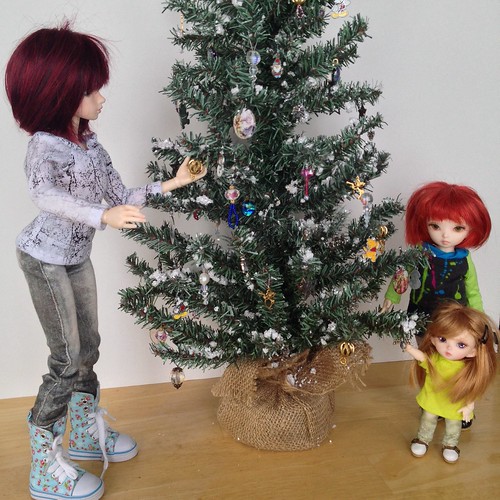
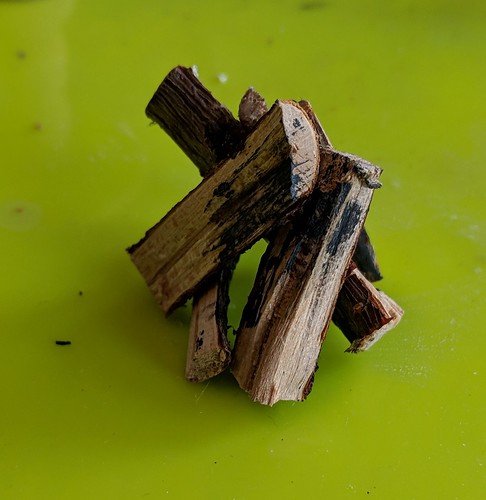
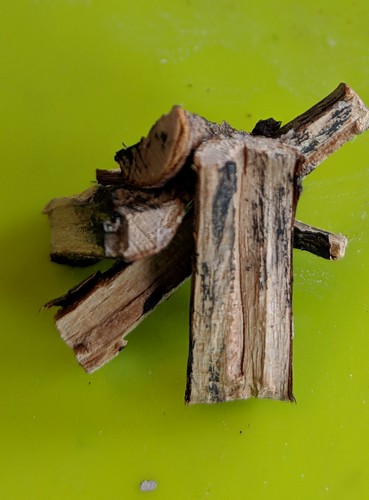
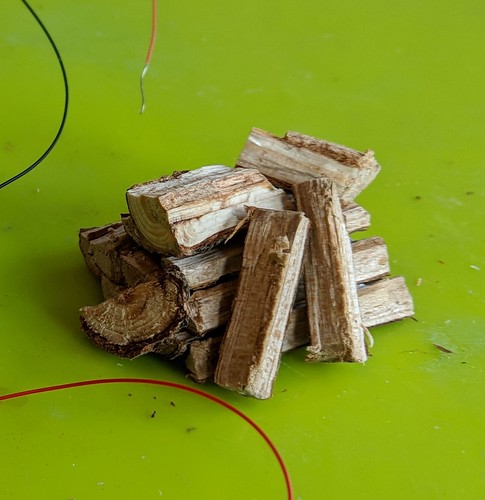
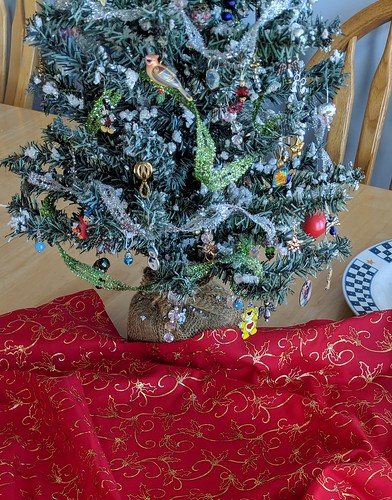
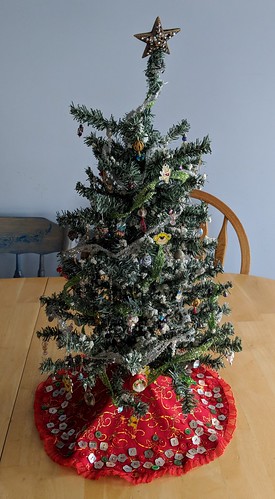
i have a 24″ mini tree i bought several years ago and have slowly been changing into a prop for my mnf and smaller girls. it is approx 24 inches tall so on the scale of a 7′ tree. i wish i had thought to take a picture of it “before”. it used to have really ugly outsized berries and huge globs of “snow”. i have removed most of that and replaced them with better scale, mostly homemade ornaments. adding a few more each year. unfortunately while i was working on it, i left it on my south facing kitchen windowsill and noticed that this year instead of having a nice green pine, it has faded to more of a blue spruce :(. not sure if it is possible to recolor it? especially since the ornies are wired on and would be hard to remove. if you have any suggestions on how to fix it, please comment below. otherwise my girls will just have a spruce tree. something that is much more common here anyway, so i guess it works?

the tree had a burlap bag around the bottom and i have wanted a tree skirt to cover it since the beginning. i had elaborate plans but never got around to doing it so today was the day!

my first attempt was to make an origami white felt skirt using a pattern i’d saved ages ago. it looked nice flat but didn’t suit my tree, so into the recycle bin it went.

second attempt was to make a lined skirt. this is the fabric i’m using
tree skirt
i spite of careful measuring, the lining made the skirt too stiff, it stuck out and didn’t hit the floor. so attempt two also went into the recycle bin.

this time i decided to make it just a single layer. i cut the appropriate circle, then slit up the back and trimmed the center till it was just wide enough to wrap round the trunk.
tree skirt
already a vast improvement. but of course i couldn’t stop there…

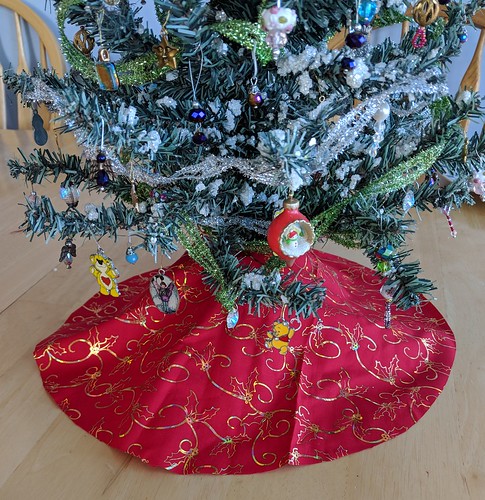
i went through my lace bin and found some red ruffled elastic. i folded over the outside edge about 1/4″ and pinned the elastic to that edge. then top stitched them together. the back slit and center were just turned and stitched. while looking for buttons to do up the back, i spied a bunch of floral shaped mother of pearl buttons and scattered them around the edge to see what they would look like. i liked it, so tacked them down with glue to keep track of where to put them and then sewed each one on by hand. that looked pretty good but it was still a bit sparse, so i tried adding square mop buttons and some assorted red ones. almost there…. it just needed a few green ones for pop. happy with the number and placement i glued and stitched those as well. several hours later this was the result
tree skirt
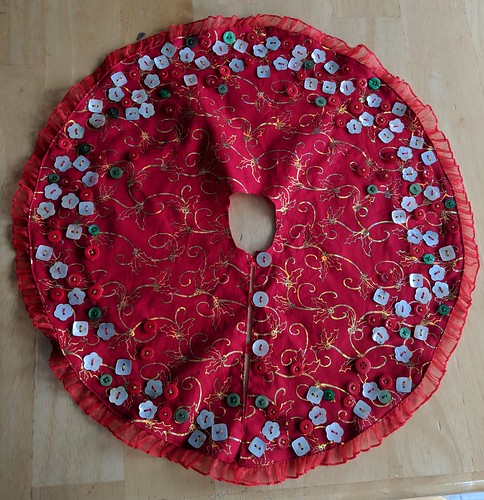
i think it is kind of fun and quirky. it’s all made from supplies unearthed in my craft purge, and should be plenty big enough to hide the battery pack from my fairy light string that will go on later this week.
tree skirt done

(here is a picture of the tree taken 5 years ago just so you can see the scale)
merry christmas!

washtub

  • Posted on October 16, 2018 at 3:56 pm

in my pre-purge days i had amassed quite a collection of sample cups – you know the ones that costco, or the groceries stores used to pass out samples of food items they want you to try? anyway every time i got a sample, if the food in it wasn’t too sticky, once iI ate the food, i would stick it in my purse or pocket instead of the garbage. at home i would wash it out and add it to my ever growing pile. One time i really scored and the lady passing out samples accidently knocked a stack onto the floor while we were there. she explained that she couldn’t use them for food anymore (obviously) and would just have to throw them out, if we had any use for them, we were welcome to them, of course i snagged them all!

anyway i use the for all sorts of things, like mixing paint colors or holding small amounts of glue when crafting. i reuse them as much as possible and then throw them out when they get too covered with stuff or crack, as they eventually do. as i was looking for something to turn into a washtub, my eyes lit on the stack of sample cups and i knew that some of them would be perfect.
stack of cups
this is just a few of the ones i have at the moment. you can see they are all well used.

sprayed with primer
while i was making my washboard i coated the cups with off white primer. i have a good can of spray that will stick pretty much anything – wood, metal, plastic etc. i use that as my base coat so my acrylic paints will stick and not just drip or peel off.

next i sprayed on a coat of stainless silver to get the right base color…. and disaster!
disaster
even though they were both the same kind and brand of paint. the paint peeled and buckled when i put on the first coat. so back to the drawing board.

of course this washtub fits the bigger of my two washboards, so i had to find something else for my realpuki’s anyway. as luck would have it, i was putting in an order for new saw blades at stockade wood supplies, and they had a miniature tub available, and it was smaller than any of the ones i had seen. i thought it might be the perfect size so added it to my order.

wash tub new
turns out it was perfect. since it was already silver i just needed to make it look worn.

washtub painted
washtub painted
to age it, i brushed on random streaks and dabs of black and white and grays. as usual i put a bit of each color on my palette, and used a toothpick to swirl it together in the middle. this gives me black, white, and a near infinite variety of grays. i looked at several pictures of old galvanized tins and buckets from the internet, as i worked, so i could see what i was aiming for, and make sure it looked realistic.
After that paint dried, for the final touch, i added some rusty brown wood stain in the creases, and around the handles -places where rust was most likely to form. the stain is more transparent than the paint, so works better for light rusting than the thicker acrylic would.

washtub done
and ready to go

washboard

  • Posted on October 13, 2018 at 9:58 am

it’s hard to stay clean while traveling, so my ‘pukis asked for a washtub and board. i made the washboard first.

washboard supplies
i started with toothpicks – placed on duck tape to make it easier to cut them all the same size,
skinny sticks
and 5/8″ wide craft sticks.
not shown is silver and black paint, wood stain, and fast tack glue.

washboard pieces cut dimensions
here are the sizes i cut to get to approx 1/12th scale. i used a pair of heavy duty scissors to cut on the drawn line for the toothpicks, and my small saw to cut the wood. you could use a small saw for all of it, or a good cutting knife.

washboard done
first i pre-painted the rollers silver and stained the wood. when that was dry, i glued the top and bottom wood pieces to the top and bottom toothpick. next i lined up toothpicks till i liked the length and glued on the sides. there is no need to glue the toothpicks to each other as the side pieces hold them all in place. make sure the glue covers the whole edge except for the bottom “leg” portion.

once the glue dried, i dry brushed on black paint over the silver to age it.

there you have a quick and easy washboard!

except…. it was too big!
and done again
i somehow forgot that 1/12th scale is too big for my ‘puki’s :doh. the washboard was better suited for my realfees or my dream high elf so i’m thinking it’s actually more like 1/8th? anyhow i did the same thing again just cutting it all smaller.

this time i used the skinny sticks for the top and the bottom, and match sticks for the sides. the finished measurements are 1″ wide by 1-3/4″ long. the toothpicks, top and bottom pieces are cut 3/4″ wide. the bottom is a full skinny stick width, the top is a piece split roughly in half.

back to the campfire

  • Posted on October 12, 2018 at 12:53 pm

with the fire mostly done, i turned my attention back to cooking. it was now time to build the stand for my soup pot.

i started with some fairly stiff wire that i had salvaged from some packing materials. it was the right diameter, stiffness and best of all free…

cook stand start
i cut it down and bent it to make two side posts with loops – i wanted to make the loops smaller, but it was too stiff to bend with the end of my pliers. this is the smallest diameter i could use and still bend it. the cross bar has turned up hooks on the end to hold extra pots and pans or a coffee pot – all still on the way. the small hook in the center was formed by trimming down an eye pin and forming it into a roughly “s” shape

cook stand done
after spraying all the wire parts with several coats of flat black paint, to more closely mimic cast or forged iron bars, i cut pieces off of my dried branches to form the bottom supports, drilled holes in the center and glued it all together with e6ooo glue. because the loops were really too big, the stand fell apart easily, consequently i ended up having to glue the crossbar in place as well. since there wasn’t a lot of surface area touching, i left it to set for the full 72 hours before moving it again. lastly i touched up the glue with matte black acrylic paint to get rid of the shine. the roughness left by the glue just added to the look of cast iron -bonus!

the other problem i ran into was the bottom log supports weren’t quite wide enough to make the whole array steady on the uneven grass of the diorama, which means i had to glue them down as well. that was a little disappointing, as i had planned to make a second optional tripod structure that i could swap out for some pictures. i am quite used to things not necessarily working out according to my original ideas though, so in spite of the problems, and changes i am happy with how it came out. i’ll save the tripod idea for a campfire i’m planning later for my larger dolls.

cook stand with pot
and here it is with the soup pot on.

we interrupt this campfire

  • Posted on October 4, 2018 at 1:57 pm

to bring you a minifee sized desk.

we have so much snow that school was cancelled the last couple of days, and it’s hard to work on the diorama when my son is home. instead i decided on a quick and easy project – redoing a wooden jewelry box i picked up a while back. it is the perfect size for my minifee’s bedroom…
dresser start
but those pineapples have to go!

dresser drawers
pulling off the handles left some largish holes so i covered them with printed cardstock

dresser
glue on some buttons for handles and i’m done!

the original plan was rhinestone buttons for handles, but i didn’t have enough of any of them, and they didn’t go together well enough to mix and match, so used these wooden ones instead. in the end i rather like the more subtle look.

campfire part 3

  • Posted on October 3, 2018 at 10:06 am

next step is adding the fire to the diorama
i wanted to hide all the wiring so i found a panel board at the dollerama for $4.
panel front
it is 12″ x 16″. a little small for photos, but it will fit nicely on a shelf.

panel back
the back is hollow, with more than enough space to hide the wiring and battery

camp fire - hole for wires
after deciding where i wanted the fire to go, i marked the center with an x and then drilled a hole large enough for all the wires to fit through. i didn’t have to drill three holes this time. the top disc will keep the leds from falling through the hole.

diorama grass
then i added the grass. first i traced around the campfire disc. this area will be left glue free. i spread glue all over the top, except for in the circle, and down the sides. then i spread a moss mat (mine was from walmart, because it was cheapest, but michael’s also has some and with a coupon the price isn’t bad.) i boxed the corners by cutting out little squares the width of the sides. this gave nice neat edges all round. As you can see, adding moss is a messy process, so best to have a broom or vacuum on hand! 😊

diorama cut out
i then poked up with a pen through the hole from underneath, to find the center, and carefully cut out the unglued moss. i cut just slightly smaller than the actual circle

diorama campfire in place
lifting the edges i tucked the fire inside the cut out, adding bits of moss to a couple of places where i went too wide

here you can see how i painted the gray/white ash as well

diorama underside
underneath i taped the wires with heavy duty tape.

diorama
then i glued the firewood in place. the wood pile and caravan are just set on top.

almost done. i still need to add the battery. but i don’t have the right battery in the house and we are in the middle of a snow storm so it may take a day or two to go get one.

camp fire part 2

  • Posted on October 2, 2018 at 8:17 am

my logs are thoroughly cooked, so i cut them down to size, then used a hammer and chisel to split them. if you don’t have a chisel, you could always leave the logs whole.

camp fire logs
once they were the right size i arranged and re-arranged them till it looked right to me, then glued them together with fast tack glue and let it dry for 1/2 hour or so.

camp fire charring the logs
after the glue set, i carefully lifted the logs out and painted the inside with a combination of black and white paint to get the look of char and ash. to do that, i put a drop of black on my palette, then white beside it and swirled the two in the middle, with a toothpick, to get marbled shades of gray. i painted with the black first and wiped it off with a damp rag to get it nice and thin. then right at the bottom, and up the middle i dabbed on the grey swirly paint, tying not to brush so much that the colors completely blended. i also swirled some of the gray mix on the wood disc to make the fire more realistic. you can’t really see it under the logs, but i know it’s there, and you can see it if you get really close.

camp fire wood pile
with the extra wood, i built a little pile of firewood that my ‘pukis can use to keep their fire burning.

camp fire part 1

  • Posted on October 1, 2018 at 8:05 am

i’m ready to start making the camp fire now. i’m going to use an evans design led fire size 3mm. a 1.8mm would probably have been big enough, but i already had the 3mm and am trying to use what i have in hand before buying new.

the other things i need so far are a 3 inch diameter, flat, wood disk from michaels, and some small rocks from the gravel pad outside, (i picked out ones i liked for color shape and size and washed them to get rid of any bugs or dirt). also acrylic paint in black, dark brown, rust and white, and glue suitable for gluing rocks to wood, i used e6000.

camp fire
first i painted the top of the wood disk solid black for the charcoal, then while still wet swirled and blended in some dark brown and rusty brown to get the look of dirt around the edge. my realpukis are safety conscious 🙂

camp fire
i drilled a set of three holes in the center to thread my leds through. i should have done that before painting since i had to repaint around the holes with my black paint. when it dried again i arranged the rocks till i liked the look and then glued them down with e6000 glue. i let that set a bit and then painted the inner surface of the rocks to make them look soot covered.

camp fire leds back
finally i threaded the leds through the holes and taped them down in the back with a bit of tape. i just used regular tape since it doesn’t have to hold for long.

next step will be building the fire itself, but first i have to dry my “logs” in the oven. i took pruned, dead branches that have been sitting in my burn pile all summer (we have had a fire ban most of the summer so they never got burned). it is pouring rain so they are all wet, and i assume have bugs. i am going to bake them at 200F for 2-4 hours to make sure any bugs are good and dead! i’ll check them every 15 min or so to make sure they don’t catch fire. i wouldn’t mind if they got a bit scorched, but i would rather not burn my house down! 😉

my caravan has a table

  • Posted on September 30, 2018 at 9:28 am

since the last attempt at a table turned into a storage bench, my ‘pukis requested another table, and there was just enough room in the caravan for a small one.

table bare
i started with a miniature candlestick from my stash, just a shade under 1-1/2″ tall. the top is a 1-1/2″ wooden disk and i just glued them together.

table painted
i painted the bottom metallic purple, the top turquoise. it looked a little bare and i considered painting a floral design on top, but realized my painting skills don’t really match the vision i had. so instead i looked online for pictures of mandalas, resized them and then printed out a bunch on cardstock. i find that what looks good on my desktop is not always the correct color or clarity when printed, so this gave me some choice. after i cut out and auditioned them, i modge-podged the one i liked best on the table-top.

table in caravan
it just fits, and holds two tiny pewter mugs i ordered online. the furnishings are done, it’s time to work on the diorama next.

rusty soup pot

  • Posted on September 29, 2018 at 8:50 am

with no kitchen in the caravan, my ‘pukis need to cook over an open fire. what better to cook with than a nice soup pot? i could have just bought one, but where is the fun in that? once i figured out the appropriate size, it was time to hunt for a suitable base.

pots
i found these bolt covers really cheap at the hardware store. they were the perfect size and shape for a soup pot. the top is the cap from a travel size spray bottle. i’m going to try all three and see which works best.

first i sanded them all to get rid of any imperfections and to get the surface ready for painting. i sprayed the bolt covers with a couple coats of rustoleum aged metallic rust, inside and out. the spray bottle cap was sealed with clear spray, painted with a light dusting of the aged metallic to make “rust” spots. and then put aside as i’m not sure yet what i am going to do with it yet.

bucket 2 patina
bucket patina
next i hand painted a combination of coppers/bronze, brown and teal metallic to get an aged look.

bucket side
for the first pot i glued on tiny copper hearts to form the bottom handles, and made the actual handle out of copper wire. now it can swing freely

bucket 2 side
for the second pot the handle was made out of #2 black eyes. the handle will be wire again. i’m debating trying to get some black wire for this one, doing the plain copper wire again or just trying to spray the copper with black paint….