You are currently browsing the archives for June 2012.
Displaying 1 - 10 of 12 entries.

dinosaur provincial park

  • Posted on June 30, 2012 at 1:12 pm

we took a trip to dinosaur provincial park yesterday, en route to the dinner theatre at rose bud. it wasn’t really on the way but we made a days outing of it and they weren’t that far apart. we’d were planning to do a bit of photo touting and hiking. at our first stop we saw three of these up close and personal
why we didn't go hiking today
so decided against the hiking.
although they weren’t in the least aggressive, the bush was dense and we weren’t sure what they would be like if we accidentally stepped on one!

noah found a cool rock to climb up on instead
noah on klinker

mr tumnus and the fairy mushrooms

  • Posted on June 26, 2012 at 11:09 pm

we been out off-roading this week. several of the kids have come along and we had great plans for lovely photo shoots in the woods, unfortunately it as been pouring rain. now this makes for wonderfully fun off-roading and glorious sprays of muddy water as we drive through huge puddles, but it is not great for picture taking and most of the kids refused to get out of the jeep at all! mr tumnus had a sharp eye out and spyed some lovely fairy mushrooms that he just had to have for dinner. i managed to get a quick shot of him, dripping with rain and a little muddy, just about to pick a nice basket full.

mr tumnus and the fairy mushrooms

introducing mr tumnus

  • Posted on June 20, 2012 at 4:26 pm

i though i’d introduce mr tumnus. he looks so innocent but i think he is going to be a real troublemaker.
i went to find the realpuki clothing bin to get out his welcome home suit from willow’s wardrobe and even though the bin is clear and should have been with all the other clothes in the closet i couldn’t find it anywhere. mr tumnus just kept streaking around the house nude and laughing madly while smidge and beezie hid their faces.
a week later it finally turned up right where it should have been all along, but then i realized all the pukifees clothes were missing. today i found their bin upside down and emptied all over the closet floor… on top of some stuff i was looking at yesterday. i swear the smidge and beezie never caused this much trouble. but then he smiles at me and i melt. what am i to do?
mr tumnus

penguins

  • Posted on June 18, 2012 at 9:34 pm

we have a new penguin exhibit at the zoo this year and i finally got a chance to see them
penguin1

white wolf

  • Posted on June 17, 2012 at 11:55 pm

white wolf
a great shot of the white wolf at the zoo taken on our latest field trip. it looks so harmless here, it’s easy to forget that these are wild animals and must be treated with respect.

building a treehouse part 4

  • Posted on June 12, 2012 at 4:09 pm

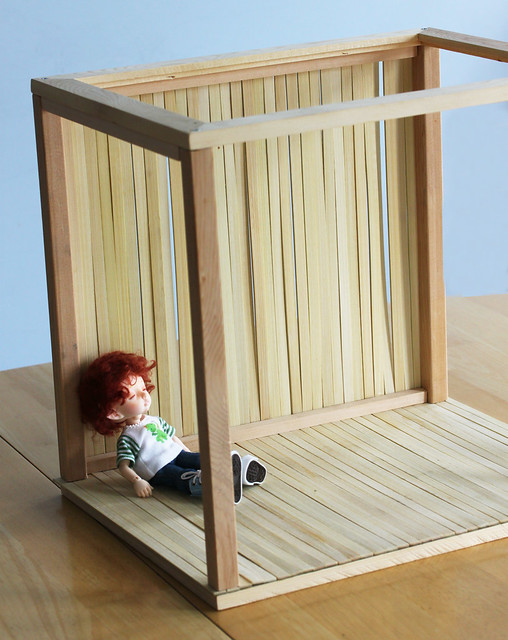
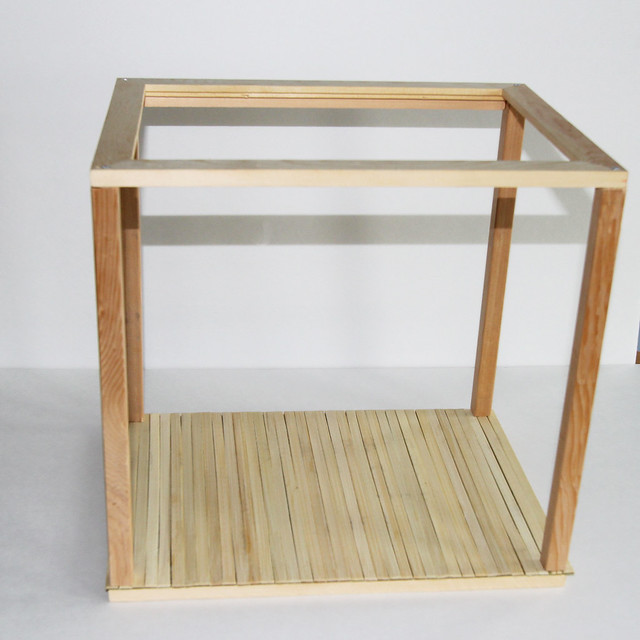
so as i planned last session i glued support beams across the back to straighten out the slats. it does that very well, but since i didn’t plan it out it looks unfinished now. good thing i never really expected this one side to show. if i was doing it again i would make this like the side walls and sandwich the slats between the flat beams at the top and bottom, recessing it to allow the back beams to be flush with the side pillars
treehouse 15
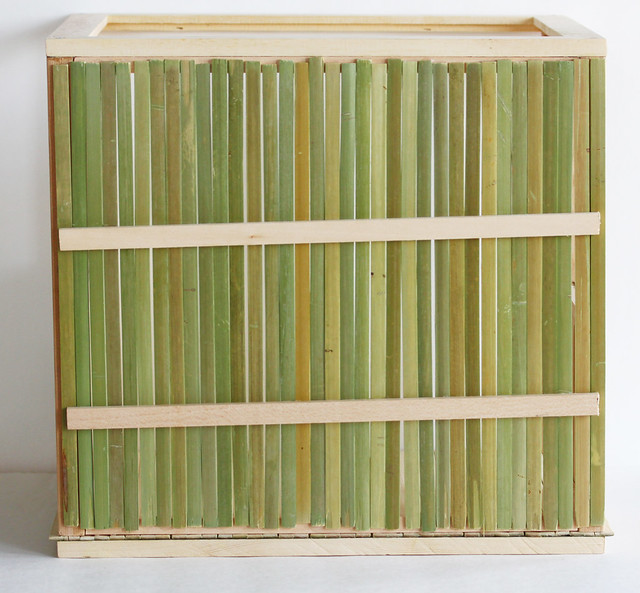
you can see that the slats are much straighter now. i pressed them really flat with a stack of heavy books till the glue was firmly set.
treehouse 17
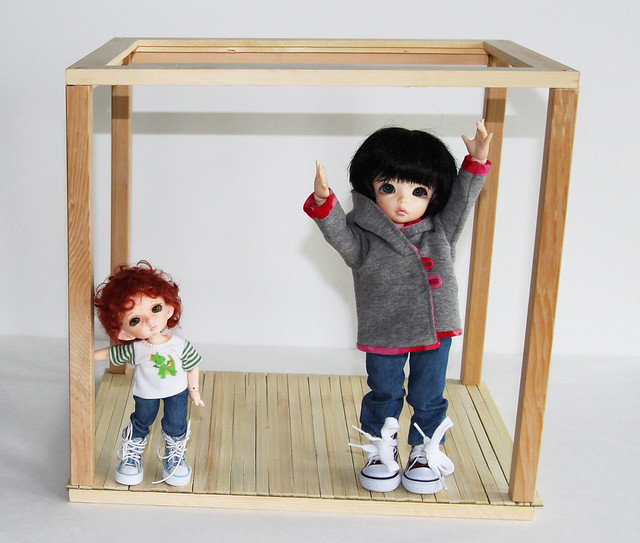
once the glue on the back wall was hard, i finished the side walls as i said above by gluing slats between 2 narrow strips of wood, top and bottom. i thought at first i’d have to paint the wrong side since they have a greenish coating, but it ends up just looking like weather treated lumber so i’ll probably leave it. the stairs will go up to the open doorway and the last side will have a railing instead of a wall to let more light in
treehouse 19
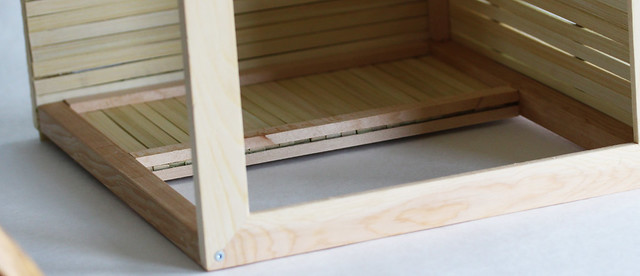
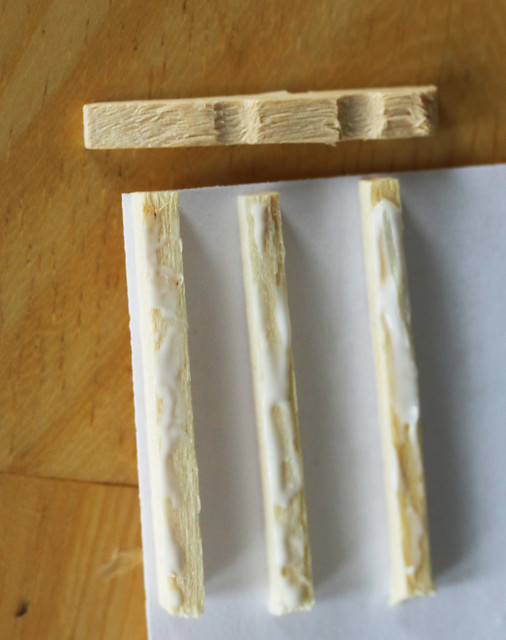
this shows the slats sandwiched between two beams from the top. i need to figure out how to finish that edge. the large beams are wide enough but they look too bulky, and the narrow beams aren’t wide enough. i need something wide and flat, almost like a veneer or something.

next step will probably be to get a cutting board or similar chunk of wood for the base, cut the tree stump and build the stairs.

amazing irridescent color

  • Posted on June 11, 2012 at 5:27 pm

indulging my love of peacocks with another closeup
peacock close up
i think God must have had fun mixing these colors,

building a treehouse part 3

  • Posted on June 10, 2012 at 12:29 am

i got the back wall done. i glued small square dowels to the top and bottom of the frame and then trimmed the skewers the right length before gluing them on. it’s a good thing i didn’t make the wall any higher or i would have had to piece it. the skewers were just long enough to fit. i really lucked out there since i didn’t think to check before making the frame. i think i need to glue a crossbeam across the middle of that wall to even out some of the warping. i picked the slats that were the straightest end to end, but didn’t check for bowing.
treehouse 14
noah insisted on helping, but was so tired towards the end he fell asleep.

miniature clothespin rocker

  • Posted on June 9, 2012 at 3:33 pm

i took a short break from the treehouse to make a rocking chair from clothespins and woodsies match sticks for my real pukis. it’s a variation on a clothespin rocker i’ve seen posted in several places, but i switched out some of the clothespin pieces for woodsies to make it more symmetrical, so i thought i would post a quick tutorial.clothespin rocker 10
smidge is graciously modelling without her hair since otherwise you can’t see the chair at all 😆
clothespin rocker 1
first remove all the springs from 24 miniature clothespins then glue 11 sets together back to back. i used aleene’s fast tac glue since it sets fairly quickly and dries really hard and clear.
clothespin rocker 2
following the picture glue three sets together for the chair back and the rest together as shown for the sides. (you will also be using 10 half pins to finish up the sides.) make sure the sides are mirror images of each other and that the crossbar is the same height for both sides.
clothespin rocker 3
cut three “woodsie” matchsticks the same length as the width of the widest part of the chair back. these will be the seat supports
clothespin rocker 4
i lined the seat supports up on the corner of a piece of paper to make sure they were squared properly. two should fit in the dips of the clothespin and the third almost at the thinest part of the end. run a line of glue down each wood strip
clothespin rocker 5
cover your wood strips with clothespin halves. mine took 8 halves for this size but a larger size only took 5.
clothespin rocker 6
turn the sides so that the crossbars face in and glue the seat on
clothespin rocker 7
another view of how the seat is attached
clothespin rocker 8
cut 5 woodsies long enough to reach across the frame. you will be putting the seat back pieces on the natural ledges formed by the clothespin ends. one on the front, one on the back. (if that doesn’t make sense let me know and i’ll try and take another picture. the other 3 brace the rockers. two inside the legs and one across the back right against the legs.
clothespin rocker 9
last glue the seat back in place. the should just touch the outer uprights and rest on the lower seatback brace. gluing it to the upper brace though is what really holds it in position. and now your chair is done.

you can make it with larger clothespins for larger dolls but you will have to get bigger wood for the braces as well.

have fun and if you want to show yours off, feel free to post a link :o)

building a treehouse part 2

  • Posted on June 9, 2012 at 2:14 pm

i finished up the base by cutting a piece of foamcore to fit in the hole of the frame,then glued it down. you can see it fills the space pretty exactly. this is so neither the flooring or the base will bow when i attach the tree stump
treehouse 9
then i added back the hardboard backing and glued this to the foamcore, using a stack of books as weights to hold it all flat as the glue dried.
i trimmed the boards so that they were close to the frame, then cut 1/2″ square strips of wood 11-1/2 inches long for the side supports. i first attached them to the corners of the second frame then the corners of the floor. i tried screwing them in but didn’t have the right size square head attachment for my drill so ended up drilling holes slightly too small and then hammering the screw in. odd but it worked.
treehouse 12

here kiri and noah demonstrate the size. i probably could have made it a smidge shorter, but the proportions are nice this way so i’m happy with it.
checking it out