You are currently browsing the archives for September 2018.
Displaying 11 - 20 of 23 entries.

everyone needs more storage

  • Posted on September 19, 2018 at 10:01 am

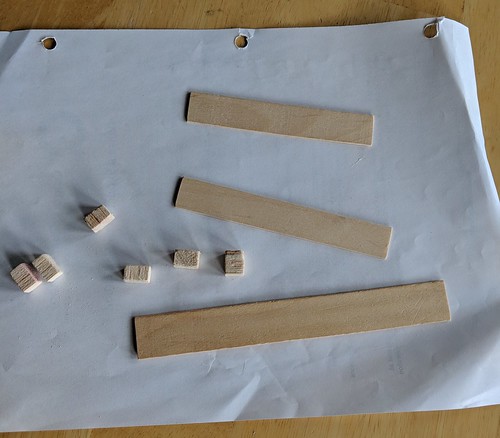
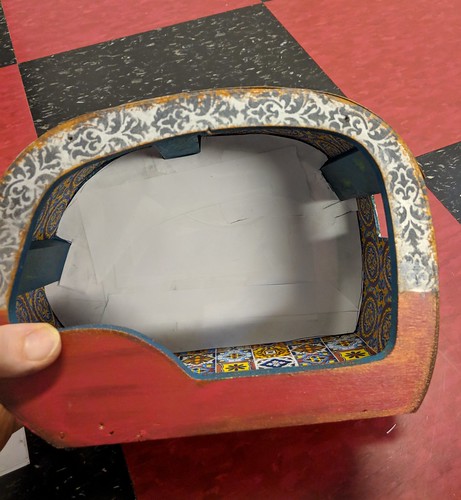
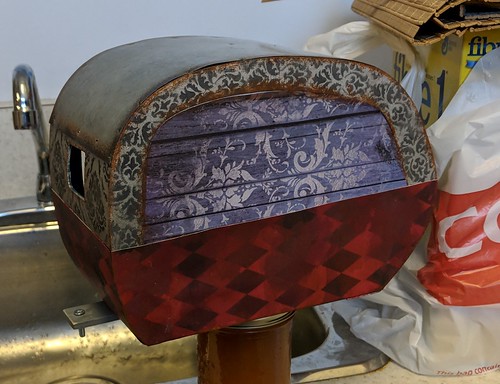
as i continue to clean out the cupboards/closet in my craft room, i added storage to my little caravan.
adding more storage
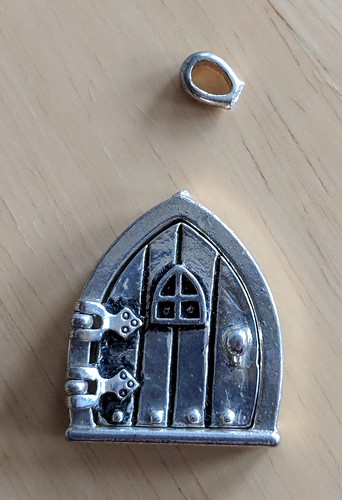
first set is a pair of little lockets, once the loops are removed they make great tiny cupboards.

adding more storage
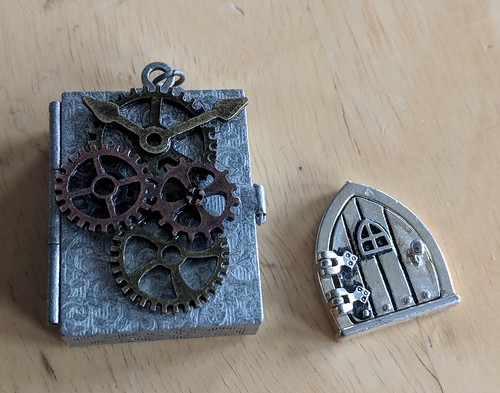
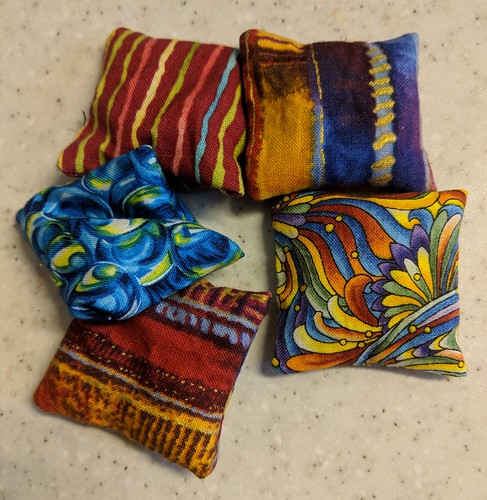
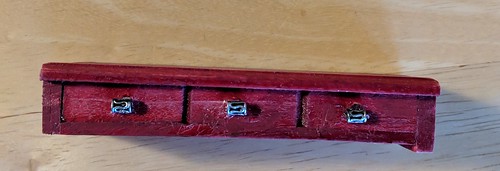
here are the two styles of lockets i am using. the rectangular ones will go on the back wall over the bed. the triangular ones on the front wall over the table

adding more storage
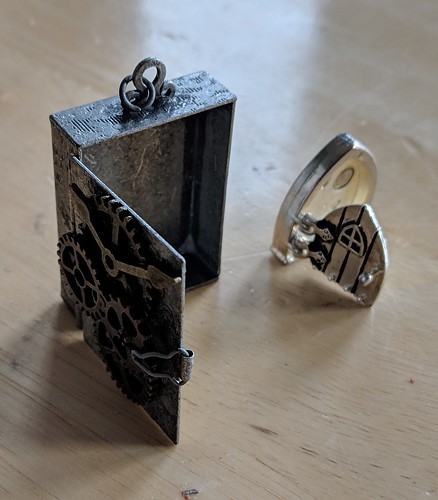
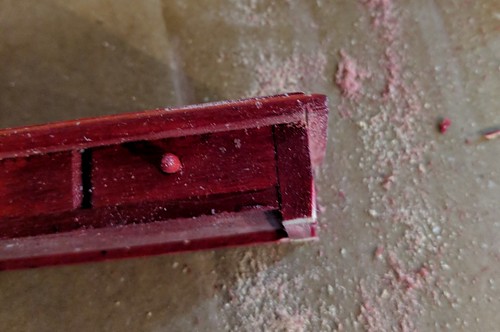
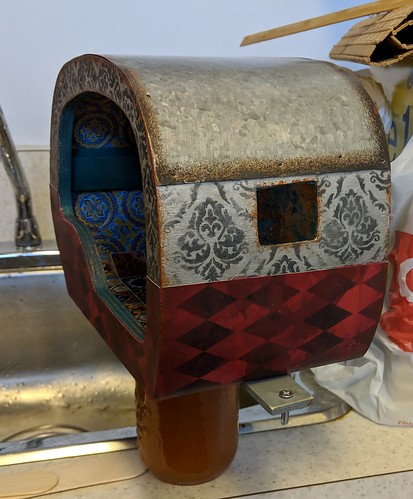
and just because i love the fact that they both really open! 🙂 the larger ones have a clasp on the side, the smaller use a tiny magnet to hold it closed.

adding more storage
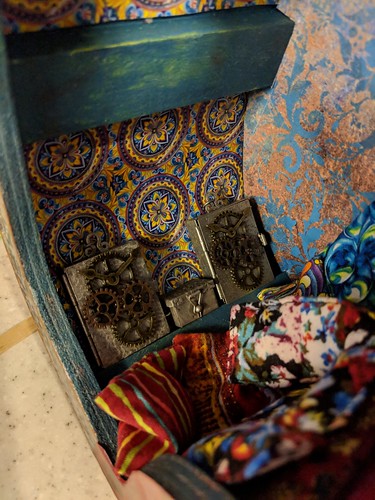
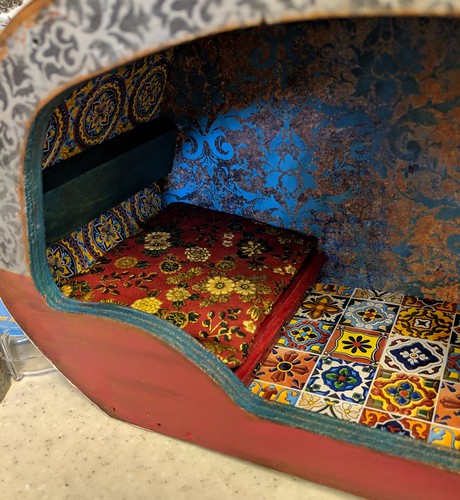
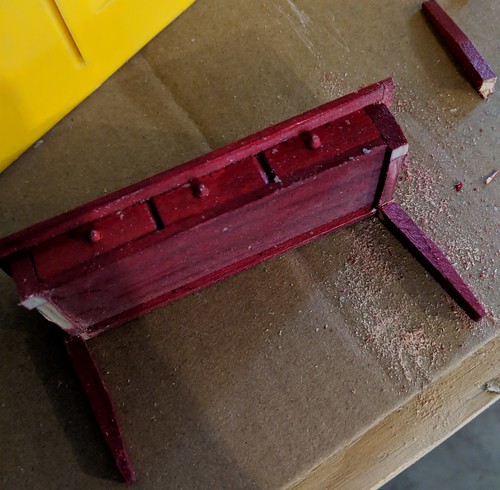
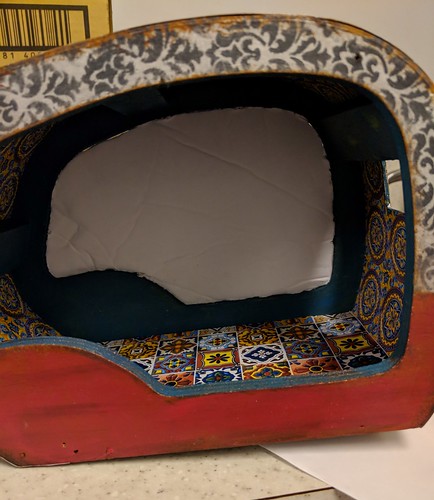
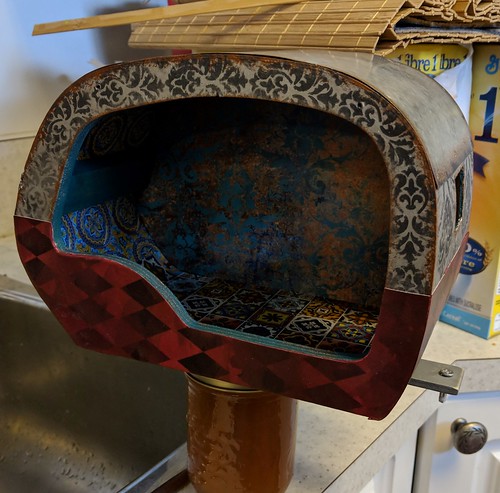
the back ones being glued in place. the angle is funny ’cause i took this picture while waiting for the glue to set. if i put it upright too soon, they would just fall off! the little box in the middle is another locket from michaels. i wanted that one removable so stuck it in place with silicone. the shelf/beam is on an angle when the caravan is upright, so without the sticky stuff the box kept falling off. technically the cupboards are also on an angle and everything will fall out if i open them, but i like how they look, so don’t care. realpukis are magic anyway so i’m sure they can make the stuff stay in 😉

adding more storage
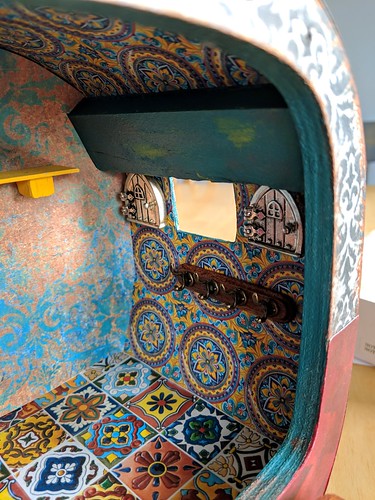
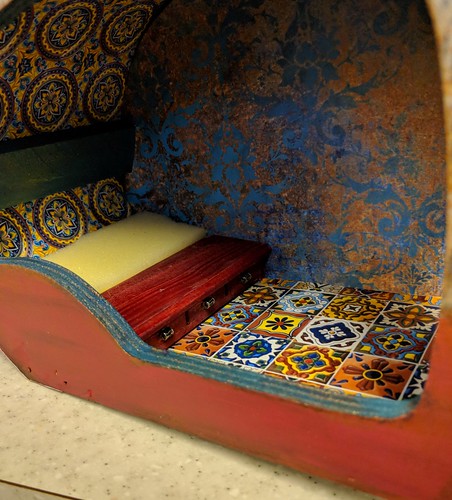
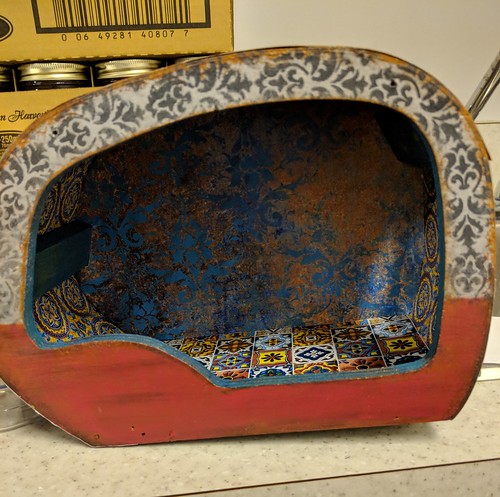
and the front wall. while waiting for the glue to set on the back wall i changed my mind on the configuration of the front half, so the coat hook went under the cupboards, instead of under the yellow shelf as originally planned.

a quick little project

  • Posted on September 17, 2018 at 7:50 am

i decided to add shelves along the back wall. not terribly practical for a moving vehicle, but i thought they would look cuter than cupboards.

a quick project- shelves
first i cut three shelves from craft sticks, in various/lengths widths. 6 balsa wood rectangles will form the support brackets.

a quick project- shelves
here they are glued together

a quick project- shelves
and painted. i need more yellow in my caravan, so yellow paint it is

a quick project- shelves
once again i over estimated. i had cut the shelves before i put the bed in. once it was in, there was only room for one shelf. i used the middle one.

and the bedding

  • Posted on September 16, 2018 at 12:46 pm

time to get to work on bedding for the bed

first a mattress,
mattress
i wanted it to be fairly thin, so it didn’t take up too much space. i cut out two pieces of warm and natural time to start on bedding
cut two pieces of warm and natural, the exact size of the bed, then used it as a pattern to stitch the mattress

mattress 2
turned, stuffed and stitched closed. the lighting is off, the colors are a bit brighter and it has metallic gold accents. much closer to the picture below

mattress
and in place.

next the bedding
quilt take 1
i had this lovely soft rayon, which i bought just for this project. it had a printed pattern on it that kept changing, and i loved that particular rectangle. it had the right colors, and looked like striped piecework without having to sew seams. the fewer the seams, the better it drapes. to get the little piece i wanted, i had to buy .4m. luckily it was on sale and really cheap.

to keep the quilt/blanket drapey i made an unstuffed quilt. it looked like it would work nicely, but unfortunately once i put it on the bed, it was still too stiff. i still like how it drapes, so am sure i can use it somewhere else.

luckily there were three identical rectangles across, so i could try again.
quilt take 2
the good news was, that i got to try a technique that i’ve been wanting to try for ages. this time i stuffed the quilt with a single layer of warm and natural and one of tinfoil, folded over three times for sturdiness. i used spray adhesive to hold them together on the underside of the quilt, but left the top loose, except for the two rows of quilting. it worked perfectly! i can scrunch and bend the quilt to achieve whatever level of messiness my ‘pukis have left 🙂

lastly pillows!
pillows!
i pulled a bunch of fabics and cut little rectangles for pillows. since they take so little fabric i went a bit crazy….
they are stuffed with tiny glass beads to let them “plop” realistically. it is also possible to poke little “head dents” in them which will stay till i shake them out or move them.

pillows, the chosen ones
of course once i put them on the bed i realized i had way too many! so i selected just five. the rest will go in my box of spare props to be used in another project or sold.

bedding
and all the bedding in place. the purple blanket is a rectangle of silk velvet (much softer and a bit thinner than regular) i left it with unfinished edges and no lining to keep it soft.

making the bed

  • Posted on September 15, 2018 at 12:32 pm

i wanted to make a bed with storage underneath.
making a bed
i’m starting with this table with faux drawers from the dollar store. i would have preferred real drawers, but this is what i had, and checking out new tables with working drawers showed that they were all too wide, so faux it is. besides this is still about decluttering so as much as possible, i am using what i already have on hand.

making a bed
first i chopped off the legs

making a bed
then trimmed off side edges. it will be the perfect width without them, but too wide if i don’t. i’m used a hand saw, cutting as close as i can

making a bed
here it is with all the bits cut off and a light sanding to try and get the overly shine varnish off, but leave most of the color.

making a bed
next the knobs pried off and replaced with silver bead “handles”

making a bed
lastly dry fit to check for any needed adjustments. i filled in the back with a small piece of foam, carefully trimmed to fit the curve of the back wall. once i finish checking the fit , i will glue both place with fast-tak glue.

next step bedding…

a new wall

  • Posted on September 12, 2018 at 7:10 am

so i decided that while having that big opening let in a lot of light, it also severely limited what i could do on the inside. so today is operation wall close.
inside wall
first i had to create a pattern for the inside wall. i cut and added, taped and refit, till the pattern was perfect. this will be recut from printed cardstock

outside wall
the other side was easier, i just flipped it over and traced. then used this to cut a piece of foam core board. that will add stability and thickness to the wall. i will also use the same pattern to cut the outer wall.

inside wall dry fit foam core
and here you can see the foamcore stuck in. it’s not perfect, but close enough, since it will get completely covered anyway.

inside wall (2)
my printed wall fits pretty much perfectly.

outside wall
this was a bit of a miss. i altered the color on a jpg of wood i had, trying to look like the window is boarded up. i trimmed carefully to get a perfect fit. but didn’t realize till i added the bottom layer that leveling the wood from top to bottom makes it right at the top, but wonky at the bottom, sigh. i’m still deciding whether to leave it because it will usually be in out of sight, or try and do something to fix it? but what?

please ignore the mess in the background. the downstairs kitchen is on my list of places to clean/tidy, but i probably won’t get to it for a long time as it is far down the list, since very few people see it.

front
front side
alternate views of the bottom half. i like the way they look…. and aren’t jam jars useful?

another mini project

  • Posted on September 11, 2018 at 10:04 am

so here is the scenario
i am knitting merrily along, when the tiny jump ring i am using as a stitch markers goes flying. it hits the floor and disappears into the netherworld, never to be seen again. growling i declare there has to be a better way….
a week or so later i am happily wandering around michaels trying to remember what i came in for when i spy jump rings on sale. ooh, i need those, i’m always losing mine. then i spy a string of tiny beads already on little loops, no idea what other people would use them for, but i immediately think they could be added to the jump rings to make stitch markers that are easier to find when i drop them, so into my basket both items go. i arrive home and deposit them on my sewing desk to finish…later.
weeks go by, i wander into my craft room, spy these strange beads on my desk, have no clue what they are for and prepare to put them in my give away pile. suddenly i see the jump rings beside them, and say “oh yeah, the are for stitch markers”, put both back on my desk and wander out….
weeks go by, i wander into my craft room, spy these strange beads on my desk, have no clue what they are for and prepare to put them in my give away pile. suddenly i see the jump rings beside them, nd say “oh yeah, the are for stitch markers”, put both back on my desk and wander out….
weeks go by, i wander into my craft room, spy these strange beads on my desk, have no clue what they are for and prepare to put them in my give away pile. suddenly i see the jump rings beside them, nd say “oh yeah, the are for stitch markers”, put both back on my desk and wander out…
weeks go by, i’m cleaning out my craft room for real this time, spy these strange beads on my desk, have no clue what they are for and prepare to put them in my give away pile. suddenly i see the jump rings beside them, and say “oh yeah, the are for stitch markers”, grab my needle-nose pliers, whip up a couple of dozen stitch-markers, but them in a neatly labelled box and stick them with my knitting supplies. (then give the spare beads away 😉 )
stitch markers
case closed 🙂 🙂 🙂

wheels painted

  • Posted on September 10, 2018 at 6:34 am

i’m not a terribly neat painter, so these took a surprisingly long time to paint. i had to do one color at a time, then keep touching up where i over painted. but they are done, and i’m happy. i was originally planning bright red wheels, with yellow centers, but realized they would get lost against the red body of the caravan, so i reversed the colors. it’s hard to tell in the picture, but the very center is lime green. the outer ring is metallic gold, and the outer edge is sponged lightly with brown and antique copper, supposedly to look like they are dirty from driving along dusty roads, but i’m not sure that was quite successful. regardless i think they work.
wheels

i absolutely adore these wheels (photo by francesca sorbello.)
carretto

if i was a better painter i would try adding embellishment, but alas i’m not…

i admit i cheated…

  • Posted on September 9, 2018 at 12:08 pm

i had a self imposed rule that once something goes in the giveaway box,there are no second thoughts, and no pulling them out. but this time the rule just had to be broken…
i painted up the top part of my caravan. the “chipped” wood look was poorly done, and just had to go. so i covered it with a shiny coat of silver metallic paint. then i carefully added a bit of “rust” at the edges with plain brown and copper metallic, to match the painted rust that was already on the roof (the only thing from the original that i am actually keeping.) it looked ok, but was too plain for the look i’m going for, so i left it to percolate. just as i was about to go to bed, i remembered the damask stencil i had in my paint supplies, and the mini shiva paint sticks that were already in the giveaway box, and loaded in the car ready to go. i ran out and rescued them. rules are made to be broken right? at least as far as crafts are concerned, and i think the result was worth it. i intentionally painted lighter and darker, because my gypsies will be a little run down at the heels.
top color
of course the other rule that just has to be broken on this one, is not mixing too many patterns together. in this case the more the merrier.
you can get a glimpse of one of the fabrics i’m planning to use for the couch/bed in the background too, if you are interested.
now i just have to remember not to touch it for 24 hours, till the paint dries, so back to cleaning…

today’s mini project

  • Posted on September 8, 2018 at 2:31 pm

as i excavated down through the layers covering my sewing table, i found this cork board partially done and the lettering pre-sewn for a different project long forgotten. the saying already had steam-a seam on the back, so i cut out the words (they were just sewn randomly on fabric) used my handy craft iron to stick them on and hung it on my wall.
todays mini project
i’m getting as much satisfaction in finishing up these little projects as i am from the fact the i can actually tell what color my rug is again! 🙂

i got wheels!

  • Posted on September 7, 2018 at 9:02 am

not a lot happening, since i have had multiple appointments the past couple of days but my wheels arrived 🙂
i got wheels!
they are very nice detailed, and just need painting