Displaying 121 - 130 of 536 entries.

back to the campfire

  • Posted on October 12, 2018 at 12:53 pm

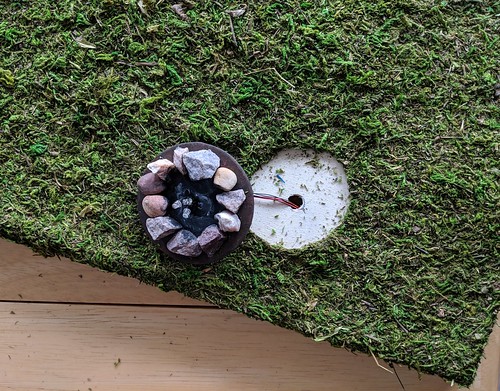
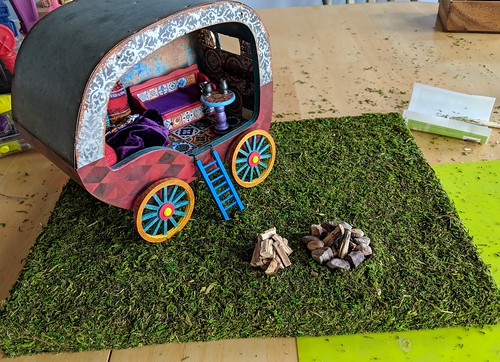
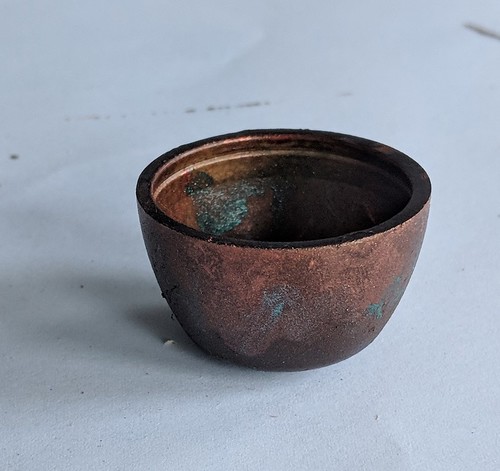
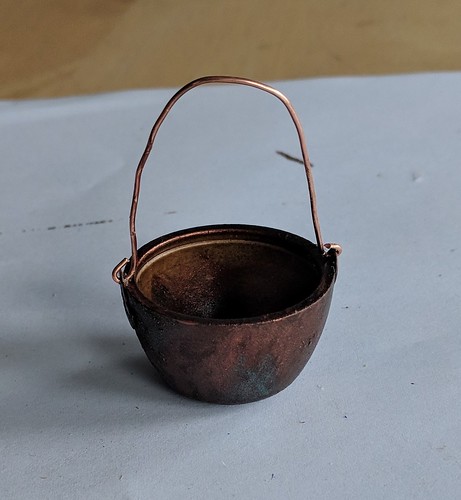
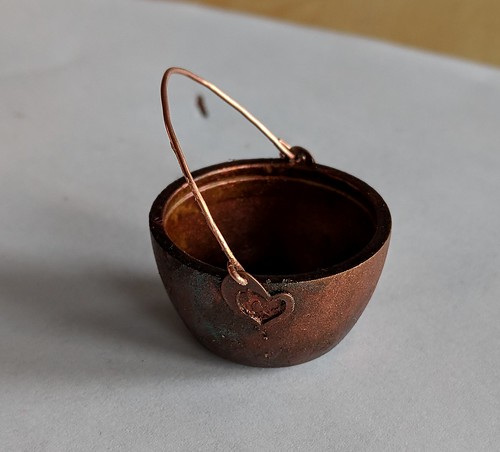
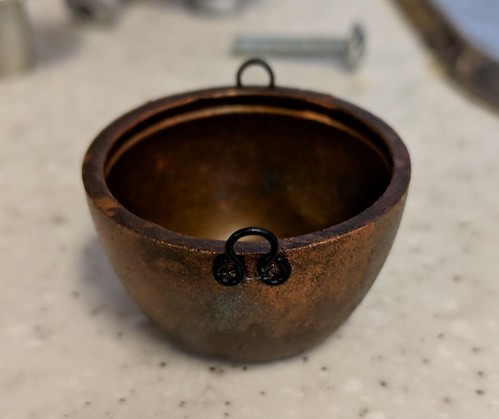
with the fire mostly done, i turned my attention back to cooking. it was now time to build the stand for my soup pot.

i started with some fairly stiff wire that i had salvaged from some packing materials. it was the right diameter, stiffness and best of all free…

cook stand start
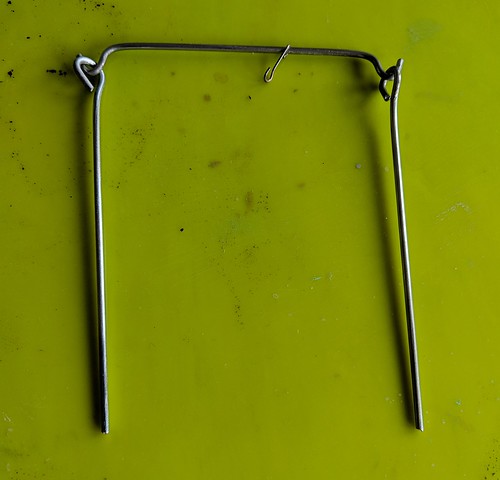
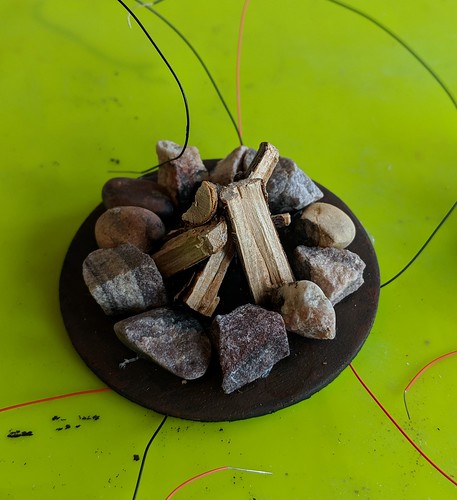
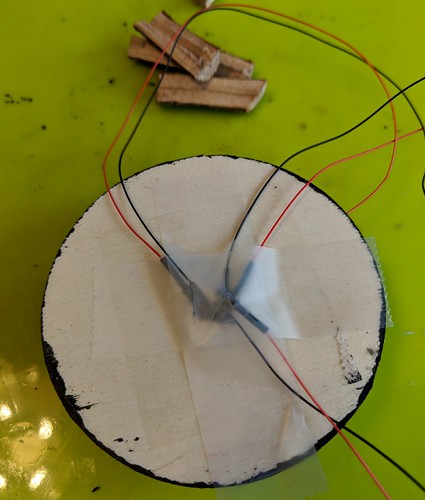
i cut it down and bent it to make two side posts with loops – i wanted to make the loops smaller, but it was too stiff to bend with the end of my pliers. this is the smallest diameter i could use and still bend it. the cross bar has turned up hooks on the end to hold extra pots and pans or a coffee pot – all still on the way. the small hook in the center was formed by trimming down an eye pin and forming it into a roughly “s” shape

cook stand done
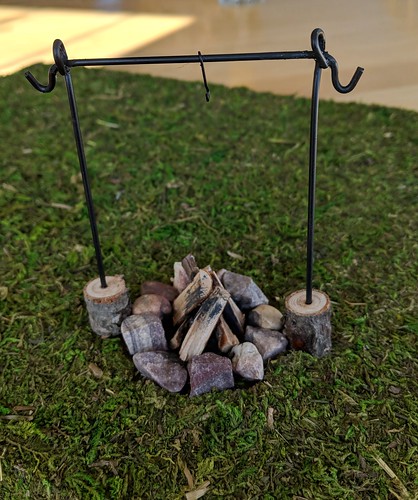
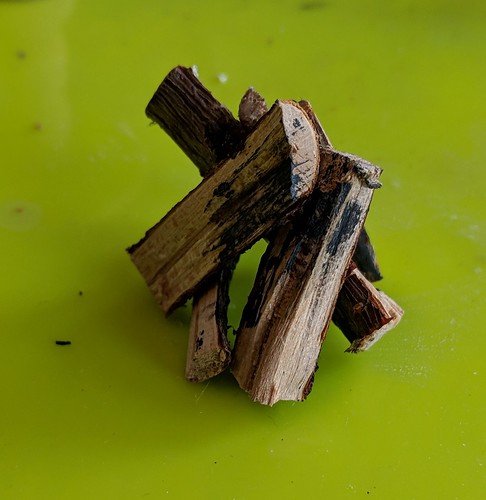
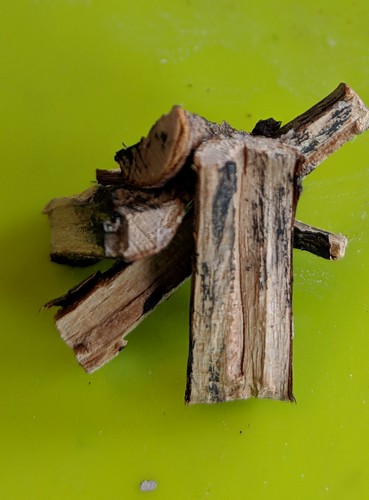
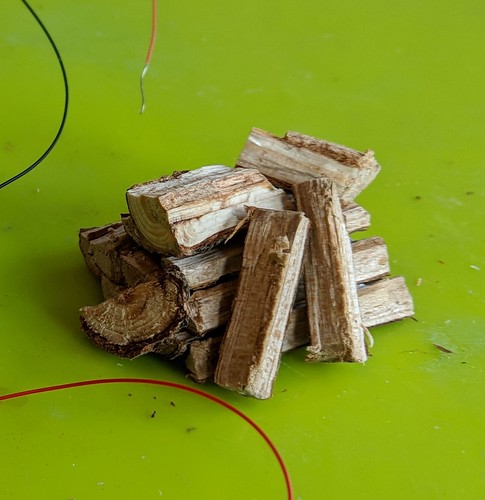
after spraying all the wire parts with several coats of flat black paint, to more closely mimic cast or forged iron bars, i cut pieces off of my dried branches to form the bottom supports, drilled holes in the center and glued it all together with e6ooo glue. because the loops were really too big, the stand fell apart easily, consequently i ended up having to glue the crossbar in place as well. since there wasn’t a lot of surface area touching, i left it to set for the full 72 hours before moving it again. lastly i touched up the glue with matte black acrylic paint to get rid of the shine. the roughness left by the glue just added to the look of cast iron -bonus!

the other problem i ran into was the bottom log supports weren’t quite wide enough to make the whole array steady on the uneven grass of the diorama, which means i had to glue them down as well. that was a little disappointing, as i had planned to make a second optional tripod structure that i could swap out for some pictures. i am quite used to things not necessarily working out according to my original ideas though, so in spite of the problems, and changes i am happy with how it came out. i’ll save the tripod idea for a campfire i’m planning later for my larger dolls.

cook stand with pot
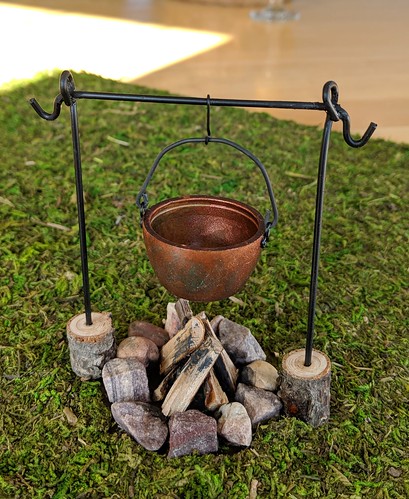
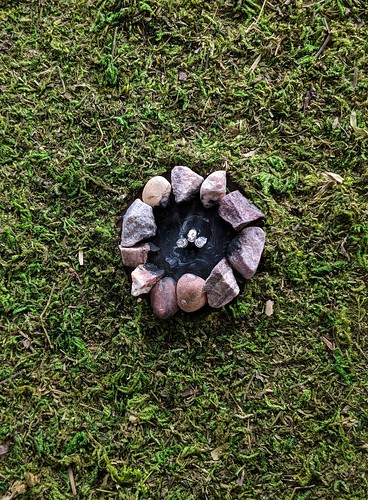
and here it is with the soup pot on.

we interrupt this campfire

  • Posted on October 4, 2018 at 1:57 pm

to bring you a minifee sized desk.

we have so much snow that school was cancelled the last couple of days, and it’s hard to work on the diorama when my son is home. instead i decided on a quick and easy project – redoing a wooden jewelry box i picked up a while back. it is the perfect size for my minifee’s bedroom…
dresser start
but those pineapples have to go!

dresser drawers
pulling off the handles left some largish holes so i covered them with printed cardstock

dresser
glue on some buttons for handles and i’m done!

the original plan was rhinestone buttons for handles, but i didn’t have enough of any of them, and they didn’t go together well enough to mix and match, so used these wooden ones instead. in the end i rather like the more subtle look.

campfire part 3

  • Posted on October 3, 2018 at 10:06 am

next step is adding the fire to the diorama
i wanted to hide all the wiring so i found a panel board at the dollerama for $4.
panel front
it is 12″ x 16″. a little small for photos, but it will fit nicely on a shelf.

panel back
the back is hollow, with more than enough space to hide the wiring and battery

camp fire - hole for wires
after deciding where i wanted the fire to go, i marked the center with an x and then drilled a hole large enough for all the wires to fit through. i didn’t have to drill three holes this time. the top disc will keep the leds from falling through the hole.

diorama grass
then i added the grass. first i traced around the campfire disc. this area will be left glue free. i spread glue all over the top, except for in the circle, and down the sides. then i spread a moss mat (mine was from walmart, because it was cheapest, but michael’s also has some and with a coupon the price isn’t bad.) i boxed the corners by cutting out little squares the width of the sides. this gave nice neat edges all round. As you can see, adding moss is a messy process, so best to have a broom or vacuum on hand! 😊

diorama cut out
i then poked up with a pen through the hole from underneath, to find the center, and carefully cut out the unglued moss. i cut just slightly smaller than the actual circle

diorama campfire in place
lifting the edges i tucked the fire inside the cut out, adding bits of moss to a couple of places where i went too wide

here you can see how i painted the gray/white ash as well

diorama underside
underneath i taped the wires with heavy duty tape.

diorama
then i glued the firewood in place. the wood pile and caravan are just set on top.

almost done. i still need to add the battery. but i don’t have the right battery in the house and we are in the middle of a snow storm so it may take a day or two to go get one.

camp fire part 2

  • Posted on October 2, 2018 at 8:17 am

my logs are thoroughly cooked, so i cut them down to size, then used a hammer and chisel to split them. if you don’t have a chisel, you could always leave the logs whole.

camp fire logs
once they were the right size i arranged and re-arranged them till it looked right to me, then glued them together with fast tack glue and let it dry for 1/2 hour or so.

camp fire charring the logs
after the glue set, i carefully lifted the logs out and painted the inside with a combination of black and white paint to get the look of char and ash. to do that, i put a drop of black on my palette, then white beside it and swirled the two in the middle, with a toothpick, to get marbled shades of gray. i painted with the black first and wiped it off with a damp rag to get it nice and thin. then right at the bottom, and up the middle i dabbed on the grey swirly paint, tying not to brush so much that the colors completely blended. i also swirled some of the gray mix on the wood disc to make the fire more realistic. you can’t really see it under the logs, but i know it’s there, and you can see it if you get really close.

camp fire wood pile
with the extra wood, i built a little pile of firewood that my ‘pukis can use to keep their fire burning.

camp fire part 1

  • Posted on October 1, 2018 at 8:05 am

i’m ready to start making the camp fire now. i’m going to use an evans design led fire size 3mm. a 1.8mm would probably have been big enough, but i already had the 3mm and am trying to use what i have in hand before buying new.

the other things i need so far are a 3 inch diameter, flat, wood disk from michaels, and some small rocks from the gravel pad outside, (i picked out ones i liked for color shape and size and washed them to get rid of any bugs or dirt). also acrylic paint in black, dark brown, rust and white, and glue suitable for gluing rocks to wood, i used e6000.

camp fire
first i painted the top of the wood disk solid black for the charcoal, then while still wet swirled and blended in some dark brown and rusty brown to get the look of dirt around the edge. my realpukis are safety conscious 🙂

camp fire
i drilled a set of three holes in the center to thread my leds through. i should have done that before painting since i had to repaint around the holes with my black paint. when it dried again i arranged the rocks till i liked the look and then glued them down with e6000 glue. i let that set a bit and then painted the inner surface of the rocks to make them look soot covered.

camp fire leds back
finally i threaded the leds through the holes and taped them down in the back with a bit of tape. i just used regular tape since it doesn’t have to hold for long.

next step will be building the fire itself, but first i have to dry my “logs” in the oven. i took pruned, dead branches that have been sitting in my burn pile all summer (we have had a fire ban most of the summer so they never got burned). it is pouring rain so they are all wet, and i assume have bugs. i am going to bake them at 200F for 2-4 hours to make sure any bugs are good and dead! i’ll check them every 15 min or so to make sure they don’t catch fire. i wouldn’t mind if they got a bit scorched, but i would rather not burn my house down! 😉

my caravan has a table

  • Posted on September 30, 2018 at 9:28 am

since the last attempt at a table turned into a storage bench, my ‘pukis requested another table, and there was just enough room in the caravan for a small one.

table bare
i started with a miniature candlestick from my stash, just a shade under 1-1/2″ tall. the top is a 1-1/2″ wooden disk and i just glued them together.

table painted
i painted the bottom metallic purple, the top turquoise. it looked a little bare and i considered painting a floral design on top, but realized my painting skills don’t really match the vision i had. so instead i looked online for pictures of mandalas, resized them and then printed out a bunch on cardstock. i find that what looks good on my desktop is not always the correct color or clarity when printed, so this gave me some choice. after i cut out and auditioned them, i modge-podged the one i liked best on the table-top.

table in caravan
it just fits, and holds two tiny pewter mugs i ordered online. the furnishings are done, it’s time to work on the diorama next.

rusty soup pot

  • Posted on September 29, 2018 at 8:50 am

with no kitchen in the caravan, my ‘pukis need to cook over an open fire. what better to cook with than a nice soup pot? i could have just bought one, but where is the fun in that? once i figured out the appropriate size, it was time to hunt for a suitable base.

pots
i found these bolt covers really cheap at the hardware store. they were the perfect size and shape for a soup pot. the top is the cap from a travel size spray bottle. i’m going to try all three and see which works best.

first i sanded them all to get rid of any imperfections and to get the surface ready for painting. i sprayed the bolt covers with a couple coats of rustoleum aged metallic rust, inside and out. the spray bottle cap was sealed with clear spray, painted with a light dusting of the aged metallic to make “rust” spots. and then put aside as i’m not sure yet what i am going to do with it yet.

bucket 2 patina
bucket patina
next i hand painted a combination of coppers/bronze, brown and teal metallic to get an aged look.

bucket side
for the first pot i glued on tiny copper hearts to form the bottom handles, and made the actual handle out of copper wire. now it can swing freely

bucket 2 side
for the second pot the handle was made out of #2 black eyes. the handle will be wire again. i’m debating trying to get some black wire for this one, doing the plain copper wire again or just trying to spray the copper with black paint….

littlefee craft table

  • Posted on September 28, 2018 at 12:13 pm

i’m still working on both the craft clean-up and my realpuki caravan, but the next bits aren’t at the point where i can put up pictures or posts yet. so here is another quick and easy littlefee/yosd sized prop.

littlefee craft table
i have a bunch of these little shelving units, in various sizes and configurations. they were actually gift boxes that held wooden brain teasers. i have bought several over the years. the brain teasers themselves become stocking stuffers for various family members, or go in to shoe boxes for operation christmas child (they make great gifts for boys 10-14.) i had planned to use them in my pukifee bedroom, but ended up with way more than i needed, so what to do with the extras? these 3 turned out to be exactly the same height and are going to get re-purposed as a craft table. the top is a pine board from michaels. the width was perfect and it just needed to be shortened slightly.

littlefee craft table
here is how i plan to set it up. at first i was just going to place them together so that the pieces could be used elsewhere if needed. but they separated too easily, so i glued them together with white glue instead (fast tack to be exact)

littlefee craft table
checking to make sure the table top fits. after i trimmed it i sanded all the edges and rounded them slightly.

littlefee craft table
waiting for the glue to set.

littlefee craft table
and all finished!
because the bottom was pre-stained and the top unstained, it was going to be almost impossible to match the colors, so i didn’t even try. instead i stained the top with ‘beach glass” water color paint. i really like the contrast.

tin boxes larger…

  • Posted on September 26, 2018 at 4:49 pm

i liked how the little tin boxes came out so well, that i decided to make some bigger ones for my littlefee-minifee sized dolls

'tin' boxes larger
this time instead of 15mm (9/16″) cubes, i started with 25mm (1″) cubes

'tin' boxes larger
i picked coordinating tiles to make patterned lids instead of plain.

they were nice, but at this scale there wasn’t quite enough detail to be realistic. so after thinking a bit, i got some fine cord from my embroidery thread bin, estimated how much i would need by wrapping loosely around one cube 6 times, and then painted it silver.

tins with lids
here you can see it drying on my handy dandy silicone sheet. this lets the paint be all the way around and it still doesn’t stick. the extra paint just washes off my sheet later.

tins with lids
i then carefully glued it around the top. since the labels were coated with modgepodge already i just applied another thin layer and then stuck the cord in place. it worked perfectly, the cord stuck and no worries about extra glue showing. now my tins look like they have lids 🙂

tins in scale
and just to show the scale. here they are stacked on eilidh’s desk.

littlefee study desk

  • Posted on September 25, 2018 at 2:54 pm

switching to a different size this time…

as i went through some of my drawers i found several odds and ends that i thought might eventually be made into tables. it was time to decide which ones would actually work, and which pieces were the wrong scale for any of my dolls and could be given away.

table parts
these pieces looked like they had the potential to become part of a study center for my littlefee sized dolls.

did i mention that once i get my craft rooms cleaned out, my dh is going to help me build an msd-sized house for my dolls? i’m thinking this one, i just need to clear out enough room to set it up before we build it. i am also planning to con him into making a photo box/room box that i can set up differently depending on what photo i want to take. either way the furniture will be put to good use.

table legs shortened
the spindles needed to be shortened to make the right length table legs, so i carefully cut the tenons off. that made them the perfect length and also gave more surface area at the top to glue, and the bottom for sturdiness.

table glue drying
the spindles were glued to the bottom of the table and also to the corner of the edging. once the glue set up a bit, i carefully turned the table over and adjusted the legs to make sure they were straight and all resting on the floor without wobbling. the glue bottle worked as a weight to hold them in place while the glue finished drying. the chair was from the dollar store (according to the price sticker still on the back 😉 ) and really only needed a good sanding to work. i wish i’d grabbed a couple of them, but i’ve had this one for several years and can’t get any more. i don’t know why i only chose to get one in the first place?

table stain
first i stained all the pieces with a reddish brown. it goes on pretty solid then is wiped off with a damp cloth to lighten up and let the wood grain show through. after it dried i rubbed on a very light coat of barn wood grey to get a more aged look to it. you can see the original color on the left, the final color on the right. i still need to seal it with a light coat of matte varnish. a child’s desk/chair, in my experience at least, is seldom clean and shiny!

table and chair finished
and the finished project.

writing a paper
eilidh immediately tried it out to write her english paper.